
插画_来自花开一夏的图片分享. Out of this world, quite literally: The beautiful and mysterious Fukang meteorite « Believe nothing. Eye Drop. Stencil painted subflooring. We’ve had carpet in our bedroom since we moved in several years ago. My allergies were not a fan of the carpet. Chris and I had been talking about removing the carpet for a while, so one day I started tearing it out . I admit I didn’t really have a specific step by step plan when I took my box knife to the carpet. We had talked about putting in hardwoods, but once the carpet was out I found myself really wanting to paint the plywood sub-floor. Before I go into much detail I feel I need to make a few disclaimers… 1. 2. 3. 4. 5. First I removed the carpet, tacking, nasty carpet foam stuff, & baseboards.
Tearing out all the carpet meant relocating our bedroom to the living room. Our sub-flooring was basic plywood sheets. After all that sanding I cleaned the floor, walls & ceiling. After the first coat of paint dried (according to product directions) I used a block sander on the whole floor. DIY Shrinky Dinks. My parents are both science teachers: which means they always ruined the secrets to magic tricks, they forced me to identify every tree by leaf and bark type, and we always created our own versions of ‘science-y’ toys.
We used to cook our Easy-Bake Oven meals with foil and a light bulb, and created our own slime with cornstarch and food coloring. And, when we wanted our own shrinkable art, did we get the sweet pre-printed HeMan or Strawberry Shortcake sheets? Nope. Outdoor Room Deck with windowboxes. Make Water Balloon Candle Holders. Home » $5 and Under, cheap crafts, Decor, Headline, High Concept, Weddings 11 February 2009 364,642 views 50 Comments by heather Candletech has instructions for the coolest candle-making project I have EVER seen!

Using balloons filled with lukewarm water, you can make these amazing candle luminaries by dipping balloons in wax. I love the organic shape of the luminaries, and this project looks so fun! The comments section of the tutorial also provides a lot of valuable insight for making this project. Other commenters suggested adhering something to the outside of the wax to add additional interest (although I just LOVE them as they are!) The project recommends high-melt paraffin wax to avoid the melting issue when used with tea lights.
Project Estimate: Paraffin Wax*, $1 (find at the grocery store in the canning section)Balloons, $1Double boiler, on handCookie sheet, on handBattery operated tea lights, 2 for $1 Total cost: $3. Carved-book-landscapes-by-guy-laramee from thisiscolossal.com - StumbleUpon. (click images for detail) For the better part of three decades multidisciplinary artist Guy Laramee has worked as a stage writer, director, composer, a fabricator of musical instruments, a singer, sculptor, painter and writer.
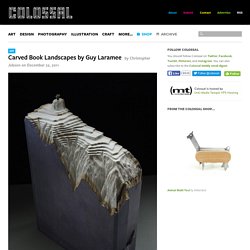
Among his sculptural works are two incredible series of carved book landscapes and structures entitled Biblios and The Great Wall, where the dense pages of old books are excavated to reveal serene mountains, plateaus, and ancient structures. Of these works he says: So I carve landscapes out of books and I paint Romantic landscapes.
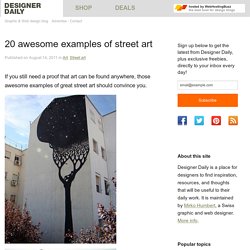
Mountains of disused knowledge return to what they really are: mountains. Laramee’s next show will be in April of 2012 at the Galerie d’Art d’Outremont in Montreal. 20 awesome examples of street art - StumbleUpon. If you still need a proof that art can be found anywhere, those awesome examples of great street art should convince you.
1001 Free Fonts - Download Free Fonts for Windows and Macintosh - StumbleUpon. 20 PSD Tuts That Will Turn You Into A Photoshop Guru. Many people can use Photoshop, but only a select few can call themselves gurus.

Learn all the methods in the 20 tutorials below and you’ll be well on your way to joining this elite. Rather than focus on tuts for beginners, intermediates or advanced users, we’ve simply chosen ones which produce jaw-dropping effects. All of them are easy to follow, although most do require at least some prior knowledge and experience. 1. Colorful Plexi Text Effect Follow this tutorial to create dazzling, multi-layered, semi-transparent lettering, with a Perspex-like quality. 2. 3D Pixel Stretch Effect File this tutorial under “simple but effective”. Photoshop Tutorials - Age Progression. Disclaimer: None of the given Photoshop Tutorials are written by me.
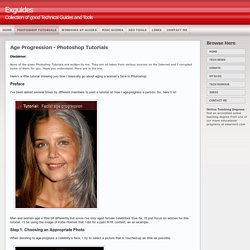
They are all taken from various sources on the Internet and I compiled some of them for you. Hope you understand. More are in the line. Here’s a little tutorial showing you how I basically go about aging a woman’s face in Photoshop. Preface I've been asked several times by different members to post a tutorial on how I age-progress a person. Men and women age a little bit differently but since I've only aged female celebrities thus far, I'll just focus on women for this tutorial. Step 1: Choosing an Appropriate Photo.
Drawings/Paintings/DM. Geeky. Interior/Exterior Design. Sistine Chapel. Sculpture/Cuts/MixedMedia. Photography. Crafts/How To. Supply Shopping. Etsy. Brusheezy!