
Settingupphaser. Getting Started with Node.js on Heroku. Introduction This tutorial will have you deploying a Node.js app in minutes.
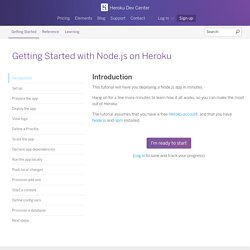
Hang on for a few more minutes to learn how it all works, so you can make the most out of Heroku. The tutorial assumes that you have a free Heroku account, and that you have Node.js and npm installed. Set up In this step you will install the Heroku Toolbelt. Once installed, you can use the heroku command from your command shell. Log in using the email address and password you used when creating your Heroku account: $ heroku login Enter your Heroku credentials. Authenticating is required to allow both the heroku and git commands to operate. Note that if you’re behind a firewall that requires use of a proxy to connect with external HTTP/HTTPS services, you can set the HTTP_PROXY or HTTPS_PROXY environment variables in your local development environment before running the heroku command.
Prepare the app In this step, you will prepare a simple application that can be deployed. $ git clone $ cd node-js-getting-started. The Twelve-Factor App.
Node js loadbalancing. JSON Web Tokens - jwt.io. Passwordless - Examples. Passwordless - A node.js/express module for token-based logins. Express.js 4, Node.js and MongoDB REST API Tutorial. Usually good things don’t stay the same, so our tutorial on building a JSON REST API server with Node.js and MongoDB using Mongoskin and Express.js, and testing it with Mocha and Superagent, has became a bit outdated with the new Express.js 4 version release.
Here’s a brand new, revisited tutorial for Express.js 4, Node.js and MongoDB (Mongoskin) free-JSON RESTful API server. The code for this new tutorial is available at github.com/azat-co/rest-api-express (master branch). The old tutorial’s code for Express 3.x, is still working and in the express3 branch. Express.js 4 and MongoDB REST API Tutorial consists of these parts: Instead of TL;DR: If you’re only interested in a working code from the repository and know what to do, here are brief instructions on how to download and run the REST API server: How to build a scalable REST API using Node.JS and Express. When I build an API, I like to have it as light-weight and scalable as possible.
At the same time, I want to be able to easily add or remove features with the least amount of effort possible. Because Node.JS and Express give control over the inner workings of a web application, they are the perfect fit. What will we build? We will build a RESTful API for a library. A library has books, accounts, DVDs, and many more things. First Rollout: Build a Dumb Server Before we start writing code, we need to fetch the dependencies. Now open up your terminal or command line and go to the project's directory.
Build a RESTful API Using Node and Express 4. # Express Router and Routes We will use an instance of the Express Router to handle all of our routes.
Here is an overview of the routes we will require, what they will do, and the HTTP Verb used to access it. This will cover the basic routes needed for an API. This also keeps to a good format where we have kept the actions we need to execute (GET, POST, PUT, and DELETE) as HTTP verbs. # Route Middleware We’ve already defined our first route and seen it in action. Let’s say that we wanted something to happen every time a request was sent to our API. All we needed to do to declare that middleware was to use router.use(function()). We are sending back information as JSON data. We will also add next() to indicate to our application that it should continue to the other routes. Middleware Uses Using middleware like this can be very powerful.
Testing Our Middleware. Passwordless - A node.js/express module for token-based logins. Build a RESTful API Using Node and Express 4. RESTful API Design With NodeJS & Restify - Tuts+ Code Tutorial. The RESTful API consists of two main concepts: Resource, and Representation.
Resource can be any object associated with data, or identified with a URI (more than one URI can refer to the same resource), and can be operated using HTTP methods. Representation is the way you display the resource. In this tutorial we will cover some theoretical information about RESTful API design, and implement an example blogging application API by using NodeJS. Choosing the correct resources for a RESTful API is an important section of designing. First of all, you need to analyze your business domain and then decide how many and what kind of resources will be used that are relevant to your business need. You can proceed with a resource operation after you have decided on the required resources. In the same way, you can view an existing article by issuing the following request: What about updating an existing article?
I can make another POST request to /articles/update/123456789012 with the payload. or: