background preloader

Crafts

Facebook Twitter

10 Affordable DIY Modern Wall Art Projects! & Curbly | DIY Design Community & Keywords: DIY, Craft, art, wall art. Bare walls are the pits. 
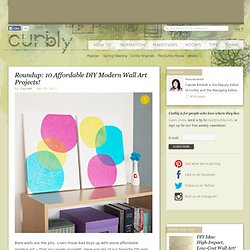
Liven those bad boys up with some affordable modern art -- that you made yourself! Here are ten of our favorite DIY wall art projects to make this week. 1. Bubbles of magnificent splendor! This project is high-impact and low, low cost. See more here. [Photo: Sara Funduk] 2. 3. 4. 5. 6. 7. 8. 9. 10. Happy art-making! Tagged : Craft, art, wall art, decor, decorating, Inspiration, Roundup, curbly original, DIY. DIY 20 Minute Beach Cover Up.

** NO SEW VERSION CLICK HERE! ****HIGH-BACK VERSION/STREET WEAR- CLICK HERE****HALTER VERSION- CLICK HERE****MAXI WITH THICK STRAPS HERE** Need more help? Click HEREProbably my favorite 'la vie' project... ever. I was browsing through a swimwear catalog and saw an adorable beach cover up. I sooo wanted it, but obviously I wasn't spending $45 on it, plus, it was totally make-able. I made some revisions and here it is! Maybe it seems a little too early to be thinking about the beach... but seriously, I can't wait. So- without further ado- the 20 Minute Beach Cover Up! (1) Cut it. . (2) Braid it. . (3) Attach it. Another option: if it's bunching too much in back, you can add in a tapered curve. . (5) Wear it. It was so simple! Inspiration: Origami Cranes | It is said that when one folds 1000 origami paper cranes they are granted a wish.

Source Source Source Source Source Here’s a link to a great video showing you how to fold a crane. Easy and Unique DIY VasesInspiring Pretty. Everyone loves vases, but it’s difficult to find one that is unique and not the same old run of the mill vase you’ve seen 1000 times before. As the most prominent centerpiece, you always want a vase to be special, just like the rest of your decor. Whether it is empty, holding flower, a candle pebbles or anything else, a vase can be boring or the perfect accent you’ve been looking for. And it’s only better when you can make it yourself flexing your craft skills and saving some money as well. 
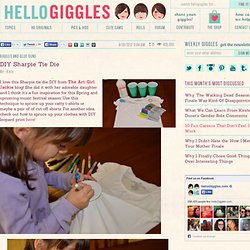
This lovely vase is simple and its beauty is its simplicity.

All it takes is a cute vase, some sequins and some glue. How you want the sequins displayed in the vase will determine which method you use to put them in there. If you want them on the bottom, just pour them in alone. For this cozy yet stylish vase, pick up some clear craft glue and yearn and collect a few pop bottles, beer or wine bottles. For some true vintage charm, these are the way to go. Courtesy of sjarmerende-gjenbruk.blogspot.com.

DIY Sharpie Tie Die. I love this Sharpie tie die DIY from The Art Girl Jackie blog! She did it with her adorable daughter and I think it’s a fun inspiration for this Spring and upcoming music festival season. Use this technique to spruce up your ratty t-shirts or maybe a pair of of cut off shorts. For another idea, check out how to spruce up your clothes with DIY leopard print here! What You Need: Pre-washed white or light colored t-shirtRubbing AlcoholLiquid dropper or medicine dropperSmall plastic cup(s)Rubber bandsVariety of colored Sharpies Do It! Choose a spot to start and put your cup in right side up and secure a rubber band around the cup rim holding the shirt tightly in place.Pick your colors and create a small design in the center of the stretched circle. Photos and DIY via The Art Girl Jackie.

Make: A Photo Clip Frame & DIY Maven. Confession: I am compelled to take pictures of flowers and insects. 
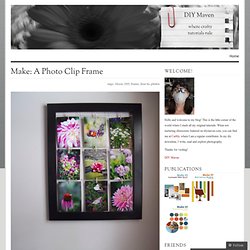
Problem: I don’t usually choose these to send to the printer. Solution: a photo clip frame. Credit: I saw something very similar to this at Pier 1 a few weeks ago and decided it would be a perfect way to display a bunch of my flowers and bugs; I also decided that I had everything on hand to make one…so I did. The original costs 28 bucks; mine cost 0 bucks. No kidding! Unbeknownst to me, this project actually started at the end of last summer when my boo and I were out taking our nightly constitutional and came upon a box sitting in a neighborhood yard.

What I used for this project: Drill/Dremel1mm drill bit (or roughly the same size at the largest wire used)1mm (19 gauge) wire.33 wirewire cutterpenciltape measurepliersandpaper, paint, brush18″ x 20″ wooden picture frame How I made it: I sifted through my stash of frames and settled on one of the 18 x 20′s. I sanded it down and gave it a couple coats of white semi-gloss. Clouds on the ceiling in Crafts for decorating and home decor, parties and events.

Jewelry

Paper. DIY Glow Jars Tutorial. Posted on October 19, 2011 by Christina Aren’t these glow jars sublime? They take about two minutes to make and cost only 20 cents a piece. How’s that for an enticing DIY wedding project? These would look amazing at an evening outdoor wedding. If you like this project, check out my DIY ‘glitterarium‘. DIY Glow Jars Tutorial For each glow jar you will need: a jartwo Glow Sticksscissorsrubber glovessafety glasses Disclaimer: This is a project meant to be done by an adult – not a child! Purchase Glow Sticks (I got a pack of 15 for $1.50) and dig a jar out of your cupboard. Grab two glow sticks and cut at one end. DIY Craft Project: How to craft a twine-ball light garland {As featured on Rock n Roll Bride}

Time for another DIY craft project and today I’ll be showing you exactly how you can make this twine-ball light garland yourself. 
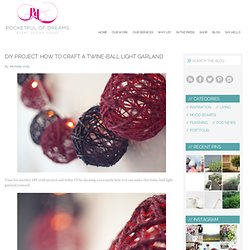
It’s one of those projects that’s a little bit messy and does take quite a bit of time, but it is so much fun. Plus you have a really cool piece of decor at the end of it. Perfect for parties or around the home, you can paint it up in any colour you want to match your design scheme, and when lit, it looks so pretty, casting lots of patterned twinkly light everywhere.

Mine is now taking pride of place in my office. How-to make a Twine Ball Light Garland I’ve seen twine balls used for all sorts of purposes, from chandeliers to dining table decor, so I thought I’d have a go at making a light garland using this idea. I chose to use coloured twine, alternating between pink and purple twine balls. {You will need} {Four} This is the really messy part. {Five} Leave to dry overnight. So what do you think, is this one you’ll be trying out at home? Michelle x.

Supplies

Persephone Magazine | Blog | The Lazy Lady's Guide to DIY: Hanging Herb Garden - StumbleUpon. At some point near the middle of March, I always decide that I’m “done” with winter. The sweaters and jackets get pushed to the back of the closet, the flip flops come out, and I inevitably freeze my butt off for several weeks until the weather catches up with my warm-weather state of mind. Likewise, my cravings for fresh herbs and veggies are always a little ahead of the season. Growing your own herbs is a great way to save money and avoid buying too much at a time and letting most of it go to waste.

If it’s still too cold to plant outside where you are (or if you’re short on space!) This hanging herb garden is the perfect project to get you in gear for spring. What you’ll need: Tin containers with snap-on plastic lids (tea, cocoa, and coffee cans are a good bet), coat hangers, pliers, scissors, herbs (I bought basil, rosemary, dill, and cilantro for about $2.50 each), masking tape, coffee filters, a nail, a hammer, X-acto knife, scrap fabric or paper, and glue or spray adhesive. Drink Can Tinwork - StumbleUpon. Tinwork Embossed tinwork is sometimes used to decorate rustic style photo or mirror frames, or just to make decorative items such as Christmas tree decorations.

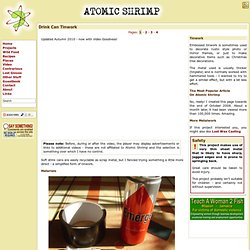
The metal used is usually thicker (tinplate) and is normally worked with hammered tools - I wanted to try to get a similar effect, but with a bit less effort. The Most Popular ArticleOn Atomic Shrimp No, really! More Metalwork If this project interested you, you might also like Lost Wax Casting Safety This project makes use of very thin sheet metal that is likely to have sharp, jagged edges and is prone to springing back. Great care should be taken to avoid injury. This project probably isn't suitable for children - and certainly not without supervision.

Updated Autumn 2010 - now with Video Goodness! Please note: Before, during or after the video, the player may display advertisements or links to additional videos - these are not affiliated to Atomic Shrimp and the selection is something over which I have no control. Materials Finished. Hershey Kiss Craft — Infarrantly Creative. - StumbleUpon. If you’ve been following my blog, you know how I made 60 of these painted frames with song lyrics for our wedding decorations /favors… Well, a lot of wedding guests loved them and took one home, but we had a ton left at the end of the night, which we boxed back up and took home with us… So we now have 30 of them hanging on our big white living room wall! Yay!! There are several duplicate lyrics, some of which I already changed out to engagement photos, but once we get our wedding photos I’ll switch out some more lyrics with photos (but just a few, because we love the look of the lyrics!) : So, hey, you want to know how to make these yourself?

It’s a pretty simple project, but a bit time (and space) consuming… Well, that’s if you’re making 60 like I did… If you just make a few, it shouldn’t take long. I made 2 different types of painted frames: textured frames that were just plain spray painted, and smooth(ish) frames that were painted with lace used as stencils. / (covering The Carpenters) DIY: Dictionary Art | The Inspired Room - StumbleUpon. Delightful country cookin: homemade air freshener. "Don't you get fresh with me, ya hear! " Oh, I love it when adults (especially grandparents) say that to little kids. What does it mean exactly? Does it mean we'd rather children get dirty with us?

Haha...who knows? Today, I'm going to ask you to actually get fresh with me. I digress. I was roaming around on Tasty Kitchen one day when I came across a recipe for homemade air freshener. To make these little beauties, you first need a heat-proof jars (I found mine for $0.99 each at Michael's), food coloring colors of your choice, and essential oil. Into each jar, drop a few drops (I repeat...a few...it doesn't take more than 2 or 3) of food coloring. Now for the fun part. Why salt? Get one cup of water boiling on the stove. Then, pour in the other cup of cold water and the salt, stirring until the salt is dissolved. Quickly pour the hot gelatin mixture in each of your jars, and then use a disposable stick or spoon to stir it into the oil and food coloring. Guest post {Marie Darby…diy photo lampshades. PINTEREST UPDATE: This is a post from 2010. I do not take custom orders, only the tutorial is available.

The lamps have held up wonderfully. As many of you requested, Marie is sharing a little tutorial here on how she made her lampshades. When she made them she was not planning on doing a tutorial for this blog, so be sure to thank her for taking the time to write all this out. Also, for those wondering…Kara will be sharing some tutorials for her book art on her blog soon. Marie is happy to do custom orders for those that prefer buying over making! * LAMPSHADE – Hobby Lobby carries self-adhesive shades & nightlights, Target has some smaller lamps for $19 that would be perfect for this project, I’ve found some lamps & shades on Craigslist. . * GLUE – I used a hot glue gun for the first lamp. . * VELLUM – I buy this in packs of 20 (I think) in the scrapbooking section of Hobby Lobby. . * PRINTER – I have a color inkjet printer. If you are using photos – there are several options. That’s it! How To Mix Chalkboard Paint in Any Color.

We love using chalkboards as backdrops for displays and parties (like this one here!). So we were super excited to learn that you can create your own custom colors-and it's really easy! We first learned how from Martha Stewart whose tutorial you can read here. She recommends that you use latex paint, but we tried it out with acrylic paints with much success. Here's how you too can create your own chalkboard paint...

Supplies: 1/2 cup acrylic paint (choose any color you like, or mix colors together to make the perfect shade!) 1. 2. Once your chalkboard has fully dried be sure to slate the surface before using it for the first time. Have fun creating any color combination you like!! Seashell Lights - Martha Stewart Crafts - StumbleUpon. 16 Headband Tutorials | Croq Zine - The Blog. As a busy mom of three little boys, I don’t always have time to do my hair. (Like, never, actually! I try to sneak in sessions with my flatiron while the boys are distracted with a cartoon… IF I have to leave the house.

If I don’t, my hair looks like the bus driver from South Park’s… i.e., bird’s nest. Hmm, a bird’s nest headband sounds kind of cute and funny, actually!) Notes from a very red kitchen just hosted a Headband Tutorial Roundup, and there were some super headbands represented! The roundup was full of inspiration, but this rose and pearl headband by Whitney was one of my favorites. This scrappy leather headband by Missie Krissie is super cute, too! Other Headband Resources: I loved this Braided Headband tutorial when I saw it a few months ago, by Cakies (shown above) I loooved this yarn braided headband when I saw it a few months ago at EvaForeva (don’t you just LOVE the styling of the pic, too?) I like this lovebird headband at Crafty Bitch.

Spoonflower. Diy craft projects | going home to roost - StumbleUpon.