
Simple Adjustments. With everyone and their grandmother having a digital camera you can make almost anybody look like a professional photographer, well, better-than-amateur at least.

You can use this simple process on almost any photo you take. Let’s start with our regular, old, point-and-shoot photo. This one was taken with a little higher-end camera, but it can still use a lot of work. First, we’re going to sharpen our image a bit using the Unsharp Mask [Filter > Sharpen > Unsharp Mask]. We don’t want anything too drastic, so I used some low settings. Portrait Retouching Tutorials. Email Is it something that often happens to you?

You just sit and keep on looking through your photos on the computer screen trying to take a closer look at your full-size pictures. And then it occurs to you that they didn’t really suck that much during the actual shoot? Of course, what you see during the shoot with your eyes and what you get after the photo session is not the same thing. But do not let your despair take possession of you! Photoshop is capable of making slightly imperfect photo into an awesome shot. 1. Cinemagraph. No doubt you’ll have heard of the term Cinemagraph since it exploded onto the Internets.

Originally coined by Photographers Kevin Burg and Jamie Beck, a cinemagraph is a clever revival of the classic animated GIF. It combines features of video and photography to create a the illusion of a still image but with cool motion effects. Let’s take a look at how to create your own animated GIF cinemagraph by playing around with Photoshop’s animation tools. Some of the best cinemagraph examples can be found on the creators’ own website. Their original cinemagraphs from New York Fashion Week capture moments just like an ordinary photograph, but also preserve that living moment in time to re-experience endlessly.
As the popularity of the cinemagraph grew we began to see mobile apps such as Cinemagram emerge, which allows the easy creation of amateur cinemagraphs using the device’s built in camera. Use a tripod. Alternatively you could always play around with existing stock video footage. Adding Textures. Remove Someone Completely. With the launch of the new Adobe Suite of programs comes the long awaited Adobe Photoshop CS5. Packed with new features to speed up your workflow it truly is the most advanced edition of Photoshop to date. One of the new features we will be looking at today is called Content Aware. This feature allows you to quickly fill in a selection with surrounding content making it look like a part of the original image.
In this case we will choose to remove a person from a photo, this can be done in less than five minutes. Dark Processed Lomo Effect. This post was originally published in 2010 The tips and techniques explained may be outdated.

Follow this step by step post processing guide to give your photos a dark lomo style effect with high contrast, blue tones and vignette burns. The effect is based on the popular lomographic technique and is similar to the processing effect used in many fashion shots and advertisement designs. Overall this effect does a great job of adding impact to a plain photography with cool colour casts and unusual saturation. View full size photo effect Begin by opening your photograph of choice into Adobe Photoshop. Go to Image > Adjustments > Levels and tweak the tones of the image. At the bottom of the Layers palette, click the Adjustment Layer icon and select Curves. Change the drop down menu to Green and tweak the graph for the green channel to further alter the tones of the image.
Make a Realistic Star Field. Haunted Room. Today I gonna show you how to realize from scratch a ghostly scene in few steps.

We will use a couple of stock photos and modify them so they will look harmoniously combined. In particular we will deal with the burn tool, layer masks and some Photoshop filters often overlooked. Preview: Click to enlarge Step 1 The starting point of this tutorial is the photo of an abandoned castel room. Open the photo in Photoshop. Step 2 To darken the room, duplicate the layer (ctrl+J) and set the duplicated layer blend mode to Color Burn with opacity 30%. Step 3 Now I don’t like this “warm” atmosphere. Step 4. Vintage Look. By Guest Contributor Anna Gay Photographers are often striving for a “vintage” look in their photos, and even though there are endless ways of achieving a vintage look, there are a couple of characteristics to keep in mind.

First of all, the color tones in a vintage photo often lean towards either a blue or a red hue, or a cross-processed look. Retro Collage. Watercolor Wallpaper. Wallpaper Tutorial. It's very simple.

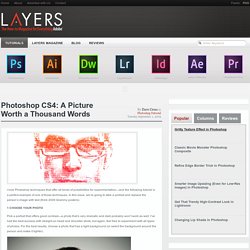
Typography Portrait. I love Photoshop techniques that offer all kinds of possibilities for experimentation—and the following tutorial is a perfect example of one of those techniques.

In this issue, we’re going to take a portrait and replace the person’s image with text (think 2009 Grammy posters). Pick a portrait that offers good contrast—a photo that’s very dramatic and dark probably won’t work as well. I’ve had the best success with straight-on head and shoulder shots, but again, feel free to experiment with all types of photos. Draw Hair in Photoshop.