
Create your own Google Maps style - Snazzy Maps - Free Styles for Google Maps. 52 Brushes Photoshop gratuits pour vos digitals painting. Vous recherchez un brush Photoshop pour vos digitals painting ?
Voici 52 brushes Photoshop gratuits de qualité pour compléter votre catalogue personnel et professionnel ! Retrouvez ci-dessous 52 brushes sous 4 catégories différentes : Brush Photoshop de cheveuxBrush Photoshop pour le digital paintingBrush Photoshop aquarelleBrush Photoshop de nuages De quoi vous donner toutes les clés pour réussir vos différents projets.
Brush Photoshop cheveux Dans cette catégorie, vous allez pouvoir retrouver différents brushes pour créer des cheveux facilement et rapidement sous Photoshop. Create a Stamp Texture in Illustrator. So What’s the Big Deal with Horizontal & Vertical Bezier Handles Anyway? Have you ever seen Illustrator progress shots from your favourite designers and wondered how and why their bezier handles are so obsessively arranged?
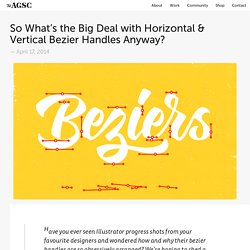
We’re hoping to shed a little light on this seemingly unnecessary process. Note: this tutorial assumes a solid grasp of Illustrator & the pen tool. Until recently, I definitely belonged to the What’s the point of that? Club —and perhaps secretly the How did they do that? Club. Here’s a piece of lettering we created to play around with for this tutorial: Here’s an outline preview ( ⌘Y) in Illustrator: Note: To preview your own beziers like this you may need to turn on the “Show handles…” option highlighted below in Illustrators’ Preferences ( ⌘K). Notice all the bezier handles (save for a few strays; we’ll get to those later) are neatly locked to the horizontal or vertical plane. It reduces your node placement options That may kinda sound like a bad thing, but it’s really handy. Node placement That’s the secret sauce right there.
…and others. How To Create a Vector Sponge Art Effect in Illustrator. I’m sure we all remember painting with sponge (or potato!)
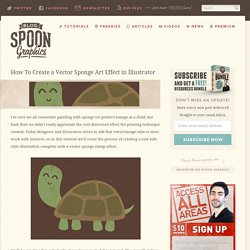
Stamps as a child, but back then we didn’t really appreciate the cool distressed effect the printing technique created. Today designers and illustrators strive to add that retro/vintage style to their work with textures, so in this tutorial we’ll cover the process of creating a cute kids style illustration complete with a vector sponge stamp effect. We’ll be creating this cute turtle character as part of this tutorial.
The overall styling of the character is super simple with large round shapes and irregular lines to relate to the kids theme, then a range of vector texture elements are used to distress the solid shapes to create an old print or stamp effect. Open up Adobe Illustrator and fill the artboard with a brown rectangle. Move on to the outline of the turtle’s head and neck, taking creative liberties on the sizing and proportion to create a kids’ style character. Copy and paste a copy of a grain texture into Illustrator. How To Create Vector Smoke in Illustrator - Vectips. Today you’ll find out how to create vector smoke with the help of gradient meshes, Transparency panel and Warp Tool.
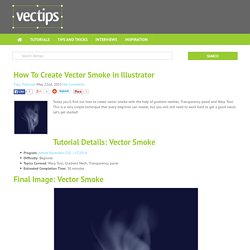
This is a very simple technique that every beginner can master, but you will still need to work hard to get a good result. Let’s get started! Tutorial Details: Vector Smoke Program: Adobe Illustrator CS5 – CC2014Difficulty: BeginnerTopics Covered: Warp Tool, Gradient Mesh, Transparency panelEstimated Completion Time: 30 minutes Final Image: Vector Smoke Step 1: Vector Smoke To begin this vector smoke tutorial open your Adobe Illustrator and create a new document (Cmd / Ctrl + N). Step 2 Take the Rectangle Tool (M) and create a dark-blue rectangle. Step 3. 30+ Styles Photoshop à télécharger pour créer des Effets de texte en un clic. Si vous êtes un utilisateur de Photoshop, vous devez déjà savoir qu’il existe le panneau des styles qui vous permet de customiser vos éléments graphiques en un seul clic.
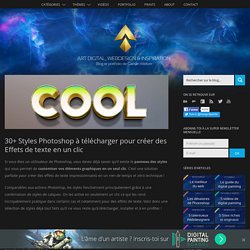
C’est une solution parfaite pour créer des effets de texte impressionnants en un rien de temps et zéro technique ! Comparables aux actions Photoshop, les styles fonctionnent principalement grâce à une combinaison de styles de calques. On les active en seulement un clic ce qui les rend incroyablement pratique dans certains cas et notamment pour des effets de texte. Voici donc une sélection de styles déjà tout faits qu’il ne vous reste qu’à télécharger, installer et à en profiter ! Comment installer de nouveaux styles ? Mais avant toute chose, comment installe-t-on un ou plusieurs styles afin qu’il apparaisse dans l’interface de Photoshop ? Les fichiers téléchargeables contiennent l’extension .ASL et il suffit de les charger dans le panneau des Styles (Fenêtre > Styles). Typographie rétro pour Photoshop Style rétro – Happy. Templatemaker.nl.