
200+ Ultimate Collection of Photoshop Plugins. Photoshop is a powerful image editing software which is very useful for web designers and photographers to create desired effects in the images.
But sometimes it’s difficult to perform certain tasks manually in photoshop. Once there was a belief that only designers who have mastered photoshop can create special effects on photographs or images. But now with the help of Photoshop Plug-in anyone can create desired effects on their images. Photoshop Plugins are actually add-ons to the main program which helps to attain additional image effects or performing tasks that are impossible or hard to fulfill using Adobe Photoshop alone.
And they make the complicated task much easier and help users in creating amazing effects, designing faster & better. The Complete Guide to Making Animated GIFs. The Gimp : Aides, trucs, astuces et tutoriaux en français ! Collect & Go. Notre service.
Gimp. 21.Gimp-Colaj nunta 2. The Plugin Site - Adobe Photoshop plugins and plug-ins, filters and effects for Paint Shop Pro, Corel Photo-Paint, Adobe Premiere. Gutenprint Printer Drivers. Ed Halley's GIMP Tutorial on Using Multiple Exposures. The human eye is very good at adapting to complicated lighting situations.

The iris can open up to see details in shadowy areas, and it can close down to avoid the pain of bright light. A single image from a camera, however, is limited to one exposure setting at a time, and the film or sensor may not be able to retain details in both light and dark extremes. If you take multiple exposures, however, this can be blended later for excellent detail over a very wide range of exposure. Many cameras offer an automatic "bracketing" feature to help with this task, though any manually-adustable camera can be used as well. Take at least two shots; one shot which is exposed brightly enough to capture the details in dark areas, and one shot which is exposed darkly enough to keep the details in bright regions.
Once you've got the right blending, you will likely notice that the images have lost some of their colorful lustre. Ciel étoilé. "Soleil, lune, étoiles.
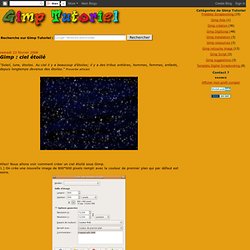
Au ciel il y a beaucoup d'étoiles; il y a des tribus entières, hommes, femmes, enfants, depuis longtemps devenus des étoiles. " 70 creative Gimp tutorials. Gimp Tutorials in this review include a handpicked selection of creative Gimp tutorials for intermediate and advanced users.

Gimp is a free multiplatform image editing tool, using Gimp you can achieve pretty much everything what can be done in pricey Photoshop. These Gimp tutorials will help you to learn text, Gimp photo editing, advanced photo manipulations such as changing colors, background, remove objects, proper black and white conversion in Gimp. You’ll also learn by following these Gimp tutorials how to design poster, website, wallpaper, logo and icons with Gimp. Ed Halley's GIMP Tutorial on Using Multiple Exposures. Thema anzeigen - Plugin: Abdunkelnde Rahmen (Darken Frames) GimpLensfun. Gimp Tutorials - Search for Gimp Tutorials on Pixel2Life. GIMP思い込みチュートリアル(GIMPの使い方) カラー写真を版画風白黒写真に変更させる方法 ≫ 写真加工. まずは、加工前と加工後を並べて比べておきます。
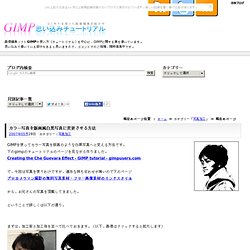
(以下、画像はクリックすると拡大します) では、作成方法です。 白黒にしたい写真を用意します。 あらかじめ適当な大きさにしておいてください。 この写真をGIMP(ギンプ)で開きます。 (電脳はさみ)を使って、人物の部分を選択します。 「選択 → 反転」(「Ctrl」+「i」)で選択範囲を反転させ、「編集 → 消去」(「Ctrl」+「k」)で背景を消します。 選択領域(背景部分)を「#aeaeae」で塗りつぶします。 「選択 → なし」(「Ctrl」+「Shift」+「a」)で選択を解除します。 次に「レイヤー → 色 → 脱色」で全体的に灰色っぽくします。 「レイヤー → 色 → しきい値」で、左右の値をお好みに設定して、 完成です。 どうでも良い話ですが、パンダの写真でやるとどうなるんだろう…。 Simple steps to photo touch-up. In this post I’m going to show you how to go post-process this image: By the end, we’ll have an image that looks like this: This tutorial was created using the GIMP, but it’s equally applicable to your favourite editing software as long as it has the same tools.
Photoshop, and other editing software should work equally well. The steps described here are worth practising, and will apply equally well to any portrait! First of all, I came across this photo on Flickr through my contacts page. After you load the image, the first thing to do is use Auto Levels from the Layer->Colors menu.
The image is a little noisy so let’s clean it up a bit. CosmeticRetouch « GIMP Guru. Gimp Tutorials for pictures, Bilder and Fotos. 60+ (more) Advanced Photoshop & GIMP Tutorials. Skip to content Dennis Plucinik's Web Design Blog Just another WordPress site advertisements Follow Me.
GIMP tricks. GIMP tricks Sunday, 27 April 2008, michuk. Vitor Rodrigues » Blog Archive » Photoshop filters on GIMP. For the GIMP users that, like me, keep complaining that Photoshop has so much more filters to do some fancy effects, the agony is over I just found this today, but it dates back to 2004. There is a GIMP plugin that handles Photoshop plugins. It is called PSPI and it works like a charm on the filters I have tested so far. Gimparoo! Gimp Tutorial: Awesome Bokeh Effect in Gimp. It was fun to to follow Abduzeedo tutorial for making bokeh digital effect in Photoshop (i'm using photoshop and gimp) and i really excited when i managed to do similiar effect in Gimp.
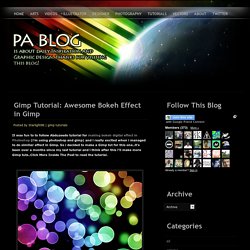
So i decided to make a Gimp tut for this one..it's been over a months since my last tutorial and i think after this i'll make more Gimp tuts..Click More Inside The Post to read the tutorial. P/s: This tutorial has been converted from the original Photoshop tutorial into Gimp. The original Photoshop tutorial can be found HERE in Abduzeedo site. Before you try this tutorial,please download my Eclipse brush where i made it by myself.
You can download the brush by click HERE. Create new document. Then create new layer.I renamed it as dark violet. Choose a dark purple. Select gradient tool, Radial for the shape and low the opacity to 50. Gimp Tutorial: Bokeh Effect. GimpKnowHow's Channel. SelectiveColorization « GIMP Guru. SelectiveColorization In this tutorial I will explain how to convert a color photograph to a B&W one with color restored to selective areas.
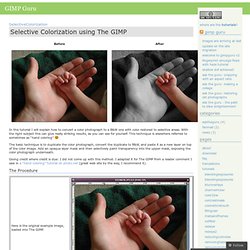
With the right subject this can give really striking results, as you can see for yourself. This technique is elsewhere referred to sometimes as “hand coloring” :-) The basic technique is to duplicate the color photograph, convert the duplicate to B&W, and paste it as a new layer on top of the color image. Add an opaque layer mask and then selectively paint transparency into the upper mask, exposing the color photograph underneath. Giving credit where credit is due: I did not come up with this method.
The Procedure Tips For this kind of fine paint work, a pen tablet like this Wacom one is very useful. Other Examples Further Reading. SoftPortrait « GIMP Guru. SoftPortrait I’m sure you’ve seen examples of “soft focus” portraiture, often used by photographers to lend a soft, slightly hazy, “dreamy” feel to a photograph. The midtones are sometimes keyed up a bit also, giving a sort of glow to the faces of the subjects. Typical applications are high school senior/wedding/baby/couples portraits as well as in fashion or “glamour” photography. Welcome - Liquid Rescale GIMP plugin.
GIMP Plugin: image-subdivide.scm suddivide una immagine in M righe x N colonne. Descrizione Lo script image-subdivide.scm suddivide una immagine in N righe x N colonne e salva su file ogni singola porzione. Ogni porzione dell'immagine viene rinominata aggiungendo al nome del file il numero della riga e della colonna a cui appartiene. Installazione. GIMP - Save for Web - Need to Know Info! Gimp Tutorial: Awesome Bokeh Effect in Gimp. Tutorials. Beginner GIMP Quickies Use GIMP for simple graphics needs without having to learn advanced image manipulation methods. Simple Floating Logo This tutorial walks through some basic image and layer manipulation techniques. Layer Masks An introduction to using layer masks to modify the opacity of a layer. Basic Color Curves A first look at the Curves tool and adjusting color tones in an image. Photo Editing. Download and Freebies.
The GNU Image Manipulation Program. A repository of optional extensions for the GIMP. Download free GIMP plugins (40+ plugins) GIMP is the undisputed king of image editing in Linux platforms, and is next only to Photoshop in popularity in Windows and Mac platforms. With a large community of developers and an even larger pool of users, it is no surprise that GIMP is very popular. Much like Firefox, GIMP’s strength lies in its plugins, which are developed by the open-source toting community. Since the users themselves develop them, they know all the needs and conceive a plugin for everything. And what better way for me to endorse GIMP than a list of good plugins?
Most of them are aimed at web-designers and photographers, the main users of GIMP. GHUJ – Gimp Tutorials - Best GIMP Tutorials. Gimpology: GIMP Tutorials and resources for the GIMP. Gimp-tutorials.net - Gimp , tutorials , brushes , downloads, forum.
GimPhoto - free Photoshop alternative for photo and image editor. GIMPER.NET - The GIMP Community - Index page. Welcome - gimpusers.com.