
Welcome - Learn Python - Free Interactive Python Tutorial. Tiny AVR Programmer Hookup Guide. Favorited Favorite 2 Introduction Arduino is awesome. The boards are solid, the programming language and IDE are easy, and the community is awesome. But for a lot of electronics projects, an Arduino is overkill. If you’re just blinking a few LEDs, and reading a single sensor, you can get the job done smaller and cheaper using a simple IC, like the ATtiny85. Our hero! Unfortunately, the ATtiny85 doesn’t have a well-known, ubiquitous development platform like Arduino’s Uno or Leonardo. The Tiny AVR Programmer is a general AVR programmer, but it’s specifically designed to allow quick-and-easy programming of ATtiny85’s (as well as 45’s). The Tiny AVR Programmer can also be used as a general purpose AVR programmer.
Covered In This Tutorial In this hookup guide, we’ll show how you can program ATtiny85’s using the Tiny AVR Programmer and Arduino. Required Materials In addition to the Tiny AVR Programmer, you’ll also need the following items to follow along with this tutorial: Suggested Reading. Thermocouple. A thermocouple is a kind of temperature sensor.
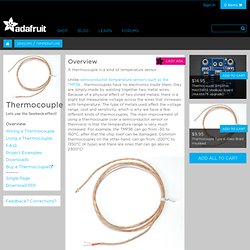
Unlike semiconductor temperature sensors such as the TMP36 , thermocouples have no electronics inside them, they are simply made by welding together two metal wires. Because of a physical effect of two joined metals, there is a slight but measurable voltage across the wires that increases with temperature. The type of metals used affect the voltage range, cost and sensitivity, which is why we have a few different kinds of thermocouples.
The main improvement of using a thermocouple over a semiconductor sensor or thermistor is that the temperature range is very much increased. For example, the TMP36 can go from -50 to 150°C, after that the chip itself can be damaged. Thermocouples are often used in HVAC systems, heaters and boilers, kilns, etc. Controlling an Arduino with an iPhone. Skill Level: Beginner by Pete-O | November 30, 2009 | 72 comments You can download the Source Code here.
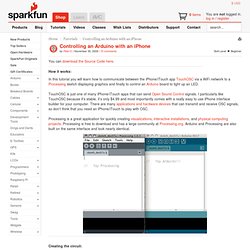
How it works: In this tutorial you will learn how to communicate between the iPhone/iTouch app TouchOSC via a WiFi network to a Processing sketch displaying graphics and finally to control an Arduino board to light up an LED. TouchOSC is just one of many iPhone/iTouch apps that can send Open Sound Control signals. Processing is a great application for quickly creating visualizations, interactive installations, and physical computing projects. Creating the circuit: Xoscillo - A software oscilloscope that acquires data using an arduino or a parallax (more platforms to come). About This is a multiplatform software oscilloscope and logical analyzer.
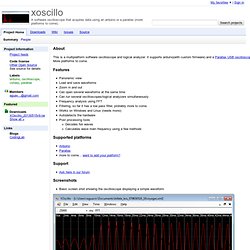
It supports arduino(with custom firmware) and a Parallax USB oscilloscope. More platforms to come. Features Panoramic view Load and save waveforms Zoom in and out Can open several waveforms at the same time Can run several oscilloscopes/logical analyzers simultaneously Frequency analysis using FFT Filtering, so far it has a low pass filter, probably more to come. Turn Your Arduino Into an ISP.
There are a few instances in which it is neccesary to program microcontrollers without a bootloader.
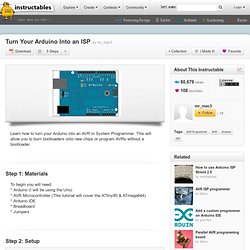
For example, if have run out of storage on a chip you can get an additional 2KB when you program without a bootloader. Another example, the one I will show you how to do, is to program chips that have no serial capabilities and therefore cannot use a bootloader. The ATtiny85 is one of these chips. To program the ATtiny85 using the Arduino ISP you must first add ATtiny85 support to the Arduino environment: * Download attiny45_85.zip * Unzip the folder * Copy the folder to the Arduino IDE's Hardware folder * Reopen the Arduino IDE, you should see the ATtiny85 in the Tools >> Board menu. Arduino & Freeduino Knowledge.
Breadboard Sanguino. Okay, so you want a Sanguino but Zach's Sanguino is too expensive ;-> Or too red ;-> Or you just have to have it NOW ;-> And you just used up the last of your solder so a strip board is out.
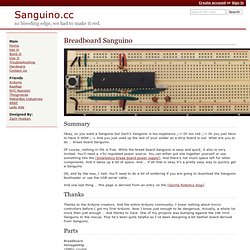
What are you to do … bread board Sanguino. Of course, nothing in life is free. While the bread board Sanguino is easy and quick, it also is very limited. You'll need a +5V regulated power source. You can either put one together yourself or use something like the [Solarbotics bread board power supply]. Oh, and by the way, I lied. And one last thing … this page is derived from an entry on the [Gorilla Robotics blog]. Thanks to the Arduino creators. Breadboard Atmega644p 16MHz crystal momentary switch 4 x .1uF capacitor 2 x 22pF capacitor 10K resistor 3 x 6 pin male header 1 3 pin by 2 row male header 6 wire ribbon cable, about 4-6 inches 3/32 heat shrink tubing, about 4-6 inches 22g wire Wire cutter and stripper I'll list the 644p pins that are important to the bread board sanguino. Freeduino Knowledge Base. Adafruit. Arduino Blog.
Using an Arduino + Ethernet Shield to Update a ThingSpeak Channel. Using an Arduino + Ethernet Shield to Update a ThingSpeak Channel This tutorial demonstrates how to use the Arduino to read in the analog input and update a ThingSpeak Channel by sending an HTTP POST via the Arduino Ethernet Shield or the Arduino Ethernet (all-in-one).
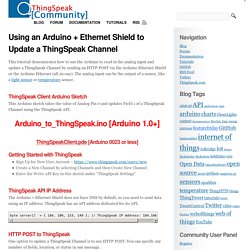
The analog input can be the output of a sensor, like a light sensor or temperature sensor. ThingSpeak Client Arduino Sketch This Arduino sketch takes the value of Analog Pin 0 and updates Field 1 of a ThingSpeak Channel using the ThingSpeak API. Arduino_to_ThingSpeak.ino [Arduino 1.0+] ThingSpeakClient.pde [Arduino 0023 or less] Getting Started with ThingSpeak Sign Up for New User Account – a New Channel by selecting Channels and then Create New ChannelEnter the Write API Key in this sketch under “ThingSpeak Settings” ThingSpeak API IP Address The Arduino + Ethernet Shield does not have DNS by default, so you need to send data using an IP address. Byte server[] = { 184, 106, 153, 149 }; // ThingSpeak IP Address: 184.106.153.149. Arduino UNO Pinout Diagram. Pachube. Pachube & Arduino.