
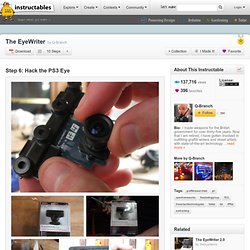
Hacking of PS3 Eye IR filter. Details Published on 10 November 2012 Hits: 6004 For our multi-touch table project we needed a camera that could only see infrared.

After looking around on the interwebs, I found out that the PlayStation Eye webcam is perfect for this. With its resolution of 640x480 pixels (@60 Hz) or 320x240 pixels (@120 Hz) it’s great for a fluid webcam stream. Materials you’ll need: Flathead screwdriverPrecision Philips (crosshead) screwdriverFloppy disk (you know, those ancient square storage thingies)Hobby knifePlayStation Eye (you won’t get very far without it) Opening up the webcam First thing we’ll need to do is take the webcam apart.
Now that the screws are removed, we’ll need to pry the case open. [PS3 EYE] Case Super MOD by BSQUANG (ver 1.0) Long time no see everybody, i have seen every thing changing so much.
![[PS3 EYE] Case Super MOD by BSQUANG (ver 1.0)](http://cdn.pearltrees.com/s/pic/th/super-bsquang-community-forums-77169445)
“Everybody changing, i dont feel the same” hi ! So come back here, i want share some my technical about ps3 eye. So first, i thank AlexP about the driver for pc. Good ! Very good ! The lens i have : M12 3.0mm & CS 3.5-8mm : Zoom manual, focus manual, iris manual ! Ok ! So, interesting ? Good but not enough ! Hacking of PS3 Eye IR filter. Download. Forum Home. MTmini - DIY Multitouch Mini Pad. What's hiding in infrared, make your own infrared camera. [PS3 EYE] Case Super MOD by BSQUANG (ver 1.0) The EyeWriter : Hack the PS3 Eye. There are a number of videos onine that explain how to mod a PS3 eye camera, the best being the crew at Peau Productions.
How to take apart the PS3 Eye and remove the IR blocking filter: How to instal a visible light filter using a floppy disk: These videos document the process of hacking the PS3 Eye pretty thoroughly. But, In our case we need to use a lens with a shorter focal length than the one provided with the PS3, so some extra hacking is in order. The EyeWriter 2.0. The EyeWriter is a low-cost eye-tracking apparatus + custom software that allows graffiti writers and artists with paralysis resulting from Amyotrophic Lateral Sclerosis to draw using only their eyes.
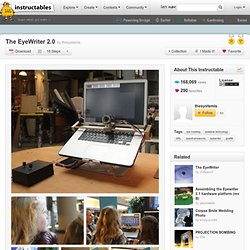
The original design, as shown here, featured a pair of glasses as the basis for the eyewriter design: Since that first video, we've been hacking on and developing the project, and we have a new design, which we've called "eyewriter 2.0" which improves the accuracy of the device, and allow for people who's heads are moving slightly to also use an eye tracker. The original eyewriter, designed for a paralyzed Graffiti artist TEMPT1, is designed to be worn on a completely motionless head. The 2.0 design, which uses a camera and LED system mounted away from the head, can be used by people whose heads are moving slightly, such as MS patients, and people who wear glasses, etc.
This eyewriter system is cheap, and completely open source. The EyeWriter 2.0. Hacking Sony PS3 Eye Camera on Behance. How to build a Multi-Touch surface. The most important acrylic layer is the EndLighten acrylic.
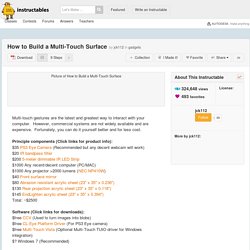
This layer is the one responsible for redirecting the IR light from its sides out the top and bottom surfaces of the acrylic. Therefore it is necessary to polish the edges of this layer in order to maximize the amount of IR light that can be injected into it. If it is possible, I recommend laser cutting the EndLighten layer since that will automatically polish the edge to perfection. If a laser cutter is not an option, then automotive sandpaper will do the trick. Start with 600 grit (lower if the saw cut is rough) and sand each edge until they are perfectly smooth. You do not need to polish the other two layers, and I actually recommend that they remain rough that way no IR light can shine into them. How To Build An Optical Multitouch Setup: FTIR, Rear DI, LLP, DSI, LED-LP (VIDEO TUTORIALS) So you may have seen tons of people making their own Multitouch tables and you just couldn't figure out everything you need to do to build one successfully... well, here is the Instructable you've been looking for.
This small project was a long time coming. I wanted to create a box that could be easily changed into whatever optical multitouch technique I wanted. The 5 major techniques are FTIR, Rear DI, DSI, LLP, and LED-LP. The box was a simple 5 sided box constructed out of MDF. It has one of my favorite projectors in it, Toshiba’s ultra short throw TDP-EW25U (discontinued).
Watch the first two videos to learn about everything hardware related to setting each of these methods up. For help with your projects check out the largest MT community in the world at. Forum Home. Forum Home.