
DELTA TWISTER: A DIY 3D PRINTER ANYONE CAN MAKE (FOR LESS THEN 400 BUCKS) 6x6x6 3D print: Delta CNC. As a runner up winner in the recent 'Real Challenge', I have been awarded with a custom 6x6x6 inch 3D print for my 'CNC machine for machining large pieces of polystyrene foam'.
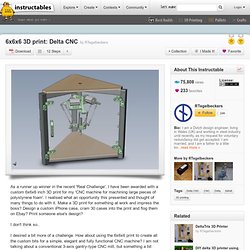
I realised what an opportunity this presented and thought of many things to do with it. Make a 3D print for something at work and impress the boss? Design a custom iPhone case, cram 30 cases into the print and flog them on Ebay? Print someone else's design? I don't think so.. I desired a bit more of a challenge. This inctructable has initially been published after the completion of the design phase. Enjoy, Richard Tegelbeckers. From Image to Reality! 3D Printing In Practicality! Hi!
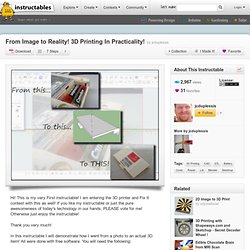
This is my very First instructable! I am entering the 3D printer and Fix It contest with this as well! If you like my instructable or just the pure awesomeness of today's technology in our hands, PLEASE vote for me! How to make a Fab Lab with only $4.10. A lot of companies give sponsorship.

All sort of sponsorships. Even Instructables! This was my first step. When Randofo told me about the Instrutables Sponsorship, I was amazed by the opportunity. Project RE_ by Samuel Bernier. UPcycling with an UP!
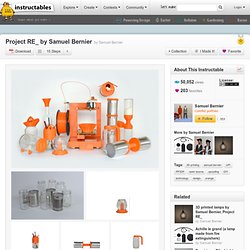
Personal and Portable 3D Printer. This experiment of Project RE_ explores 3D printing as a DIY tool for upcycling. Customised lids are created using low cost 3D printing. They are then clipped or screwed onto standard jars, tin cans and bottles to create new and personal objects. Prevent 3D prints from warping - no mess! Ever since I started experimenting with my UP!
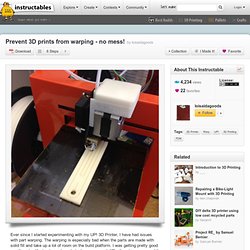
3D Printer, I have had issues with part warping. The warping is especially bad when the parts are made with solid fill and take up a lot of room on the build platform. I was getting pretty good results using Kapton tape alone, but when a new and difficult part came around it wasn't cutting it anymore. I found TechShopJim's great instructable here: about how to make an ABS slurry to help parts stick to the platform. Create Google Sketchup files that can be printed on a 3D printer. Create Google Sketchup files that can be printed on a 3D printer. RepRap eMaker Huxley Build. Adjustable constant current source 4mA to 3A. Laser Cut 3D Printer. I want a 3D printer.
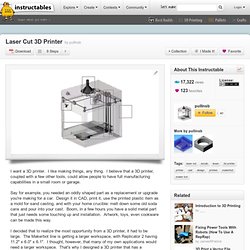
I like making things, any thing. I believe that a 3D printer, coupled with a few other tools, could allow people to have full manufacturing capabilities in a small room or garage. Say for example, you needed an oddly shaped part as a replacement or upgrade you're making for a car. Design it in CAD, print it, use the printed plastic item as a mold for sand casting, and with your home crucible: melt down some old soda cans and pour into your cast. Build a Laser 3D Printer - Stereolithography at Home. Here is how to make a Stereolithography 3D Printer. It is still a bit of a work in progress but so far it is working pretty well. This is mainly an experiment which started as a Delta Robot Stereolithography Printer but ended as a more traditional Cartesian Stereolithography Printer.
"I'll be honest, we're throwing science at the walls here to see what sticks. No idea what it'll do. " - Cave Johnson. Rob Hopeless: Delta Robot 3D Printer. Sounds cool doesn't it? Alright, I've been meaning to post an update for a while now, I was just hoping to have finished the rebuild by now...
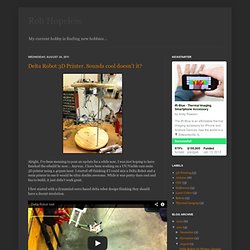
Anyway, I have been working on a UV/Visible cure resin 3D printer using a 405nm laser. I started off thinking if I could mix a Delta Robot and a resin printer in one it would be ultra double awesome. While it was pretty darn cool and fun to build, it just didn't work great. Rob Hopeless: Delta Robot 3D Printer. Sounds cool doesn't it? Checking the Calibration on your TechShop 3D Printer (or any other 3D Printer) There are lots of great designs for calibration blocks available on the web for your 3D printer.
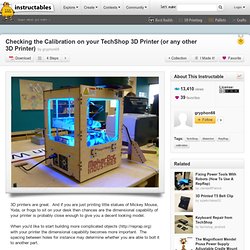
One of the best sources for STL files for things to print is Thingiverse ( If you go to the Thingiverse home page ( and type "calibration" (no quotes necessary) into the search bar and hit return you will get a long list of calibration and test objects to select from. Depending on the type of objects you plan to print after your calibration check you may want to select something that offers thin walls, overhangs, bridges, or holes.
But my suggestion if you are just getting started is to chose one that is simple, but will give a good indication that your X, Y, and Z dimensions are working correctly. I selected the Calibration block by kludgineer ( which provides 10, 20, and 40mm lengths in all three primary axis to check. You can download STL files from Thingiverse by selecting them from the LH column of Thingiverse item pages. Build a Laser 3D Printer - Stereolithography at Home. $4.5 better stepper driver. A cool Op-Amp demonstration: Differential Light Meter. What is a differential light meter?
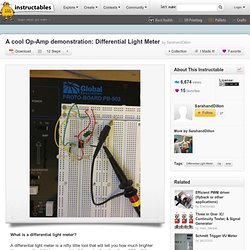
A differential light meter is a nifty little tool that will tell you how much brighter the surrounding light is on one side of the meter than the other. How To Build A Spark Gap Tesla Coil (SGTC) Shoot foot-long bolts of lighting through the air, light fluorescent tubes without wires, and power your other high voltage experiments with the aid of this tabletop-sized Tesla coil!

Once the parts have arrived, it comes together in about a weekend, and for less than $200 even for those without a big bin of spare parts. I built this coil for fun over a few weekends during 10th grade, juggling eigenvalue problems and European history for drilling and soldering high voltage components. The key to this coil's performance on such a tight budget is that all of its components are designed to work well together. Using some basic concepts from AC circuit design, the components are matched to perform well without requiring massive amounts of power.
Photo Components & Testing. Building a semi Smart, DIY boat with Arduino and some other sensors. Building a semi Smart, DIY boat with Arduino and some other sensors. Simplest Ever DC-DC Boost 12v to 73v. Easy to build Headphone amplifier using Mosfets. This instructable is about how to build a simple headphone amplifier using easy to obtain components :) The amplifier is based around a standard N-Channel Mosfet (IRF740 in my case) and is quick and easy to build with quite acceptable results.
I scavenged the heatsink for this off the voltage regulators on an old motherboard. Using Falstad's Circuit Simulator. Homemade Infrared Rangefinder (Similar to Sharp GP2D120. The theory behind an infrared rangefinder is that pulsed infrared is emitted from an IR led and then reflected back off an object into an IR receiver. As light adheres to the inverse square law which states that as distance from a source is increased, the intensity decreases by the square (Source: Essentially, the light is emitted by the infrared LED, which then bounces off the object.
In the first instance, the LED is the emitter and the reflective object is the observer. Once the light hits the object, it then bounces off and is reflected back to the IR receiver. The object is then acting as the source of light so the inverse square law takes effect twice. This has the problem that the maximum range of the rangefinder is quite short and to increase the range, higher power LED’s would be required. Homemade Infrared Rangefinder (Similar to Sharp GP2D120. How to use Arduino Mega 2560 as Arduino isp. When i build my Atmega328p-pu on a circuit board for my moped i needed to bootload it. Because i have none external programming equipment i needed to use my Arduino Mega 2560 as ArduinoISP ( ) . You need: -Arduino mega -Breadboard or pcb made atmega chip arduino -100nF capacitor -usb cable for arduino mega 2560 -> pc -arduino IDE ( ) -some wires to connect the arduino mega 250 to your homemade arduino.
One of the difficulties of the mega board is that all the pins are different so most tutorials who are aimed at the UNO board or the Duemilanove or Diecimila are useless because the Mega board pinout is different. To know which pinout is needed for the Arduino Mega 2560 the arduino.cc website has a special webpage : ( ) . Learning Arduino basics the easy way - Part 01 "Blink" or "The Internet" How electronic components work. The diode. DIY 1000 watt wind turbine.
DIY 1000 watt wind turbine. Arduino CPU+RAM usage monitor LCD. Your Image on an Arduino! - TFT LCD Screen Guide. Mini Arduino Portable EEG - Brain Wave Monitor + This is another example of the versatility , and of what , the Arduino, a small LCD Color display and the right type of sensors, are capable of doing. Mini Arduino Portable EEG - Brain Wave Monitor + Build a 60 Watt Solar Panel. Repairing Solar Cells. Making a 1 Watt Solar Array. Usb to Serial/TTL adapter. Bootloading ATmega328 with Arduino Mega2560. I2C LCD Controller (the easy way) Since the seller doesn't provide any info I neede to find the address for the module so I ran an I2C scanner / /Written by Nick Gammon // Date: 20th April 2011 #include <Wire.h> void setup() { Serial.begin (115200); Environmental Monitoring with BeagleBone or RaspberryPI and Ardunio. Scanner and Photocopier Light.
Salvaging Liquid Crystal Displays (LCDs) Salvaging Liquid Crystal Displays (LCDs) Photo Components & Testing. Make your first Serious Amplifier. Inexpensive AC Power Adapter for My Digital Camera. This is my Kodak z710 (7.1 MP) camera. Most of its duties involve taking photos for my Instructables, and I do not really need the mobility provided by battery power for that purpose, at least not most of the time. The batteries are expensive and I would like to lessen my dependence on them. Web Based Water Metering with ioBridge. After the real-time power meter project I did back in January, the next logical step seemed to be an ioBridge based water meter. Real-time Web Based Household Power Usage Monitor. There are a few ways to measure electrical power.
The way I chose might not be the most accurate but it achieves two of the main criteria for this project. EVERYONE Needs a Multi-Meter. Arduino ultrasonic range finder, with lcd display! High efficiency regulated Joule thief. High efficiency regulated Joule thief. Building POF home user network. Powering and Controlling Your Devices; Part 1 - Determining Voltage and Current Requirements. Digital multimeter shield for Arduino. Parallel AVR programming board. Turn Your Arduino Into an ISP. Attiny25/45/85 PWM generator and Servo tester!