
Tips & Tricks FAQ. IMAGING FOSSILS USING REFLECTANCE TRANSFORMATION AND INTERACTIVE MANIPULATION OF VIRTUAL LIGHT SOURCES by Oyvind Hammer, Stefan Bengtson, Tom Malzbender, and Dan Gelb. Tips & Tricks FAQ. What kind of camera will I need? A digital SLR camera with interchangeable lenses is the ideal solution, but almost any camera will work if you can lock the aperture, lock the focus, and lock the white balance. Ultimately, you get what you pay for. Digital SLRs generally have more options for white balance, mirror lockup, etc… the more choices, the better!
If you want a camera with the most convenient HDR shooting setup, choose a camera that has an auto-bracketing (AEB) option. Click here for a good list of cameras that have auto-bracketing (3 shots are common, but 5 or 7 is better) It also depends on how many HDRs you will be shooting and for what purpose? Back to top 4 Rules of shooting HDRs Lock f-stop (aperture – which controls your depth of field) Lock focus Lock white balance Turn off any in camera "automatic" image enhancing (i.e.: auto-contrast or auto-saturation, including sharpening) You will be bracketing the exposure time for your various exposures.
Mercedes-Benz Cyprus - Fascination - 360° views. Pixomondo: VFX for Star Trek Into Darkness using 3dsMax. PMVS2. Introduction New!

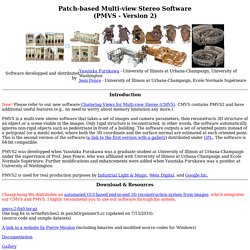
Please refer to our new software Clustering Views for Multi-view Stereo (CMVS). CMVS contains PMVS2 and have additional useful features (e.g., no need to worry about memory limitation any more.) PMVS is a multi-view stereo software that takes a set of images and camera parameters, then reconstructs 3D structure of an object or a scene visible in the images. Only rigid structure is reconstructed, in other words, the software automatically ignores non-rigid objects such as pedestrians in front of a building. PMVS2 was developped when Yasutaka Furukawa was a graduate student at University of Illinois at Urbana-Champaign under the supervision of Prof. PMVS2 is used for real production purposes by Industrial Light & Magic, Weta Digital, and Google Inc. Download & Resources. Materials - Hair Farm™ - The Ultimate Hair Plug-in for 3ds Max.
“ Hair Farm's material and shader toolset is far better than any other hair solution on the market.

3DY RnD. Author : Edy Susanto Feathers is always an interesting topic to discuss.

This article covers more on the rigid deformation that is handled inside the feather system that I built. I hope that it can give a better idea to everyone about how the system works.The system actually requires simple only math knowledge on vectors and quaternion for calculation. VizWorld.com - Visualization, Computer Graphics, and Animation.
Tutos. Boites. Blur Studio on the state of the CG Industry. By Dave Baker, Neil Blevins, Pablo Hadis and Scott Kirvan Introduction.

Breakdowns. 3D scan. Kinect Physics Tutorial for Processing. Price compare 3D printers. Andrew McWilliams. Posted Thursday, 6 March 2014 My co-founder Kent Rahman and I kicked off the Hardware Hack Lab about six months ago now - and the energy just keeps building and building.

Those of us running the lab take our inspiration not from technology but from people and interactions. We believe that innovations gain most of their richness and momentum from the cultural context of their creation. Therefore, our goal is to convene a regular meeting space of openness, breadth, and inquiry - and good times. In this post I want to outline a few of the key insights that have really made the weekly lab come of age. Hardware, yes - but ultimately people in a spaceWe are lucky enough to have ThoughtWorks sponsor us with the use of the amazing Gallery space in NYC every Wednesday. But what to do with that space? This is a city, like many, in which conversation takes place every day about the recent-and-adjacent possible.
We ask ourselves: How to make 3d scan with pictures and the PPT GUI. More than ever before 3D models have become a "physical" part of our life, how we can see in the internet with 3D services of printing.

After download and unzip you have to edit the ppt_gui_start file putting the right path of the program (in orange). Now, if you are in Linux is only run the script edited: $ . /ppt_gui_start Once the program is opened, click on “Check Camera Database”. With the Terminal/Prompt by side, click in “Select Photos Path”. Choose the path and then click on “Open”. Click in “Run” and wait a little. This Crazy Software Extracts 3D Objects from Photos with a Few Clicks. If you were wanting to have your mind blown today, the video above might do it.

It’s a demonstration of a piece of 3D object extraction and manipulation software that made its debut at SIGGRAPH 2013, and it may just offer a glimpse into the future of photo manipulation. The software was developed by Tao Chen, Zhe Zhu, Ariel Shamir, Shi-Min Hu and Daniel Cohen-Or, and even in its infancy it’s capable of some pretty amazing feats. Throughout the demonstration, 3D objects are quickly and easily extracted from regular old 2D photos using a “3-sweep” method: two strokes to define the profile of the object, and one along the main axis. Depending on the complexity of the shape, sometimes parts have to be outlined individually, but the result it always the same: the software pulls an editable, movable 3D model straight out of a 2D photo. Bundler - Structure from Motion (SfM) for Unordered Image Collections.
3d retopo. 3d render.