
Disable rightclick menu? Some one said the click time may effect things like selecting polygroups.
ZBrush modeling tutorial: Creating a rendered turntable video. Default Hotkeys file. As with other ZBrush configuration files, the StartupHotkeys.txt file is stored in a Public folder on your computer.
It is a standard text file and can be edited in a text editor such as Notepad if necessary. The factory settings are shown below, with the addition of the [ and ] hotkeys for brush size. StartupHotkeys.txt file – Windows. [UDK] WIP Destroyed House-small env.(big pics) - Page 2 — polycount. Thanks Lycan!!
![[UDK] WIP Destroyed House-small env.(big pics) - Page 2 — polycount](http://cdn.pearltrees.com/s/pic/th/destroyed-house-polycount-135351091)
Hi everybody. I was asked for a tuto/breakdown about the making of the plaster. It's quick and dirty, I'll do a better and more in depth tuto later, but I will explain how I made both versions : This one And this one I'll explain the zbrush part, and the diffuse compositing later. WEBINAR RECAP: Array Mesh (Recap in Post 1)
HelloHere is a step-by-step of the dragon piece that I completed for the most recent ZBrush Webinar - Don't Just Build It, ArrayMesh It.
This is a render with two lights and BasicMaterial2 selected.Click here to view the original image of 2000x3333px. This is the final Tattoo render using BPR in ZBrush.Click here to view the original image of 1000x1666px. Here is a little breakdown of how I made the scale.Click here to view the original image of 1735x1222px. Click here to view the original image of 1735x1222px. Click here to view the original image of 1735x1222px. More steps in the next post. Wellington Weishaupt. Hello guys,I would like to share my most recent personal artwork, I decided to keep 100% of the process inside of Zbrush, to learn ways to solving some problems that could appear during the process, and to improve my workflow speed.
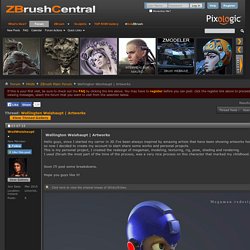
I've learnt a lot during the process, and I'm felling more fanatic about this amazing software. The model is based on the concept art from the awesome artist RiiickI used Zbrush to do modeling, texturing and BPR rendering, with composition in photoshop. I'm preparing some breakdowns and soon I'll be post it.Hope you enjoy! Click here to view the original image of 2644x2259px. ZBrush Double Action Brushes - ZBrush Guides. Ten24 Sample Scan – Ten24. #AskZBrush: Updated December 15, see post #20. Click here to view the original image of 1080x720px.
Pixologic is pleased to bring you the #AskZBrush system -- an exciting new way to get answers to your feature questions.Using Twitter, simply ask the question through the hashtag #AskZBrush. Our experts @Pixologic will review the question and where practical follow up with a short video containing the answer. The #AskZBrush system is set up to provide answers to questions that would generate 3-10 minute videos. Marvelous Designer 5 to ZBrush Workflow Tutorial - CG Elves. In this short Marvelous Designer 5 to ZBrush workflow tutorial we’ll show you how to best export Marvelous Designer clothing for use in ZBrush.
The first thing you need to do before exporting your Marvelous Designer clothes, is to convert the tri mesh into a quad mesh. Here below you can see the difference between the same dress, once exported from Marvelous Designer as a tri mesh and once as a quad mesh. Both dresses were subdivided in ZBrush 4 times. As you can see, the quad mesh is much smoother. Here’s how to convert your Marvelous Designer clothes from tris into quads: Select all your pattern pieces by doing ctrl A. Next, to export the 3D clothing from Marvelous Designer, go to the ‘File’ Menu and click ‘Export – OBJ’. If you want to export your Marvelous garment with the avatar, then select the avatar, otherwise leave it unchecked. For using the Marvelous Designer clothes in ZBrush, the most important thing is to select ‘Weld’.
DE HairTubes Brush. Toad traditional clay sculpture in cg. ArtforGames-MemoryFolds_High.jpg (JPEG Image, 1600 × 5618 pixels) - Scaled (17%) BRUTE ZBRUSH SCULPTED TUTORIAL - 3D Show. Zbrush 4R4 - undo crtl + Z hotkey don't work. Mega Weapon Tutorial: Basic Sculpting and Setup. NanoTile Textures! unofficial - Information, Installation. NanoTile Textures!
Unofficial - Information, InstallationNanoTile Textures! (Ver 1.2 Updated 3/21/2015) by: Joseph DrustNanoTile Textures is a plugin that allows for the creation of tiling textures using NanoMeshes inside of ZBrush.This plugin is unofficial.Main featuresAllows the creation of seamless tiling textures using NanoMesh indexesRespects polypainted and textured NanoMeshesCan create ZBrush rendered: BPR, Preview, Albedo, AO, Normal, Bump, Polygroup ID, and Height Maps Will generate 256, 512, 1024, 2048, and 4096 resolution texturesUsageClick here to view the original image of 1024x768px. Click here to view the original image of 1024x768px. Click here to view the original image of 1024x768px. Horn-Workflow.jpg. Intro to Destruction Sculpting. Dragon Elf - Part 01 (time lapse) Zbrush Archives - Page 3 of 4 - ITS ART. Orc_breakdown_mask.jpg (JPEG Image, 2304 × 2014 pixels) - Scaled (44%) Ryan Kingslien on Gumroad. Zbrush Clay Alphas. Pirate timelapse. RECAP: 3D Printer World Expo Update #9.
Over the final weekend of January, Pixologic attended the 3D Printer World Expo in Burbank, CA with two days of industry specific presentations and a fistful of live demos including a clay slinging showdown between top ZBrush artists!

Adding to the action happening at the booth itself, the Pixologic Team was proud to present industry seminars with the likes of Legacy Effects and Neville Page (whom you can also currently see each Tuesday night on SyFy's "Face Off").Part of the action was an event where 8 leading artists from studios like Blizzard Entertainment, Sony Santa Monica, Insomniac Games, The Aaron Sims Company and many more squared off in head-to-head sculpting action to create their own "Aliens From Beyond". Their creations were printed in 3D and then shown on Facebook for community voting, with Raphael Grassetti coming away as the victor.Our cameras were rolling throughout the show and today we are pleased to bring that to you in the form of photos and recap videos. Zremesher re-topology with no spirals!
Process 02. Lasso toggle. Cloth Fold Sculpting in ZBrush. NicksTools Zbrush Plugin. Some works - Gilberto Magno. Custom sized/named UI buttons. Blur mask plugin. "Middle Button" Plug-in for ZBrush 4R6. DragMaster Plugin. zAdjustor 2.0 plugin. Salut à vous zBrusheurs avertis !!!
J'avais déjà posté le SizeAjustor il y a quelques temps mais pour cause de "franglais" inacceptable dans l'esprit anglo-saxon il a du être renommé, il s'appelle donc maintenant zAdjustor, il a beaucoup muri et est maintenant tout à fait comme voulu, parfaitement rapide et fluide. Ah oui, et nouveauté le curseur reste sur place !!! En plus il est ultra léger et ne sollicite aucune resource. Donc pour eux qui ne connaissent pas le principe : Quand dans photoshop tu appuies ALT+Bouton_Droit_Souris, tu bouges ton curseur et ça change la taille de ta brush avec une indication visuelle. Dans maya pareil en appuyant sur B, etc... Donc avec zAdjustor, tu peux ajuster de la manière décrite ci-dessus avec une hotkey que tu enfonce et en bougeant ta souris, au choix, ta BrushSize, FocalShift, Z Intensity, RGB Intensity. PS : Si t'as rien compris à ce que je viens de dire, t'as qu'à tester tu verras c'est cool et au pire t'auras perdu 5 minutes.
[Solved] Scale all Subtools Zbrush at Once! It is best practice to properly set scale value for your model to match real world scale value before getting deeper in to modeling or sculpting process. If the scale of a model is not properly set prior to modeling process, then there’s a big chance to face frequent hurdles in middle of your creative work process. Let’s assume, you’re facing similar scaling problem, which needs to rectified. ZBrush UGM with Josh Singh at Riot Games. Mummy Wraps/Bandages Technique with SliceCurve & Panel Loops. Jeremy Klein. Record_2014_08_10_12_56_00_941.mp4. HandDoodle2. BPR Batch Zbrush Script. Frank Tzeng on Gumroad. Useful small ZScripts and Macros for ZBrush 4 & 4R3. DynaMesh Master! unofficial - Information, Installation. DynaMesh Master! Unofficial - Information, InstallationDynaMesh Master! (Ver 1.1 Updated 4/1/2013) by: Joseph Drust and Nick MillerDynaMesh Master is a plugin that allows the user to set a Desired Polycount and generate a DynaMeshed mesh.
This plugin is unofficial. Main features Will automatically bake layers and clear masks before DynaMeshingWill automatically scale the mesh to the correct size to reach the Polycount*Options for Scaling up or Scaling down subtools for increased workflows * DynaMesh resolution is based on the bounding box of the subtool. If you have a small objects that would create a large bounding box the desired resolution may be off.Usage.
DynaMesh Master! unofficial - Information, Installation. DynaMesh Master! Useful small ZScripts and Macros for ZBrush 4R6 - Page 4. Video tutorial - wood carving panel (Maya/Zbrush) Beetle Lord Zbrush Sculpting Time-Lapse. Sculpting Pants in Zbrush. 1 hr Paul Richards sculpt. Clean extrusion in Zbrush by elemmanuel. Mech helmet 100% ZBrush sculpt (plus game res real time renders!) This is the progression; I started with a base mesh female that I had previously made, then did a quick concept sculpt using a combination of dynamesh and clay / clay buildup / smooth trim border / standard / move / zspheres / trim dynamic and hpolish brushes: This is about where I left off in the loose concept sculpting phase (the body anyway), then I went through and refined each piece.
I usually have three refinement phases, starting with the quick loose concept sculpt (hpolish, pinch, trim dynamic to refine shapes), then breaking pieces apart that make sense (mask, hidept, split, re-dynamesh, then refine each piece quickly. Last, I'll rebuild those pieces using the topology brush / zspheres / zremesh, then hide / crease borders, subdivide, uncrease / subdivide to get a nice bevel. 3d Tutorials/Sculpts sur Pinterest. Speed sculpt. Postapocalyptic Character - Marcus - Page 5. Holdeen's Max - Workflow. 07b12cbd74e66438ecc2a9e6c4e5427f.jpg (JPEG Image, 554 × 29100 pixels)
Sakaki's sketchBook & video (+ breakdown Pg 2) I have printed 148 parts by Projet HD3500. We clean up three people, including me. I was in charge of the parts from the neck down. Expert gave painting. Andrea Orioli. Create Edge Maps in ZBrush - Zbrush. ZBrush tutorial: Monster-size sculpting tips from the BBC's Planet Dinosaur. Creating dinosaurs for a TV series can be a tricky process. In my experience, deadlines are tight and most of the time you only have one shot at getting the creatures right. But with some basic planning and forethought, you can focus on creating the creatures - knowing that they will fulfil all the necessary requirements - and facilitating any changes that may be required.
Monsterous 3D modelling At Jellyfish Pictures, while working on Planet Dinosaur, it was decided that the theropods (I sculpted 27 of them) should have scaly skin, which can be time-consuming. So I planned a quick and simple character pipeline that would ensure consistent style across all the characters and enable artists to follow the same style. This is an overview of the settings, brushes and steps we used to create the dinosaurs. My Character Art video tutorial series now online! 3D Character Art for Games - Vol. 1 - 720P. Projecting Zbrush Matcaps back onto a model as Polypaint - timelapse 4x. ZBRUSH tutorial by *soulty666 on deviantART. [Unity] rock pack WIP.