
Illustrator full spectrum spirograph. Prepare color palette First you'll need to do some preparation work.
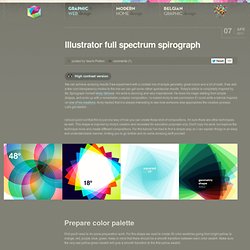
For this shape we need to create 36 color swatches going from bright yellow, to orange, red, purple, blue, green. Keep in mind that there should be a smooth transition between each color swatch. Make sure the very last yellow-green swatch will give a smooth transition to the first yellow swatch. Create the shape to duplicate Draw a circle using the Ellipse tool, holding down the Shift key. Select the circle at the center left point, hold down the Shift + Alt/Option key and drag/duplicate the circle. Select both circles, go to the Pathfinder palette and click the Intersect option.
Adjust transparency value and mode Go to the Transparency palette and adjust the value of 100 to 25. Inspired Movie Poster in Photoshop. Some common posters I keep seeing on Flickr are reinventions of movie posters, like the ones by Ibraheem Youssef, based on movies such as Scarface and The Big Lebowski.
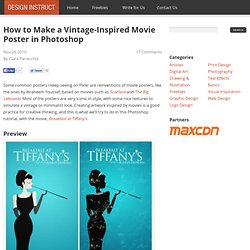
Most of the posters are very iconic in style, with some nice textures to simulate a vintage or minimalist look. Creating artwork inspired by movies is a good practice for creative thinking, and this is what we’ll try to do in this Photoshop tutorial, with the movie, Breakfast at Tiffany’s. Preview Tutorial Resources Textures: Elemental Grunge Texture Pack by Jerry Jones (ShadowHouse Creations) Step 1: Document Setup We will be using Photoshop for this tutorial, so go ahead and fire it up. Step 2: Creating the Silhouette. Adobe Illustrator. May 06 2011 Today we’re going to show you a detailed step-by-step guide on how to create a glamorous portrait using a stock reference.
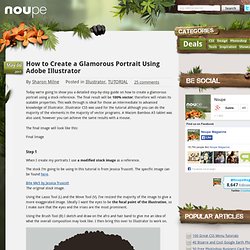
The final result will be 100% vector; therefore will retain its scalable properties. This walk through is ideal for those an intermediate to advanced knowledge of Illustrator. Brown Vintage PSD. Frosted Glass Elements in Photoshop. In addition to my teaching, I occasionally like to post tutorials outlining fairly quick, easy-to-navigate timesavers that other designers may find useful in a current or forthcoming project.
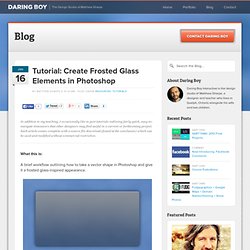
Each article comes complete with a source file download (found at the conclusion) which can be used and modified without commercial restriction. What this is: A brief workflow outlining how to take a vector shape in Photoshop and give it a frosted glass-inspired appearance. Why it’s useful: When done correctly, a glass-like element can be an effective, subtle solution to framing content for your audience.How it works: (Note: The pixel-based values referenced below are used relative to the size of the button I’ve created, so you may have to adjust if the shape you create is larger or smaller.) 1. 2. 3. 4. 5. 6. 7. 8. 9. 10.
Zombie Type in Illustrator. Nowadays it seems that the good video-games era is coming back.
Super fancy and graphic elaborated games dominated the early 2000's , but the simplicity and replayability of games as Plants Vs. Zombies will always be more fun than cinematics and complex plots. Anyway, let's skip to the tutorial that it's about this last game. Well, let's not enter on a discussion about what are the best good games nowadays, because we have a tutorial to do. I would classify this one as a intermediary tutorial, but even If you're experienced in Illustrator, you might find some good insights and ideas on it, have fun. Step 1 So, let's first open Adobe Illustrator and create a 70 x 15 cm canvas (command + N / ctrl + N). Money Style Illustration in Photoshop. Last Saturday I went to the movies to watch Wall Street Money Never Sleeps.
It was a nice movie, even though I was expecting something much better in terms of story and special effects, there were some cheesy ones, however in the end during the credits the design they created a really nice animation with money illustration, I don't know the name of the effect in english, but I loved it, so I came back and decided to try to do that in Photoshop. So in this tutorial I will show you a nice technique to create a simple money style illustration using a regular photo, it's not as perfect as the money illustrations we see in the dollar bill for example, but it's a quick tip.
There might be different ways so if you know another one share with us, this was the one I came up with and it's very easy. Step 1 Open Photoshop and use a photo that you have or want to apply the effect, in this case I will use of myself, the one I use on Twitter. Step 2 Go to Image>Adjustmenst>Desaturate. Step 3 Step 4. Billboard in Adobe Illustrator. Final Image Preview In this vector tutorial we will learn how to create an advertising billboard using 3D modeling and a few simple techniques such as shape building using the Pathfinder palette, defining the vanishing point by using the guides, filling an object with gradients and using the Blend Tool.
You can download the source vector file for this tutorial Tutorial Details Program: Adobe IllustratorCS-CS5; Difficulty: Beginner; Estimated Completion Time: 45 minutes; Step 1 Take the Rounded Rectangle Tool and create billboard advertising space. Lexus. Intro to Photoshop Layer Styles.