Zoom
Trash

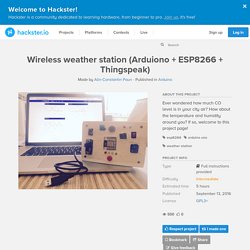
IoT Weather Station with Adafruit Huzzah. Hello, everyone!
Some time ago I saw this Weather Station by Aleator777 and I got inspired to make my own weather station. I saw that the Intel Edison is too expensive in my country, so I decided to find something cheaper, and I found that the Adafruit HUZZAH is a lot cheaper. So I ordered one. Arduino Basics: ESP8266 for Home Automation. The ESP8266 is a useful little board that comes super cheap (about $2.50 if you buy a few on eBay) and can be programmed via Arduino, Lua, and a number of other options.
It comes in a number of different packages, which break out different pins so that you can sense and control things – we'll be working with the popular ESP8266-01 module. It can serve a web page on your WiFi network, or act as an access point, creating its own custom network. ESP8266 Simple Weather Station. Introduction Wemos D1 is an ESP8266 development board with an onboard ESP8266-12E module and a USB to Serial converter chip.
It is an inexpensive way to build connected things and is Arduino compatible. In this project, we're going to build a simple Weather station monitoring Temperature and Humidity using a DHT11 sensor (you can also use DHT22 for the same). Remote Wi-FI DHT11 Temperature & Humidity LCD Display. Picture 1 ESP8266 modules are great low cost stand alone controllers with built in Wi-Fi, and I already made a simple Blink Tutorial with ESP8266 NodeMCU module.
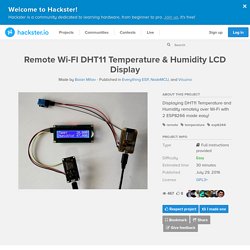
The advantage of the ESP8266 over Arduino and other controllers is the built in Wi-Fi. In this Tutorial I will show you how with the help of Visuino you can use two ESP8266 modules to make a remote LCD Display for Temperature and Humidity DHT11 sensor. In the Tutorial , I will use 2 NodeMCU modules. One version 0.9, and the other 1.0. Step 1: Components 2X NodeMCU ESP8266 boards (I used both NodeMCU 0.9, and NodeMCU 1.0 versions, but any other combination, or even stand alone ESP-12 will work) One DHT11 Sensor module I got from this cheap 37 sensors setOne I2C 16x2 LCD Display (Back side of the LCD with the I2C adapter showed on Picture 2) 7X Female-Female jumper wires.
Hackster. Intro: This project started off as a final assessment homework for an university course I've followed this year, but proved out to be a really fun and practical way of learning new and interesting things about wireless communication and microcontrollers in general.
The main idea: Hackster. Autonomous Weather Station With ESP8266. Today we're going to make a tiny weather station with our ESP8266 NodeMCU which will report temperature, humidity and dew point to the global community, wunderground with this station we'll get a better weather forecast of the city where we live, something that makes this tiny weather station, especial is that it works only by SOLAR ENERGY which is provided by a solar panel and by the night with a Lipo battery due to the backpack and it works all the night long without any electrical connection, if the battery level goes on a critical state of voltage the ESP8266 will notify you by IFTTT by Mail Smartphone or twitter.
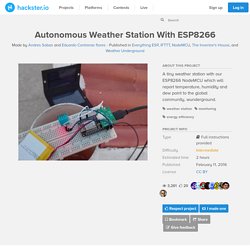
Once explained it's features, lets get started. By the low battery alert in our station we're going to use the IFTTT API which allows by the maker channel to make a notification on our smartphone with many services like Gmail, Facebook and more. We'll need to have installed the IFTTT app in our smartphone. English version by Wero. Hackster. Intro: Make a Personal Weather Station Sitting in your room you start sweating or feel chill; you wonder how much would be the temperature in your room?

Or what would be the humidity? This happened with me some time back. This lead to inception of Personal Weather Station, that monitors temperature, humidity, pressure and light intensity of your room and uploads it to a private channel on thingspeak.com. Personal Weather Station (Arduino+ ESP8266 + Thingspeak) Alexa Assistant Prototype. ESP8266 temp Humidity monitoring web app using Arduino IDE. 1 / 3 • ESP8266 weather monitoring Last week i received a ESP8266(adafruit). the new ESP8266 has arduino boot-loader so it makes possible to program arduino code directly into the ESP8266. this ESP8266 comes with UART,I2C and GPIO. with this new wifi module you dont need any arduino board you can do everything directly with it. this module doesnt have any usb port on it so there are two ways to solve this. either you can buy a usb to serial cable or you can make your own adapter with a USB to serial converter and you can plug this ESP8266 directly into it.
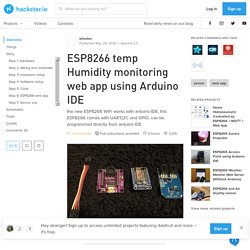
ESP8266 programmer smiler to mine can be found over here. Step 1: Hardware 1 / 3 • ESP8266 temp humidity. Garage Door Opener. I created this project for a couple of reasons; one, I got tired of trying to get the built in garage door openers in my vehicles to work with both of my garage doors.

Second, was that nagging question "Did I close the garage door? ". Now I can get that question answered with a couple of taps on my smart phone. Also, the device will send me an openHAB notification to my smart phone if the garage door is left in the "AJAR" or "OPEN" position for longer than 15 minutes.
The project consists of a HUZZAH, relay, power supply, resistors and LEDS. The HUZZAH connects to your local WIFI and runs a small web server that responds to simple http GET/POST requests that will be sent to it via openHAB. In this writeup I will cover building and installing the garage door opener project. Steps: Download and install the Arduino IDE 1.6.5. Setup Arduino IDE to support the Adafruit HUZZAH. Download the "GarageDoor 8266 Controller Code" and save it as "GarageDoor.ino" and open it in the Arduino IDE. WiFi IR Blaster. Two Steps Forward...
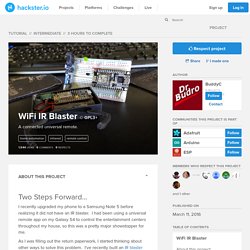
I recently upgraded my phone to a Samsung Note 5 before realizing it did not have an IR blaster. I had been using a universal remote app on my Galaxy S4 to control the entertainment centers throughout my house, so this was a pretty major showstopper for me. As I was filling out the return paperwork, I started thinking about other ways to solve this problem. I've recently built an IR blaster that controls stand alone air conditioners in my house. Temp sensor connected to ESP8266 and upload data using MQTT. Autonomous Weather Station With ESP8266.
InfraRed Receiver. Ever wanted to be able to control your Arduino project with an InfraRed remote control? I'll show you how to build a very simple IR-receiver. Step 1: Gather Materials 1. ESP8266 weather monitor. Arduino - LED Cube 3x3x3. Rui Santos. ESP8266 Web Server (Without Arduino) Tame the beast: Ultra-Low Power #ESP8266 Thing. Inspired by the lander #Philae on comet 67P we started a while back working on low-power projects assuming that we do have only solar power to recharge batteries and might need to sleep during a period of time to wake up on a given event. Update: the project has now proven to run solely of solar power for 3 days/nights, that might sound not that much, but bear in mind we are running an power hungry wifi module just from a 200mAh LiPo and harvesting solar power from a tiny 0.5W solar panel ... as a comparison the used LiPo would ran out of power without any tricks in a single hour. Read about the tricks used: The ESP8266 Thing from SparkFun is a nice board - but first we want to get it ready for NodeMCU so we can code it in LUA language without the need of an Arduino(TM) IDE.
Further more we use LUA to control the sleep mode (switching off not used components) and wake up for work - isn't it like real life ;-) With that we can run the ESP8266 Thing and equivalent ESP8226 (e.g. Step 1. ESP8266 Access Point using Arduino IDE. I was browsing through eBay the other week and saw an old HTC 8525 smartphone. For some reason, when I read it had WiFi, the $10 cost seemed reasonable as I contemplated using it as a remote control for a ESP8266 project. I can now report the success of this brain-spark after wrestling with some Arduino code for a few hours.
Sincere thanks to Sparkfun for posting a working '8266 sketch for setting-up the access point mode. MotionSense. Introduction In this tutorial, I will discuss how to create a system that notify any unauthorized activity or intrusion. I had used Arduino and PIR for activity detection and ESP8266 for WiFi connectivity. My Xperia Z1 is used for getting notification. ESP8266 and Air Quality sensor. While exploring the world of connected things (a.k.a. #IoT) the ESP8266 popped up as an new platform for measuring and sensing data - making Things becoming more relevant.
IFTTT Smart Button. IoT arduino ESP Garage Door opener (UD) Remember this is still under development and It will be another couple of months before I take out all the small bugs, But feel free to modify this code for your situation. If done correctly You should get this output If you look to the right you can see I have two AC-DC converters It's because I was low on parts and the arduino takes 5v and ESP 3v (my 3v voltage regulator burned out on a last project) Before we Begin You'll need this library for arduino IDE before we can begin Also you'll need to know how to modify the code so you can adjust to your garage door Parts needed: 10uf capacitor0.1uf capacitor1k resistor2.2k resistor3.3v regulatorWiringA boxArduino nano (or any other)ESP8266RGB LEDA relayA breadboard or protoboard Wiring.
Wifi Smart button. Tame the beast: Ultra-Low Power #ESP8266 Thing. Tame the beast: Ultra-Low Power #ESP8266 Thing.