
44 Grunge Photoshop Tutorials. What’s up today?
We’ve actually compiled a whole array of creative grunge tutorials so you can infuse staggering grungy styles into your artworks using Photoshop. Lately the grunge effect is known to be an enormously popular trend in web design, and basically it doesn’t seem to be going anywhere any time soon. So if you want to really wild on your grunge designs, you may now explore different techniques in Photoshop that can give your artwork some textured, aged and uneven looks with rusting metal signs, dirty spots, grunge patterns, scorched borders, or overall distressed accents. By the way, some time ago our good friends from Templates.com blog have published a post with as many as 900 Free Grunge Photoshop Brushes, so if you’re really into the grunge design style you should definitely take a look at these. Now jump into the mix to get mod unkempt appearances!
Head blow off effect. Quick Tip: Remove a Person From a Photo With Photoshop CS5’s Content Aware Feature. With the launch of the new Adobe Suite of programs comes the long awaited Adobe Photoshop CS5. Packed with new features to speed up your workflow it truly is the most advanced edition of Photoshop to date. One of the new features we will be looking at today is called Content Aware. This feature allows you to quickly fill in a selection with surrounding content making it look like a part of the original image. The Power of Photoshop’s Refine Edge Tool.
One of the most difficult and frustrating tasks in Photoshop is making a clean and decent selection on photos that involve super fine hair, fur, leaves, and any fiber like elements.
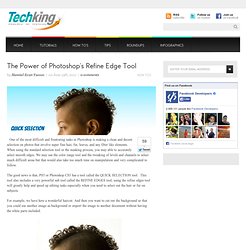
When using the standard selection tool or the masking process, you may able to accurately select smooth edges. We may use the color range tool and the tweaking of levels and channels to select much difficult areas but that would also take too much time on manipulation and very complicated to follow. The good news is that, PS5 or Photoshop CS5 has a tool called the QUICK SELECTION tool. This tool also includes a very powerful sub tool called the REFINE EDGES tool, using the refine edges tool will greatly help and speed up editing tasks especially when you need to select out the hair or fur on subjects.
For example, we have here a wonderful haircut. Normally we would start at the marquee tool. Now when you have selected the necessary parts, find the Refine Edges option found at the right top area. 26 Professional Photoshop Retouching Tutorials. Adobe Photoshop is the go-to tool for digital artists when it comes to professionally retouching images.
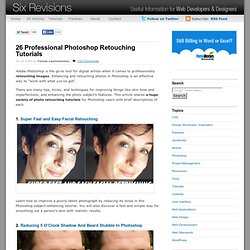
Enhancing and retouching photos in Photoshop is an effective way to "work with what you’ve got". There are many tips, tricks, and techniques for improving things like skin tone and imperfections, and enhancing the photo subject’s features. This article shares a huge variety of photo retouching tutorials for Photoshop users with brief descriptions of each. 1. 150+ Free and Time-Saving Photoshop Actions for Photo Retouching(Tutorial Included) Photoshop actions are really useful especially for amateur users.The main purpose of the actions is to make the photo editing and photo retouching very easily.If you are working with many photos everyday,you don’t have to edit each photo one by one.You play the action for the photo and in a few seconds,the recorded action applies the effects to the photo.

The below tutorial helps you understand the actions and create your custom Photoshop Action. Sample Tutorial Let me show you how simple is to create a Photoshop action.Step 1 Open a photo file and find the Actions Tab in the upper right.As you see,there are default Photosho actions in Default Actions Set.You can either insert your custom action into the Default Action Set or you can create your own set to put in it. Step 2 Click on the Create New Action icon.You can name your action and set a function key.It’s up to you.Click on the Record Button.From now on every action you make will be recorded to use for different photos. That’s all. How to Clean Up a Self-Portrait in Photoshop. Whether it’s for a high fashion magazine, an advertisement for a new product, a marketing promotion, or just for your new Facebook photo, we all end up retouching photos on occasion.

With a few Photoshop techniques, you can change a boring, flawed photo into something much more eye-catching and professional. Your subject may not be a model, but you can still create a pristine picture that you can be proud of. Today, we are going to cover some basic photo retouching techniques that enhance an image without making it appear unnatural. 25 Helpful Tutorials for Lighting Effects in Photoshop.
Photoshop allows designers with unlimited possibilities when it comes to creative effects, including lighting effects.
There are plenty of different ways to create lighting effects in Photoshop, and there are equally as many different possible uses for them. If you’re interested in learning more about how to create awesome lighting effects in your own work, here are 25 tutorials that can help. Looking for hosting? WPEngine offers secure managed WordPress hosting. You’ll get expert WordPress support, automatic backups, and caching for fast page loads. Create Interesting Abstract Backgrounds in Photoshop CS6 - DesignFestival. The Best New Features of Adobe Photoshop CS6 - DesignFestival. Photoshop CS6 has some great new features that designers are sure to love.

Upgrading from CS4 or CS5 is simple and straightforward, and the new tools are intuitive, practical, and extremely helpful for a wide variety of design purposes. Adobe put a lot of time and effort into their newest iteration of Photoshop. As a result, there are hundreds of improvements. Rather than trying to list every single one of them, here are a few of the most noteworthy additions in Photoshop CS6. Content Aware Move This is one of the most impressive additions to Photoshop CS6.
Once you have made your selection, make sure that the Content Aware Move Tool is selected, and simply move your selection wherever you want it. The New Blur Filters. Photoshop Retouching Tutorials. External Tip – 10 Advanced Photoshop Tutorials You Should See. Give Your Photos a Retro Comic Book Effect. 45 Photo Editing Tutorials for Photoshop.
This post was originally published a few years ago, and since that time many of the tutorials that were featured in the post are no longer online. So we’ve revamped the article with a fresh selection of tutorials, some old and some new, that should prove to be very helpful. Photoshop allows designers and photographers to improve photos in countless ways. Some photos are edited in a subtle way that the viewer may not even notice unless it is side-by-side with the original photo, and others are edited in more drastic ways. The good news is that there is a tutorial for just about anything you would want to do in Photoshop. How to create HDR Photos - HDR/Photomatix tutorial. There has been a lot of buzz recently about HDR photography, but many people assume that it's only limited to professional photographers.

The reality is that just about anyone can take and process an HDR photo with most cameras and proper HDR software. There are plenty of explanations of what HDR is and how it works, so we won't cover that here. If you want more background info, check out HDR explained so anyone can understand or Jon Meyer's popular HDR primer. Photoshop's Five Essential Layer Blend Modes For Photo Editing. When it comes to learning Photoshop, believe it or not, there's really only a handful of things you absolutely, positively need to know.

Sure, Photoshop is a massive program that only seems to get bigger and bigger with each new version. But do you really need the latest and greatest version of Photoshop with all its bells and whistles in order to complete most of your day-to-day photo editing tasks? Adobe would like you to think, "Yes, absolutely!! ", but chances are, more often than not, the answer is no. 22 Professional Photoshop Image Enhancing Tutorials. Adobe Photoshop is the premier tool for digital artists when it comes to professionally enhancing images. Whether you’re a beginner just learning the ropes or an advanced user looking for unique techniques to add to your Photoshop arsenal, you’ll find some tutorials here that you’ll surely want to bookmark.
In this article, you’ll discover plenty of tutorials that deal with enhancing images, adding unique and impressive effects, and recreating digital replications of popular traditional photography techniques. 1. Cross Processing You can learn how to apply the Cross Processing film-developing technique digitally to your images by reading through this quick and educational tutorial that leverages the powers of the Curves tool in Photoshop. 2. 20 Very Useful Photography Tips And Tricks. The summer is here so now is the perfect time to make a lot of photos.

If you want to look like a professional photographer, then you must enhance your pictures. Take a look at this article because here you will find 20 very cool tutorials which will help you transform an average photo into a work of art. How To Make Digital Photos Look Like Lomo Photography In this article, the author will teach you how to create lomo photos in a very easy way. 10 Creative Adobe Photoshop Tutorials. Post written by David Klhufek Freelance graphic, website designer, in the round for over more 10 years now..
If you fancy our work and are looking for graphic design, webdesign, logo or something special try to hire us right now!!! David has written 198 awesome articles for Phirebase.com Do you like this post? Get more with our Newsletter!!! We provide great tips, tricks, and strategies a few times a month. Photoshop. 30 Christmas Holiday PSD & AI Flyer Templates. 950+ Photoshop Tutorials To Keep Your Skillset Updated. I know how much everyone loves tutorials, I know I love writing them too. Photoshop Quick Tips #3 - Enhancing Photos with High Pass Filter.
Create Vintage and Grungy Digital Art Work in Photoshop. Follow this step by step design process for my recent digital art work, High Voltage. The design process involves photo manipulation, creating patterns, mixing images, textures and blend modes to to create a vintage and grunge theme. Learn how a range of Photoshop techniques pull together the various elements to create the final design. Open up your chosen image in Photoshop. Here I’ve picked out a nice Pylons near wheat field shot from DepositPhotos. Make small Levels adjustments to increase the contrast slightly. Adobe Photoshop CS4 Basics Video Lecture Course.