

MAGIC Decal Transfer Tutorial with Free Printables! Some of you may remember, a little while back I posted a tutorial for DIY waterslide decals.
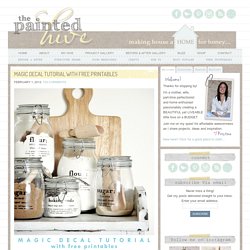
Among other things, I mentioned how awesome they are for creating custom embellishments without the need for any fancy-pants equipment. Yep, waterslide decal paper is a truly fab product, though as great as it is, there is one drawback – although it’s somewhat tough it’s not especially durable. So, whilst it’s perfect for ornamental purposes, it’s not ideal for more practical applications…until now that is!
Magic decal coating paper is a product designed to be used in conjunction with standard decal paper to make the finished transfers super durable – yes, even dishwasher resistant! If you’re already familiar with magic decal coating paper then please excuse my tardy excitement, though for everyone else who is just getting to the party now too, feel free to start throwing the streamers! 1 Image to transfer. Use anything you like. 2 Printer. EDDIE ROSS - No Wire Hangers! (Well, Maybe Just One)
Here's a Christmas wreath so darling and dear, even Miss Crawford would approve.
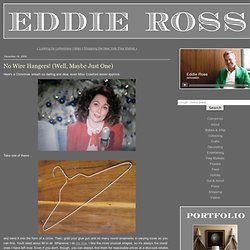
Take one of these... and bend it into the form of a circle. Then, grab your glue gun and as many round ornaments in varying sizes as you can find. You'll need about 80 in all. Whenever I do my tree, I like the more unusual shapes, so it's always the round ones I have left over. To secure the metal cap to the ball, dab a little hot glue and press. Next, untwist the end of the hanger, then string one ornament at a time, making sure to alternate the placement and colors as desired. Suitcase vanity & towel holder.
When I visit a friend’s home, it’s the little details filling the house that stand out and make me feel welcome.
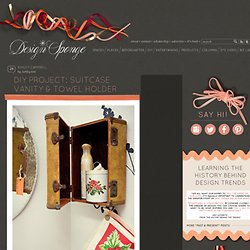
In my own home, I want to find ways to make my guests feel special. Baking cookies or having a favorite drink on hand is easy. What is not so easy is the tiny size of our guest bathroom. The small space makes it difficult to have extra little items on hand for guests. A Wordy Egg - Beyond Beyond. Over in Beyond Beyond towers we have one weakness, of the Achilles Heal variety and it is eggs.
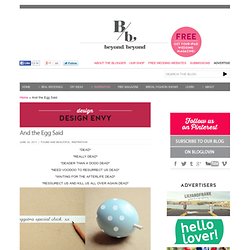
Scrambled, poached, sunny side up, boiled – whatever way you can imagine them we have had them in all the many fangled ways that you can imagine! What we have never had is an invitation in an egg and this exploded our minds not even blew them. So, if you want to fry people’s minds like eggs then you can learn how to make these eggtastic wonders here on Poppytalk. Droolsome, and after you make your message in an egg we like paprika and parma ham in our scrambled eggs. Little guiding stars. Since the new year has started I’ve been trying to think of ways to be more kind to my self.
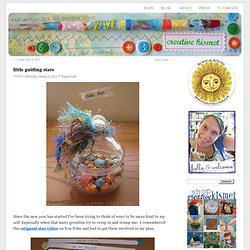
Especially when that nasty gremlins try to creep in and stump me. HOW TO: Create a Home Made Wax Seal (16 Pics. Heartbreaker Valentines. Who said valentines were only red and pink?

In bright colors, these Heart Breaker Valentines work great for boys and girls. So get out your scissors and stapler, because today, you’re tearing up my heart….. (cue N Sync) How to Make Clothing Buttons from Shrink Plastic… This tutorial is an old one of mine that’s too good not to share again.

Since posting the first time, I’ve had lots of questions about these buttons which will hopefully be answered in this revised post. Equipment Some handy notes: 1. The buttons. Single hole, hole punch (like this one here). 2. 3. Tutorial: Making a Stencil. UPDATE: If you are here at All Things Thrifty for the first time, WELCOME!!

Since I wrote this post about making a stencil I have found that making stencils are MUCH easier with my Silhouette Machine. So, if you would like to see an easy way to make a stencil with a Silhouette check out that post! UPDATE:Also, if you would like some FREE stencil designs, check out that post also! A few weeks ago, I came across this amazing image fromWhitewall and Co. I instantly fell in love with their stencils, but the prices were a little too high for my thrifty core. Step 1: Go to Office Max or Staples and get some clear folders like the ones in this picture below. Step 2: Cut the folders and tape them together. Toilet Paper Origami Book.
Silk-Dyed Eggs {aka TIE-Dyed!} I posted this tutorial a few years ago and it has become somewhat of a tradition to bring it back every year!
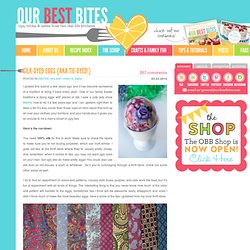
One of our family Easter traditions is dying eggs with pieces of silk. Your source of daily updated funny pictures and gifs. ORANGE RIND VOTIVES. Justina’s valentine’s day fort. There are so many different ways to express feelings of love on Valentine’s Day: some are sweet and sentimental, others are bold and celebratory.
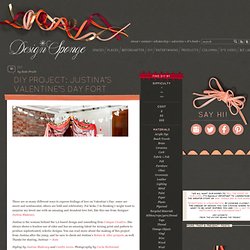
For kicks, I’m thinking I might want to surprise my loved one with an amazing and decadent love fort, like this one from designer Justina Blakeney. Justina is the woman behind the LA-based design and consulting firm Compai Creative. She always shows a fearless use of color and has an amazing talent for mixing print and pattern to produce sophisticated, eclectic designs. You can read more about the making of this project from Justina after the jump, and be sure to check out Justina’s Before & After projects, as well.
Thanks for sharing, Justina! Styling by Justina Blakeney and Caitlin Levin. CLICK HERE for the full how-to after the jump! In my family, building indoor forts was a weekly enterprise. Materials Instructions For the Fort: 1. 2. 3.