
Negative Photo Resist - ER-71. RSR Electronix Express. Photoresist Manufacturers.
Graph. Arduino LM35 Sensor. HomePage. Arduino Links - Santy's Wiki. Avr-libc: <math.h>: Mathematics. Detailed Description This header file declares basic mathematics constants and functions.

Notes: In order to access the functions declared herein, it is usually also required to additionally link against the library libm.a. See also the related FAQ entry.Math functions do not raise exceptions and do not change the errno variable. Therefore the majority of them are declared with const attribute, for better optimization by GCC. Define Documentation The natural logarithm of the 10. The natural logarithm of the 2.
Avr-libc: <math.h>: Mathematics. Detailed Description This header file declares basic mathematics constants and functions.
Notes: In order to access the functions declared herein, it is usually also required to additionally link against the library libm.a. See also the related FAQ entry.Math functions do not raise exceptions and do not change the errno variable. Therefore the majority of them are declared with const attribute, for better optimization by GCC.
Define Documentation.
Motor. Temperature. Arduino & Photography. The World Famous Index of Arduino & Freeduino Knowledge. Tutorials. Arduino. Arduino - Exemple d'application permettant de faire clignoter une Led toutes les secondes.
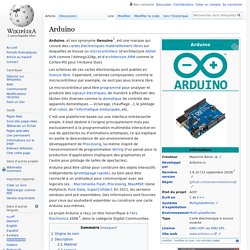
Arduino, et son synonyme Genuino[2], est une marque qui couvre des cartes électroniques matériellement libres sur lesquelles se trouve un microcontrôleur (d'architecture Atmel AVR comme l'Atmega328p, et d'architecture ARM comme le Cortex-M3 pour l'Arduino Due). Les schémas de ces cartes électroniques sont publiés en licence libre. Cependant, certaines composantes, comme le microcontrôleur par exemple, ne sont pas sous licence libre. Le microcontrôleur peut être programmé pour analyser et produire des signaux électriques, de manière à effectuer des tâches très diverses comme la domotique (le contrôle des appareils domestiques — éclairage, chauffage…), le pilotage d'un robot, de l'informatique embarquée, etc. C'est une plateforme basée sur une interface entrée/sortie simple. Le projet Arduino a reçu un titre honorifique à l'Ars Electronica 2006[3], dans la catégorie Digital Communities. BeginnersGuide. New to programming?
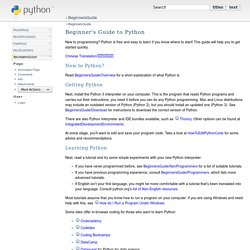
Python is free and easy to learn if you know where to start! This guide will help you to get started quickly. Transformativedesign / Arduino Tutorial 3: Analog sensors. <- back to Arduino Tutorial 2: Switches and LEDs on to Arduino Tutorial 4: Motors -> (adapted from Bjoern Hartmann's tutorial) This group of tutorials will help you work with the continuous input values provided by analog sensors - potentiometers, accelerometers, distance rangers, etc.

Dimmer: Fading an LED with a Potentiometer In this example we'll build a light dimmer: a knob connected to a light so that when you turn the knob, the light increases or decreases in brightness. Connect the middle pin of the potentiometer to analog input 0, the other two to +5V and ground.Through a 220Ohm resistor, connect an LED to pin 9(anode or long side to resistor, cathode to pin 9)
Processing.org. Processing Ghent. Using Processing to Send Values using the Serial Port to Arduino Lucky Larry. In this write-up, I’ll show how to create a value in Processing and then send this value over the serial port to the Arduino.
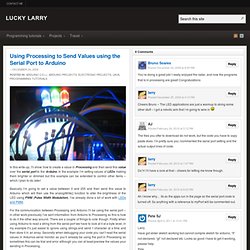
In the example I’m setting values of LEDs making them brighter or dimmed but this example can be extended to control other items – which I plan to do later! Basically I’m going to set a value between 0 and 255 and then send this value to Arduino which will then use the analogWrite() function to alter the brightness of the LED using PWM (Pulse Width Modulation). I’ve already done a bit of work with LEDs and PWM. For the communication between Processing and Arduino I’ll be using the serial port – in other work previously I’ve sent information from Arduino to Processing so this is how to do it the other way around.
There are a couple of things to note though. Processing Tutorial - Creating Motion - Arduino Education. Unit 01 - Welcome to Physical Computing - PhysComp 2010. Ball Balance Machine. Arduino meets processing - PUSHBUTTON. The Arduino meets Processing project intends to make it as easy as possible for anyone to explore the world of physical computing.

All you need is an Arduino board as well as the Arduino and Processing software, which you can download on their project websites. On this website we explain how to: set up electronic circuits with various kinds of sensors, control and measure the sensors with the Arduino board, send the data to the computer, and use the received values to generate computer graphics with Processing. For all examples you need some basic electronic equipment such as a breadboard, resistors, the sensors, and some wires. The following sensors are dealt with on this website: All examples contain a list of the parts as well as the Arduino and Processing files you need.
The Processing files have a DisplayItems class which paints a grid with values, a black or white background. Feel free to play around and have fun exploring the wonderful world of Arduino and Processing! Fritzing.
Datalogger.