

Craftaholics Anonymous. Learn how to turn old t-shirts into pom poms!
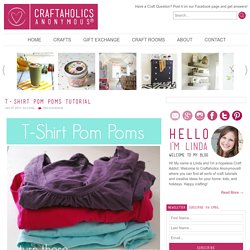
T-shirt Pom Poms are so much more durable than tissue paper ones. And I think they look loads better! Got an old tee or two {or 20!} 30 Days of Creativity: Days Twelve and Thirteen. Aluminum Can Ornaments. Thank you for visiting Little House in the Suburbs.
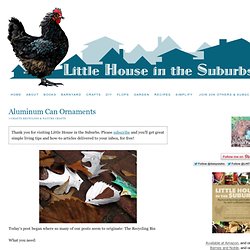
Please subscribe and you'll get great simple living tips and how-to articles delivered to your inbox, for free! Today’s post began where so many of our posts seem to originate: The Recycling Bin What you need: Empty aluminum beverage cans Scissors Sandpaper (sanding block is helpful but not necessary, or wrap sandpaper around a bit of wood) Pen or pencil Ribbon or cord for hanging 1. 2. 3. A Little Light Reading - CRAFTSTER CRAFT CHALLENGES. Make-up Magnet Board. We all know with craft blogs that original ideas are often hard to come by, we find ideas we love and make them our own but we didn't come up with the idea ourselves.
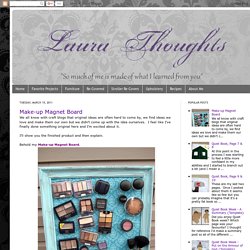
I feel like I've finally done something original here and I'm excited about it. I'll show you the finished product and then explain. Make grow gather - Posts - summercraft: simple decoration for paper lanterns. Surely last holiday season, you saw those mini gingerbread houses that perch on the edge of your mug of hot chocolate?
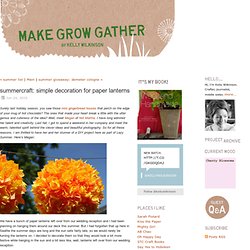
The ones that made your heart break a little with the utter genius and cuteness of the idea? Well, meet Megan of Not Martha. I have long admired her talent and creativity. Last fall, I got to spend a weekend in her company and meet the warm, talented spirit behind the clever ideas and beautiful photography. So for all these reasons, I am thrilled to have her and her stunner of a DIY project here as part of Lazy Summer. We have a bunch of paper lanterns left over from our wedding reception and I had been planning on hanging them around our deck this summer.
Here is a picture of one by night and by day next to a lantern that I used as the base. Bird Mobile. Crafty. 16 Headband Tutorials. As a busy mom of three little boys, I don’t always have time to do my hair.
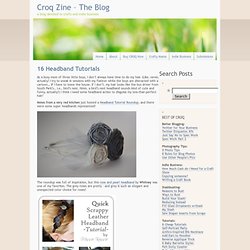
(Like, never, actually! I try to sneak in sessions with my flatiron while the boys are distracted with a cartoon… IF I have to leave the house. If I don’t, my hair looks like the bus driver from South Park’s… i.e., bird’s nest. Hmm, a bird’s nest headband sounds kind of cute and funny, actually!) Victorian Stencils. 1/15clover.jpg 2/15corner.jpg 3/15corner2.jpg 4/15cornerflower.jpg 5/15fern.jpg 6/15fleurdelis.jpg. Shrink plastic ring tutorial.
Thank you to everyone who requested a shrinkydinks ring tutorial!
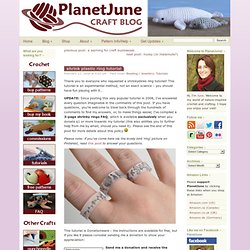
This tutorial is an experimental method, not an exact science – you should have fun playing with it… UPDATE: Since posting this very popular tutorial in 2008, I’ve answered every question imaginable in the comments of this post. If you have questions, you’re welcome to trawl back through the hundreds of comments to find my answers, or, to make things easier, I’ve compiled a 3-page shrinky rings FAQ, which is available exclusively when you donate $1 or more towards my tutorial (this also entitles you to further help from me by email, should you need it).
Please see the end of this post for more details about this policy Please note: if you’ve come here via the lovely bird ‘ring’ picture on Pinterest, read this post to answer your questions. How to make an elephant from towels. Bird and Text Collage Wall Art. [ Close Privacy Policy ] Privacy Policy / Your California Privacy Rights Revised and posted as of March 4, 2013.
Sorry. Thanks. Road Rage Reduction Project. DIY Pom Pom Project.. - this is how its done apparently - BILLIEWINTER's Black Wedding by Color Blog. Create a Chic Bud Vase Out of an Old Light Bulb. Tutorial: How to Make a Pomander Flower Ball.
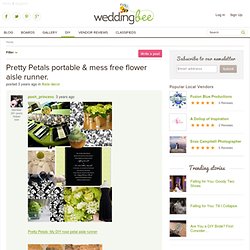
DIY Wedding - do it yourself wedding ideas and templates by Weddingbee. Pretty Petals portable & mess free flower aisle runner. Member 291 posts Helper bee Pretty Petals: My DIY rose petal aisle runner theweddingsource.com Having seen several photos of aisles completely covered in flower petals I swooned and fell in love.
DIY Thread LED Tealight Cover. I was messing around with different materials trying to dress up a little LED tealight, and this is one of the versions I ended up liking (plus it’s dirt cheap since it’s just thread!).
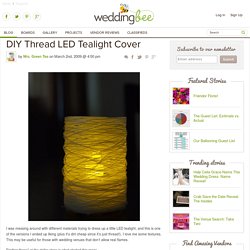
I love me some textures. This may be useful for those with wedding venues that don’t allow real flames. Finding these* at the dollar store is what started this mess… 1) Get your hands on some thin cardboard that you’ll be recycling anyway. How To: Make Your Own Round Art Gallery. Creative Kismet » Blog Archive » little guiding stars. Since the new year has started I’ve been trying to think of ways to be more kind to my self.
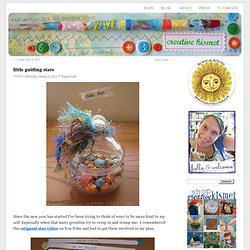
Especially when that nasty gremlins try to creep in and stump me. I remembered this origami star video on You Tube and had to get them involved in my plan. I thought it would be fun to make a whole bunch with kind words and “you are….” phrases inside. I made 60 of them, enough to last me the whole year if I open one a week, plus a few extra just in case. I used 12 x 12 inch scrapbook paper and cut 1/2 x 12″ strips, then followed the video HERE*. How To Make a String Tree Wall Mural Home Hacks. Build a Sausha’s Washer/Dryer Pedestals.
PDF version A washer/dryer pedestal made of wood to bring your front load laundry system to a back-friendly height. Special thanks to Sausha for her photos. Handmade from this plan >> Dimensions Dimensions: One of the best parts of DIY is that you can get exactly what you want, fit to your space. Things to Make and Do. Wizard Wand Craft Making: Pages packed full of wonderful, original and exciting craft projects, perfect for dads, mums and kids. One of the first shops that Harry Potter visited when Hagrid took him to Diagon Alley was Ollivanders, the wand shop to buy his most important possession, his wand.
Wands can be made from a variety of materials, after all Hagrid used an old umbrella as a wand! Yours will be made from paper. But do not be deceived it will be every bit as magical as the real wands used in the film, and if you make it carefully will look just as good. . . . Because glue is used on the paper to harden it, this wand is a made of a type of papier mache. You can paint your want in any colour you want, and the instructions show you how to make you wand look distressed (that is a technical term that furniture makers use to describe the process of artificially aging an item), and really ancient; fit for Harry Potter himself. . . .
404 Error - Page Not Found. Pumpkin Carving How-To: Making Owls - Introduction - MarthaStewart.com. Suzy's Artsy Craftsy Sitcom: Feature Friday- Faux Metal Wall Art. Looking for the Faux Metal Wall Art? Since this project was originally published on The Sitcom in December 2010, it has been my most popular project by far. Who knew that a bunch of toilet paper tubes and an idea would become so big? Halloween Painted Jar Luminaries. This isn’t the first time I’ve made luminaries for Halloween. Several years ago I made these painted Ghost Luminaries which are posted on FamilyCorner, these decoupaged Pumpkin Luminaries and this Candy Corn luminary which are both posted on Disney’s Kaboose. Today I made some colorful luminaries inspired by the ones I saw on this cute blog called Not So Idle Hands. While Emily uses the decoupage method with strips of tissue paper, I opted for what I believe to be an easier, faster and less expensive method… paint.
Great diy lighting ideas. The Hipster Home » Blog Archive » How to Make a Tiny Terrarium in a Light Bulb. Everyday DIY Ideas. Wall-E Art. Simply Vintagegirl Blog » Blog Archive » Tutorial: How to Make Lovely Fabric Flowers.
29 May 2010 These elegant fabric flowers are very simple to make . . . and only take a few basic supplies. The finished product is delightfully lovely, and at times can look like a real flower! Every flower will turn out differently and that is part of the beauty! Shadow Box Photo Display for Photographers. Wedding Invitations, Envelopes, Stationery, Crafts. Happy {Winky Face} Valentines. Free People Clothing Boutique Blog. How to make gift bags from newspaper. Tutorial: Homemade Sidewalk Chalk. By Michelle Vackar, Modern Handmade Child One of our favorite outside activities at our home is drawing with chalk on the driveway. You can play hopscotch, four-square, and of course draw and create silly stories. Most favorited all-time.
Do-it-Yourself DIY String Wedding Lanterns Yarn Chandeliers. Jessica of Wednesday Inc shows us how to make those gorgeous twine chandeliers from the inspiration shoot she shared with us this morning. Using balloons, glue and twine, you can also make these lanterns for your wedding – and then bring it home and use it as your very own mid century lampshade. What you will need are: balloons, glue, yarn, tray for glue, corn starch 1/2 cup of Corn starch, 1/4 cup of Warm water, clear fast drying spray paint, hanging lamp cord or fishing line (depending on your desired final product), and a lighting kit if you’re looking for a fully functional lantern. Page corner bookmark for kids in Ideas for kids' crafts.
How To Build A Fireball You Can Hold Video. How to Make Leaf Skeletons. DIY Doily Lamp. How to Make Cherry Blossom Lights.