
Backlit Canvas Art. Do you have one project that you've been longing to do, but just haven't found the time yet?
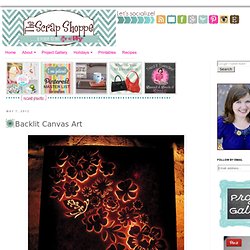
This is it for me. I call it my Backlit Canvas Art and the inspiration piece has been pinned in my "Crafts to try" Pinterest board for ages. My "pin"speration is an artist's piece made from metal that has hand cut flowers all over it. MAGAZINE ENVELOPES. 18K+ Well I got this idea from our friend Nina.
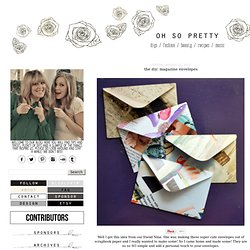
She was making these super cute envelopes out of scrapbook paper and I really wanted to make some! So I came home and made some! They are so so SO simple and add a personal touch to your envelopes. You will need: An old magazine, scissors, an envelope, a glue stick and a Sharpie. Tear out some magazine pages that you like. Carefully pull the envelope apart. Trace the envelope on a magazine page. Cake postcard tutorial. Supplies Materials needed to make two cake postcards: 1 large sponge (yellow paints the best)Serrated knifeX-Acto or utility knifeSpray paint (brown, yellow, pink or white)1 tube acrylic latex caulk (brown, cream or white)Spray adhesive (3M Super 77 works great!)
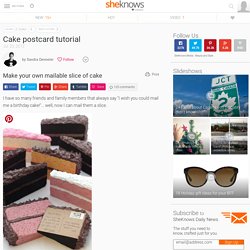
Cardboard, kraft paper or scrapbook paper Instructions.
101 Simple Handmade Gift Tutorials. These simple handmade gift tutorials will make any crafty person’s heart sing with joy!

You don’t need special skills or a bunch of time because these can all be done super fast! Simple and cute…that works for me! Oh, and think of all the money you will save making these gifts. VIDEO: How to Make Roses Out of Duct Tape. - StumbleUpon. Day 63 - DIY Corona Glasses & 366 Days of Pinterest. I cannot even tell you how excited I was when I found this pin explaining how simple it is to cut glass bottles.
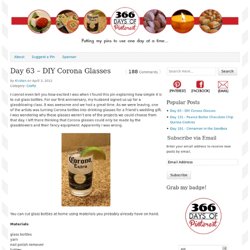
For our first anniversary, my husband signed us up for a glassblowing class. It was awesome and we had a great time. As we were leaving, one of the artists was turning Corona bottles into drinking glasses for a friend’s wedding gift. I was wondering why these glasses weren’t one of the projects we could choose from that day. I left there thinking that Corona glasses could only be made by the glassblowers and their fancy equipment.
You can cut glass bottles at home using materials you probably already have on hand. glass bottles yarn nail polish remover lighter sink full of ice water sandpaper 1. 2. 3. 4. 5. Woven gift-wrap // pastel edition ^_^ By Kate on August 8, 2012 I noticed that the woven gift-topper I made last year was doing the rounds again on Pinterest so I thought I would make an updated pastel version (pastels seem to be the new neon at the moment).
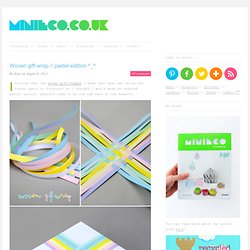
I bought some quilling strips (0.5cm) to use this time which reduces the labour by about half (I’ve also been working on some more intricate woven ‘things’ for another project…more to come soon). Anyway check out the previous post if you want full instructions. Projects // A Beautiful Mess D.I.Y Index.
Turning Photos into Canvas Prints! Modge Podge Tutorial. - StumbleUpon. {DIY} Paper Lantern & PomPom Grouping. Gift Ideas for Poor Creative Souls (10) Posted by: Cathy on May 22, 2012 Tagged in: Untagged I just loved this Paint swatch chandelier!
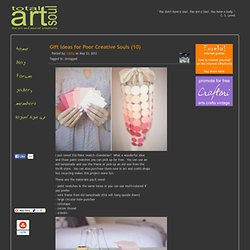
What a wonderful idea and those paint swatches you can pick up for free. You can use an old lampshade and use the frame or pick up an old one from the thrift store. You can also purchase them new in art and crafts shops but recycling makes this project more fun. 亲子育儿百科:轻松画樱花,这个主意不错吧家… 来自totogirl在堆糖网的分享. 堆糖网.
Flamingo Toes » Simple Spring Framed Vases. I don’t know about you but I am loving everything that is blooming right now!
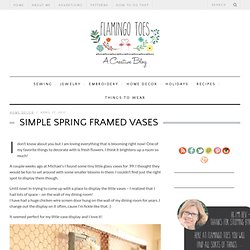
One of my favorite things to decorate with is fresh flowers. I think it brightens up a room so much! A couple weeks ago at Michael’s I found some tiny little glass vases for .99. I thought they would be fun to set around with some smaller blooms in them. Flamingo Toes » Anthro-Inspired Mirror. You all know we love a good Anthropologie knockoff around here – so a couple of days ago when I was browsing online I came across this mirror.
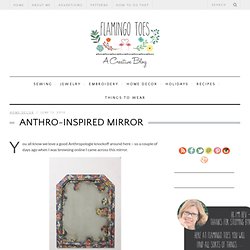
Oh I definitely need that. Hold the presses – did that say $498??? Huh. We can do better than that. :) So after scouring the thrift shops, cutting myself on mirror glass, and overcoming an unreasonable fear of Mod Podge, here is my version! (Bear with me here – taking a picture of a mirror is a bit tricky. Ready for the tutorial? DIY Elbow Patch - Honestly WTF. While perusing Pinterest one evening, I came across an intriguing tutorial on the wonderful art of needle felting. I had to learn more – especially after realizing it entailed repeatedly stabbing a needle up and down into a piece of fabric or sweater. A satisfying stress reliever that results in something wearable? Sign me up. Left - over, under, over. Right - under, over, under, over.
ORANGE RIND VOTIVES. Tiny Polaroid Magnets. Hi there! It’s felt like forever since I’ve last blogged, and has felt like an eternity since I’ve done anything crafty and nifty. Since my morning sickness has gone into full speed (yes, we’re expecting our third this fall!) I haven’t felt like myself. But nothing like inspiration to wake one out of a reverie — or nightmare, in my constantly sick state. I came across these DIY Pantone chip magnets on How About Orange and wanted to do something similar. You will need: Cardboard (mine was the backing of a sketchbook — much thicker than the back of a regular spiral bound notebook) or 2-3 sheets of white cardstock or poster board spray-mounted together to use as a sturdy backing to the magnetsOpaque white marker (necessary only if your cardboard is not white) Craft knife Metal straight edge/ruler Clear packing tape or frisk film.
Step 1: Download a Photoshop file of the Polaroid frames below. Step 2: Print out photos onto photo paper. Step 4: Trim out photos with craft knife. 487 Comments. Flax & twine: Day 3: Sparkle Headbands - a diy headband tutorial. Theses headbands I want to keep for myself. Really, I can’t decide which I like better the beads or the rhinestones. I know Allie won’t want to take them off. Who doesn’t love the idea of diamonds glittering in your hair? Glowing jar project - varázslat a lakásban (EN/HU) & from{panka}withlove. Turn Photo Negatives Into Artsy, Personalized Lamps. Inspiration: Origami Cranes. Say YES! to hoboken: DIY: Tinted Mason Jars in Rainbow.
I’ve been experimenting with tinting mason jars to create a look like those old vintage ones that are difficult to find anymore in second hand stores. Create - wall art printable template. Some months a go I shared the Love wall art template, along with that one I made this one, but unlike the previous one I wanted to make this word different and special, so no cardboard.
Instead I used a piece of Styrofoam from a box we received last week. When I saw it a knew it was perfect for this project =] And instead of painting or covering it with fabric (my first idea) I decided to just go the Decoupage route with hot pink tissue paper. Diy {stencil painted subflooring} & ashleyannphotography.com. We’ve had carpet in our bedroom since we moved in several years ago. My allergies were not a fan of the carpet. More Design Please - MoreDesignPlease - DIY : Sailors Knot Bracelet&. Wire Wrapped Tree Of Life Ornament.
How to Make a Chandelier (Part 2 (With Friends)) I'm not going to lie to you, this chandelier is both time + labor intensive. However, we worked assembly line style + were able to finish 4 chandeliers that night. 1. Tear off your wax paper into long pieces. We used 2 - 2.5 foot pieces.