
- StumbleUpon. How-To: The Cascade/Waterfall Braid. The waterfall braid also known as the cascade braid recently exploded as the new "trend braid" of the season.

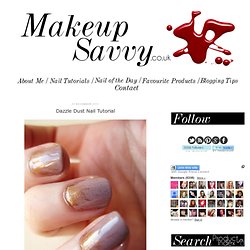
The waterfall effect looks cool and complex, but it's easier to style than you think. Give this beautiful braid a try when Beautylish takes you through the how-to! Section Off The waterfall braid works best on straight or loose waves. Brush out all the knots with a wide tooth comb. Braid As Usual Braid your strands regularly three times, beginning from the right strand. Drop the Strand This is where it gets tricky. Step and Repeat Repeat this process—French braid the left strand, drop the right strand, and pick up an adjacent new piece. Pin and Secure. 5 DIY Treatments for Your Bad Hair Days. Makeup Savvy: Dazzle Dust Nail Tutorial. I've been wanting to try out paint splattered nails for ages now, however it seems like alot of hard work and also kind of messy!

So me being supposedly 'savvy' and all I came up with a probably just as messy idea...but slightly more fun and prettier. Also it looks alot more delicate than having a paint splattered effect and alot less nail arty and more wearable. Now like I say... it is kind of messy so you will need at least one face wipe/baby wipe and something to do it on like the back of a magazine. Also your nail polish of choice and a pigment or dazzle dust! I used a Barry M Dazzle Dust in Brass (100) £4.50 and the nail polish is by Beauty UK in Smokey Lilac £1.79. 1) Firstly you need to give your nails one coat of nail polish. 2) Once dry you can apply the second coat. 4) You can either place the pigment on every finger all in one go or do one nail at a time. 5) Then you basically blow the pigment in the direction of the nail.
Cat Eye Makeup Tutorial - The Bare Intimates. Sayonara, Cellulite! - iVillage. Natural looking beach curls in under 20 minutes! I don’t know about you ladies, but I’m itching for the summer.

It doesn’t help that department stores are already putting out their summer wear and swimsuits. Have you ever wanted to get that beautiful “natural” beach curl look to your hair? I want to share with you a technique that works for ALL types of hair, whether it be short, long, thick, thin, frizzy, or flat… and no curling iron involved! 1. Dampen your hair with a spray bottle or let it semi air dry after washing it. As you can tell, I have a lot of wave to my hair, but this works for all hair types!
2. 3. 4. 5. 6. 7. 8. Something to keep in mind is, obviously, the wetter your hair is to begin with, the longer it takes to dry. How-To: Instant Nail Arts - Do Yourself. See Creatures & The Perfect Mermaid Curls. Although “perfect” is a relative term, this method for curling hair is pretty much perfect by my standards, mostly because it isn’t fussy.

While I’m a sucker for both ringlets and Californian waves, I like my own curls somewhere in between: relaxed but bouncy. Mermaid-like. Supplies: 1″ curling iron, brush, and hair sprayTime: 45 minutes (for thick hair) All of the magic happens with Revlon’s “Helen of Troy” ceramic 1″ curling iron. For those who have long, thick hair like me, you might find that larger curling barrels produce the most pathetic excuse for “waves” that fall out within the hour, regardless of the amount of hair spray. I’ve found that the 1″ barrel creates tight waves that look good for at least 5-6 hours (though they do relax over time).
For hairspray, I’m a fan of Tigi’s Hard Head, which has a strong hold without the severe crunchiness. 1. 2. 3. How-To: Instant Hairstyles- Do Yourself. The Dark Side of the Beauty Business. Virtual Makeover - iVillage. How To Use A Sock To Get Beautiful Curly Hair Without Heat. If you are a mom on the go with long hair you HAVE TO try this.

It will knock your socks off and have you wrapping your hair up in them! This is all about how to make your hair beautiful with no heat and no time. Curl your hair in your sleep with a sock. Yup, you heard me right. Have you heard of this sock bun? I was on Pinterest a while back and spotted this post about the sock bun which links you to her video on YouTube. Why? Because: It literally takes a minute to doNO heat at all – just a soft little sock in your hairNo product (for me anyway)You can sleep in it very comfortablyIt works Marvelously and is simple beautiful This is the sock bun before and after of my hair. Here are the step by step instructions on how to make this work. First steal a sock from your husband’s dress sock collection (that is what I did anyway).