
DIY Craft Project: How to craft a twine-ball light garland {As featured on Rock n Roll Bride} Time for another DIY craft project and today I’ll be showing you exactly how you can make this twine-ball light garland yourself.
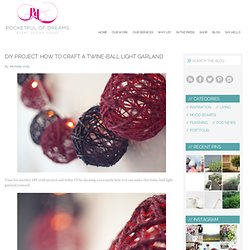
It’s one of those projects that’s a little bit messy and does take quite a bit of time, but it is so much fun. Plus you have a really cool piece of decor at the end of it. Perfect for parties or around the home, you can paint it up in any colour you want to match your design scheme, and when lit, it looks so pretty, casting lots of patterned twinkly light everywhere. Mine is now taking pride of place in my office. Hey Look - Event styling, design inspiration, DIY ideas and more: PRETTY PACKAGING IDEAS.
I think my favorite part of gift-giving is wrapping the goods.

I really don't mind if the wrapping paper is being ripped off afterwards, I simply enjoy spending a lot of time and thought on making a present look as pretty as possible. Here's some cute and creative gift wrapping inspiration I found around the web: Washi tape ideas: Sweet Paul (left) and Tea For Joy (right) Lace gift wrapping: Sweet Paul, Colorful fabric packaging: Handmade Weddings (via Haystack Needle) Gift Ideas for Poor Creative Souls (12) Posted by: Cathy on Jun 03, 2012.

Nutella Shots. Guess what I am drinking tonight? Ingredients & Measurements: • 1 cup ice • ½ cup milk • 2 tablespoons Nutella • 1 shot Baileys or Frangelico Hazelnut liquor • 1 shot vanilla vodka Instructions: Place all the ingredients into a blender and blend until thick and creamy. Pour into shot glasses and then you simply rim the shot glass with Nutella. That’s it, now it’s time to get stinking drunk…enjoy! UpCycled Window Shutters - DIY Inspiration.
Posted by ScrapHacker.com on fredag, mars 16, 2012 · 6 Comments Open your eyes to the possibilities of upcycling old shutters into new awesome creations.
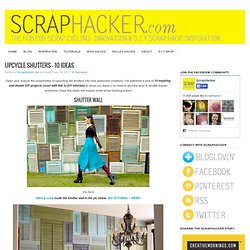
I’ve gathered a pick of 10 inspiring and doable DIY projects (most with link to DIY tutorials) to show you there’s no need to shut the door to shutter futures anywhere. Desserts That Are Almost Too Cute To Eat & Pretty Please Us Blog: Your guide to fashion, beauty, style & everything else in between.
Hi, my name is Himani and I’m a sugar addict.
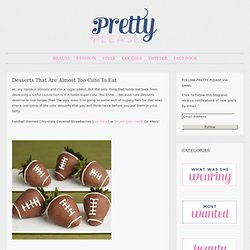
But the only thing that holds me back from devouring a sinful concoction is if it looks super cute. You know… because cute desserts deserve to live longer than the ugly ones (I’m going to some sort of sugar-y hell for that one). Check out some of the cute desserts that you will think twice before you put them in your belly: Football themed Chocolate Covered Strawberries (purchase) or (make your own). How to Make Your Own Beauty Products from Scratch - Health. Let's keep things simple this week.
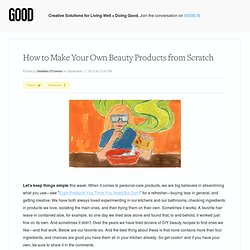
When it comes to personal-care products, we are big believers in streamlining what you use—see "Eight Products You Think You Need But Don't" for a refresher—buying less in general, and getting creative. We have both always loved experimenting in our kitchens and our bathrooms, checking ingredients in products we love, isolating the main ones, and then trying them on their own. Oh my! handmade goodness - StumbleUpon. By Michelle Vackar, Modern Handmade Child One of our favorite outside activities at our home is drawing with chalk on the driveway.

You can play hopscotch, four-square, and of course draw and create silly stories. My daughters and I were talking one day as we played hopscotch about how to make chalk and I thought to myself, let’s try it! It ended up being quite a lot of fun. What you will need: • Toilet paper or paper towel tubes • Scissors • Duct tape • Wax paper • Small bucket or disposable container to make the recipe • ¾ cup of warm water • 1 ½ cups Plaster of Paris • 2-3 tablespoons of tempera paint • Paper bag or a “mess mat” ** we made six tubes of chalk – we simply doubled the above recipe Step 1: If you are using paper towel tubes, cut each tube in half, so it is roughly the length of a toilet paper roll tube.
Step 2: Cover one end of each tube with duct table to hold the contents within. Step 3: Cut as many pieces of wax paper as you have tubes. You knew i was going to make one. - StumbleUpon. Mad in crafts: DIY Fire & Ice Lanterns - StumbleUpon. The old becomes new: A new variation on the outdoor lantern.
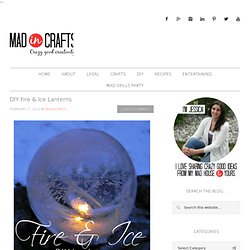
We have had an unusually warm winter in Michigan this year, and while the temps have been nice, I have had to hold off on this project idea until we got a cold snap. We finally got some snow and cold earlier this week, so I was able to try out this fun winter project. I had pinned a product called Globe Ice Lantern Kits a few months back recognizing that I could DIY them at home. Originally priced at nearly $30 for a kit that makes 6 lanterns, I think they are very reasonable for a small batch.
If you are making several (say, for a special event or to light a walkway), you can make 3 of these DIY versions for only $2 worth of supplies from the dollar store. Funny: More facebombs {Part 2} DIY Wrap Bracelet. You should all know by now that we are all about stacking bracelets on our wrists.

The more, the better. In fact . . . the most, the best! With that being said, we’ll show you how to master a version of the ever so popular wrap bracelet. Wedding Trends for Stylish + Creative Brides - StumbleUpon. If you loved the beautiful DIY wedding this morning and Nata’s gorgeous paper flower bouquets, you are in luck as Nata is sharing how she crafted them with us!

She was inspired by a template created by Morgan Levine on Martha Stewart (as was I in the flowers I created for this styled shoot). I just love that this basic idea has inspired different brides to create their own version of giant paper flowers – you might remember these equally awesome giant paper flowers from this wedding I shared last year. :) Thanks so much Nata for sharing how you created your giant pink paper rose + special thanks to Studio Castillero for the photos of the DIY + her wedding! Materials (to make one giant rose) Perfect Summer Bangle - StumbleUpon. Here's a fun tutorial on how to make a message bangle that's one-of-a-kind, done in the sun, waterproof and weatherproof. Even after several trips to the beach, it won't fade or wash off!
Essentially, it's the Perfect Summer Bangle. YOU ASKED FOR IT… - StumbleUpon. Photos + post by Kristin Ess So many emails have come in asking how I did the braid on Lauren’s hair for her last Chelsea Lately appearance. I recently recreated that braid and took a couple photos so you could see it up close.
Here’s the very simple secret to this braid: In a regular braid there are 3 strands. For this look, all you do is braid one of those strands beforehand and loosen it up with your fingers, then braid as usual. Watch this video to see how it looks as the pieces loosen up and naturally fall out of the braid: Tags: braid, braid in a braid, braids, chelsea lately, hair, hair style, kristin ess, lauren conrad, lauren conrad braid, lauren conrad plait, layers, messy braid, messy plait, plait, style, textured braid, the beauty department, thebeautydepartment.com, video. Milk and Booze! How To Make Sweet Milk Liqueur. Milk liqueur: a Portuguese recipe made from equal parts vodka (or grappa), milk, and sugar. Say hello to the newest addition to our liquor cabinet! This rather improbable combination of vodka and milk makes a liqueur so smooth and perfectly sweet that you'll want to sip it straight.
Get the recipe, our review, and some ideas for using this sweet liqueur below. We love the idea of making our own liqueurs, and we've been wanting to try this milk liqueur ever since we saw it in David Leite's most recent book The New Portuguese Table. Simply made by mixing vodka or grappa with an equal amount of milk and sugar, it just seemed so unusual and fascinating. The hardest part about this liqueur is waiting for it to infuse. But strained a few times to catch all those milk solids, the resulting liqueur is perfectly clear with a lovely sunshine yellow hue. DIY Fashion-Forward Bracelets & Diy & Lifestyle & RTR On Campus - StumbleUpon. When money is tight, but fabulous fashion is a necessity, try out your crafting skills to make something new and fantastic.
These bracelets are sure to impress and look quite expensive, but all they require is some gold chain and friendship bracelet yarn, both of which you can find at a craft store like Michael’s Art Supply. Easy Button Earrings Tutorial - StumbleUpon. How to Plant Ideas in Someones Mind - StumbleUpon. Shes Crafty: DIY Multi-Chain &Ribbon Necklace.
Due to the resounding success of her last She’s Crafty, my friend Pandora from Accessory Source is back with another lovely necklace DIY tutorial that would make a fantastic christmas present for a friend or relative! She says: When it comes to jewelry, I favor big and bold pieces. And while I tend to wear mostly gold, lately I’ve become obsessed with mixing metals like silver and gunmetal (and throwing in some bling for good measure!). DIY Fashion and Craft TutorialsStars for Streetlights. This post is part of my Project 365 where I am taking one photo every day for a year.
Click here to see all of my photos in the series-- and if you want to join, feel free to do so anytime! :) Holiday surprise crackers. I love learning about holiday customs from other countries, and this is one that I could easily see myself including in seasons to come. Kate Petty of Mini-Eco sent over this easy, modern version of Christmas crackers, a popular holiday tradition in countries like Australia, Canada, New Zealand, Ireland and the United Kingdom, where Kate hails from.
She has created templates for small and large crackers, so all you have to do is print them onto a pretty paper or cardstock, cut, assemble and fill them with candies, notes or other little treats. Large T-Shirt to Fitted Tee Tutorial.