background preloader

Things i want to come back to one day :)

Facebook Twitter

20 Desserts You Can Make in the Microwave. By Brooke McLay | I don’t know about you, but I thought January would be slower than December. 
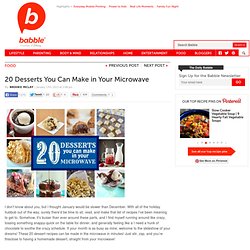
With all of the holiday hubbub out of the way, surely there’d be time to sit, read, and make that list of recipes I’ve been meaning to get to. Somehow, it’s busier than ever around these parts, and I find myself running around like crazy, tossing something snappy-quick on the table for dinner, and generally feeling like a I need a hunk of chocolate to soothe the crazy schedule.

If your month is as busy as mine, welcome to the slideshow of your dreams! Nggallery template=’carousel’ id=’129409′ Make a Mug Cake...in Your Microwave!! You need chocolate, and you need it now? Make Hot Fudge…in Your Microwave!! Like hot fudge on your ice cream? Make a PB Cake…in Your Microwave!! Chocolate and Peanut Butter go together like…well…chocolate and peanut butter! Make Chocolate Mousse…in Your Microwave!! Women's Fashion Skirts – Shop Fashion Skirts at Oasap Online Store. The Apple of My Eye. Recently it was my friend's birthday so I decided to bake him up a batch of cupcakes since he loves them even more than I do.

His favourite dessert is apple crisp so I thought, "why not make apple crisp cupcakes? " So I went straight to google and started my search. To my surprise there were hardly any apple crisp cupcake recipes! There was nothing like what I had in mind so I ended up combining ideas from all the recipes I scanned through and my one and only apple pie baking experience.

I was extremely pleased with my results and my friend was even more impressed! I did most of this by eye so please keep in mind the measurements for everything but the cake are estimates - an amateur's estimate's to be exact. CAKE From 2 dozen medium cupcakes. 1 cup unsalted butter1 1/2 cups white sugar8 egg yolks*3/4 cup milk1 1/2 teaspoons vanilla extract2 cups cake flour**2 teaspoons baking powder1/2 teaspoon salt Cream butter until soft. Hair. Wednes-diy | Free People Clothing Boutique Blog. UPDATE: This post originally ran on March 23 2011, but with summer winding down we wanted to bring it back up for some late summer inspiration! 
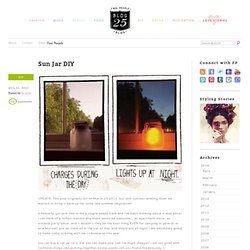
A fellow fp girl sent this to me a couple weeks back and i’ve been thinking about it ever since! I can think of a million reasons why these would be awesome… as apartment décor, as outdoor party décor, and – wouldn’t they be the best thing EVER for camping in general or at a festival?

Just let them sit in the sun all day, and they’ll last all night! I am absolutely going to make some to bring with me to bonnaroo this year. you can buy a sun jar here, but you can make your own for much cheaper! I am not good with technical things, like putting together a solar power cell, so i found the easy way :) what you need: a mason jar with a clear glass lid like this one from ikea, a solar garden light like the ones pictured above, which i found here, adhesive and glass frosting spray. last image.

Trending on FP.com: One Dog Woof: Gearing up for Summer and the Neverending Bow-Tying that Comes With It. Girls in white dresses with blue satin sashes….tied in perfectly beautiful ribbon bows… It’s spring, and inevitably, spring and summer brings wedding season. 
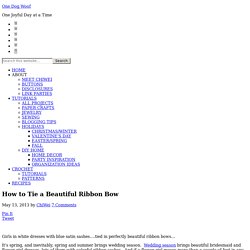
Wedding season brings beautiful bridesmaid and flower girl dresses, lots of them with colorful ribbon sashes. And if a flower girl moves more than a couple of feet in any direction, chances are those ribbon sashes will need to be tied and retied into a bow, over and over again. I was the bridesmaid who was in awe of the seamstress who tied my white satin sash into the perfect bow.

How the?! I don’t even remember when I figured this out. Now, I don’t know if you will find this useful, or if this is known information all over the world, and I’m just the last DIYer in the world to think this is cool, but here’s how I tie a bow. Hopefully, you start with double sided satin ribbon.

Make your bunny ear with the right strand of ribbon. Wrap the left strand OVER THE TOP and around the bunny ears without twisting the ribbon. No heat, overnight curls. 5 minute no heat curls - it really works! Or so she says...: Almost No Heat Curls (she: Michaela) no heat curls bornprettystore.com No-heat Soft And Pretty Curls No Heat Curls - From Socks #2 (2) Super easy "No-Heat" Sock Curls!

Teddy bear pattern | Practical Enrichment. I know this may sound random, but I was thinking the other day that I wanted to make a teddy bear. 
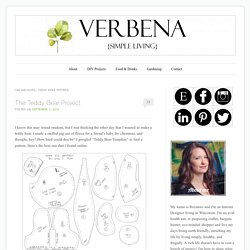
I made a stuffed pig out of fleece for a friend’s baby for christmas, and thought, hey? How hard could this be? I googled “Teddy Bear Template” to find a pattern. Here’s the best one that I found online: The teddy bear pattern pieces I used. The search gave me a pretty big looking pattern, and without a useable printer, I held up pieces of paper to the computer screen and just drew the pieces, then cut them out.

I took all the pieces to the sewing machine, and, with NO direction, just stared. I sewed the head first, sewing the two side pieces and the gusset together. My end result looks like a lamb that got ran over a few times. My Lamb-Bear!!! This is the bear from the back. Now, you can laugh. After sewing the head, and looking at it, It was very… crooked. Bear #2 I’m a fan of bear #2. Fraternal Twin Bears! So, as fun as this was, I say next time, I use a pattern with directions. Like this: DIY portable picnic blanket. What’s the very first thing you need to think of when you’re going for a picnic ? And not just any picnic, the perfect picnic. You got it – a picnic blanket (how did you guess that ?!). So that had to be our 1st DIY of picnic month on CNC. I have been meaning to make a picnic blanket forever seeing as I don’t really like using the blankets we have on our bed or couch. I would rather have something made especially for picnicking – just because I like things to have their own use !

I also feel a picnic blanket has to be loud and fun, something to contribute to the colourful parcs and woods it will lie on. Rowan fabric had to be it – isn’t that print beautiful ?! But it wasn’t just a question of which material to use… I wanted my picnic blanket to be light and easy to carry too. However, practical often means ugly. Taking all this into account, I came up with this pretty picnic blanket I’m super proud of, it turned out just the way I’d hoped !

You will need : xx Aimee. The Laughing Willow: My version of the pinwheel sweater. So, I saw this amazing circle sweater, but alas, it's knitted. 
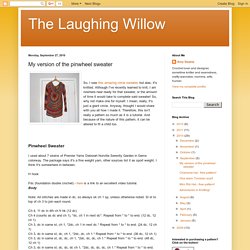
Although I've recently learned to knit, I am nowhere near ready for that sweater, or the amount of time it would take to complete said sweater! So, why not make one for myself. I mean, really, it's just a giant circle. Anyway, thought I would share with you all how I made it. Therefore, this isn't really a pattern so much as it is a tutorial. And because of the nature of this pattern, it can be altered to fit a child too. Pinwheel Sweater I used about 7 skeins of Premier Yarns Deborah Norville Serenity Garden in Gems colorway. H hook Fdc (foundation double crochet) - here is a link to an excellent video tutorial.Body Note: All stitches are made in dc, so always sk ch 1 sp, unless otherwise noted. Ch 4, 11 dc in 4th ch fr hk (12 dc) Ch 4 (counts as dc and ch 1), *dc, ch 1 in next dc*. Continue increasing as in pattern above until circle reaches diameter of the distance between the outer edges of your shoulders.

Arms. Cardigan With Wooden Buttons. KW - Hoodie. Back **Band: Ch 15. 1st row: (RS). 1 sc in 2nd ch from hook. 1 sc in each sc to end of ch. 
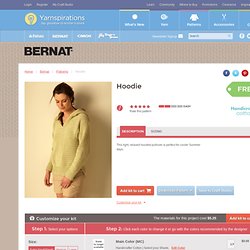
Turn. 14 sc. 2nd row: Ch 1. Working through back loops only, 1 sc in each sc to end of row. Rep last row until work from beg, when slightly stretched, measures 19 (21-23-25-30-34) ins [48 (53.5-58.5-63.5-76-86.5) cm], ending with a RS row. Next row: (RS). Next row: Ch 2. 1 hdc in each hdc to end of row. Rep last row until work from beg measures 13½ (14-14½-15-16-16) ins [34.5 (35.5-37-38-40.5-40.5) cm], ending with a WS row. Shape armholes: Next row: Miss first 8 (8-10-12-20-26) hdc. Next row: Ch 2. 1 hdc in each hdc to end of row. Rep last row until armholes measure 9 (9½-10-10½-11-12) ins [23 (24-25.5-26.5-28-30.5) cm], ending with a WS row. Front Work from ** to *** as given for Back. Cont even until armholes measure 2 (2½-3-3½-4-5) ins [5 (6-7.5-9-10-12.5) cm], ending with a WS row. Divide for Front Opening Next row: Ch 2. 1 hdc in each of first 22 (25-27-28-29-30) hdc. 2nd row: Ch 2.

Sleeves Hood. My Backyard Monsters - Kodama Pattern. Crochet Love Monkey. PDDesigns: FREE PATTERN: Moebius Headband Earwarmer. Happy Holidays!! My gift to you... make this earwarmer headband in about an hour!! © 2011 PDDesignsPlease do not redistribute pattern...instead, send your friends my way!! Materials: J HookLess than 1 skein Worsted Weight (size 4) yarn Pattern: With J hook, chain 55. 1. THIS is where the twist comes in to play!! Take hook and work 1 sc in the un-worked stitch to the left of the joining stitch on the opposite side of the chain. . (110 sc in all) 2. . (110 hdc in all) 3. . (110 dc forming 55 Xs) 4. Fasten off. Done!! The BEST part about this pattern.....keep repeating rows 3 & 4 to make a matching COWL!!!

For more great patterns: PDA.png Photo by Noxin. 50 Free Photoshop Brush Sets Everyone Should Have. Downloadcenter.samsung.com/content/UM/201002/20100219092804687/PL100_PL101_English.pdf. How To Give Your Photos a Dark Processed Lomo Effect. This post was originally published in 2010 The tips and techniques explained may be outdated.

Follow this step by step post processing guide to give your photos a dark lomo style effect with high contrast, blue tones and vignette burns. The effect is based on the popular lomographic technique and is similar to the processing effect used in many fashion shots and advertisement designs. Overall this effect does a great job of adding impact to a plain photography with cool colour casts and unusual saturation. View full size photo effect Begin by opening your photograph of choice into Adobe Photoshop. This particular shot is courtesy of ThinkStock and features a guy on a motorcycle with a blue skies and grassy fields. Go to Image > Adjustments > Levels and tweak the tones of the image. At the bottom of the Layers palette, click the Adjustment Layer icon and select Curves.

Change the drop down menu to Green and tweak the graph for the green channel to further alter the tones of the image. :) by ~love--yaoi on deviantART. Crochet a Gorgeous Mandala Floor Rug. In this tutorial we’ll be making a beautiful crochet rug, made from T-shirt yarn. 
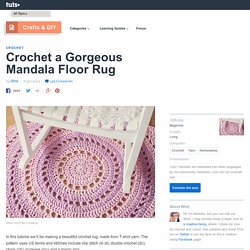
The pattern uses US terms and stitches include slip stitch (sl st); double crochet (dc); chain (ch); increase (inc) and a magic ring. T-shirt yarn (also called Zpagetti) in two colours that complement each other. You'll need about threes cones of yarn in total.A crochet hook in a size suitable for t-shirt yarn. I'm using a 15mm hook.A large darning needle for sewing in the ends.A pair of scissors. Using the main colour yarn, make a magic ring and secure with a stitch. Pull the ring closed. Chain 3 (counting as 1 dc), work another dc in the same stitch, then work 2dc in each stitch around.

Chain 3 (counting as 1 dc), work 2dc in the next stitch, then *1dc, 2dc* around. Chain 3 (counting as 1 dc), chain 2, skip a stitch, then *1dc, ch2, sk 1 st* around. Chain 3 (counting as 1 dc), work 2 dc in the ch2 space, work 1dc in the underlying dc, then *inc, 1dc in dc* around. Change colour. Change colour. Crochet Stool Cover ∙ How To by AnnemariesCrochetBlog on Cut Out. All Featured Projects · Cut Out. Anthro-Inspired Mirror » Flamingo Toes. You all know we love a good Anthropologie knockoff around here – so a couple of days ago when I was browsing online I came across this mirror. Oh I definitely need that. Hold the presses – did that say $498???

Huh. We can do better than that. :) So after scouring the thrift shops, cutting myself on mirror glass, and overcoming an unreasonable fear of Mod Podge, here is my version! (Bear with me here – taking a picture of a mirror is a bit tricky. Ready for the tutorial? You’ll need: A MirrorEasy Off Oven CleanerFabric (enough to cover the frame and the back of the mirror)Mod PodgeA Staple Gun or other framing tool I went searching for a method to removing silvering and came across a great tutorial at Mitzi’s Collectibles. I started with a frame that I found at the thrift store. Obviously not clean. We actually had to ask on this one – because it just said 1951. $19.51 seemed way to high – and it was. Start by taking your mirror out of the frame. Lay your mirror down on a protected surface. How to restore Timber Venetian Blinds | Web Compendium. When we moved a few years ago, the new house had a lot of cedar timber venetian blinds.

These blinds had been installed new, and added a nice aesthetic to the feel of the house, which also had timber flooring throughout. Imagine my dismay when I saw that the tenants who we had rented the house to had not taken care of any of the fixtures or fittings in the home. Amongst other things, the blinds were dirty, discolored, and water damaged where the tenants had left windows open during rain. Water Damaged & Discolored Timber Blinds At first I thought all the blinds would need replacing, but with so many floor-to-ceiling custom size blinds, this was not going to be a cost effective option.

So began my task to restore these timber blinds to their original condition. How to Restore Timber Venetian Blinds Sometimes a regular clean is not enough to have timber blinds looking as good as they used to. Mix 1/3 Raw Linseed Oil with 1/3 Vinegar and 1/3 Mineral Turpentine. Tutorials. Heartinthecloud.com. Pine, Needle & Thread. This page features all my DIY tutorials, as well as some DIY inspirations. Click each photo to go through to the corresponding DIY! I've taught myself to sew over the last couple of years, so don't take these DIYs as absolute gospel - I'm just showing you all what worked well for me, and will often update my techniques as I get better!

CLOTHES & ACCESSORIES (newer DIYS): DIY Dresses - Discover the latest fashion trends and looks wearing DIY Dresses. Silk Ribbon Embroidery: Five Petal Flower, Gathered Ribbon Flower. Out Of Order: DIY Tutorial - Full Skirt. Wire Bow DIY. Media.colettepatterns.com/free/patterns/colette-patterns-0001-madeleine.pdf. Assets.burdastyle.com/patterns/print_at_homes/000/001/462/Sonja_dress_A4_USLet_original.pdf?1329770373. Raised fishbone stitch. Summer of Skirts - Waistband Bow Skirt tutorial.