
...love Maegan: * Partial French Braid & Cascading Hair Tutorial *also known as the "Waterfall Braid" Fashion+Home+Lifestyle. I’m not the originator of this hair style but I’ve gotten so many requests for it, I thought I’d give it a go for you.
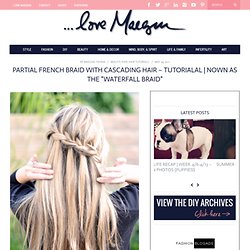
I don’t know what it’s called either so I haven’t researched it and/or found any other tutorials for it …thus, this is my version of it, and I’ve dubbed it the Partial French Braid w/ Cascading Hair. The photos I’ve seen online show the braid a little more straight across the back of the head and mine sort of braids at an angle, similar to my side/low french braid up-do.
I’m sure this is 100% easier to do on someone else’s hair than your own but it goes pretty quickly once you get the hang of it …I mean, it’s my shortest hair video tutorial to date. That’s gotta mean something, right Enjoy. Note: Apologies in advance for the yelling of “NOOOO” towards the end, where I momentarily fear I’m going to lose my entire braid and have to start over. Have Fun! Hair Romance. Hair Romance is a wonderful blog dedicated to all things hair related, where Christina, a super lovely australian blogger, offers a lot of valuable hair advice.
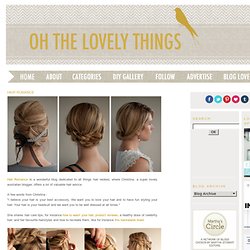
A few words from Christina : "I believe your hair is your best accessory. We want you to love your hair and to have fun styling your hair. Your hair is your headsuit and we want you to be well dressed at all times. " During the month of May 2011, she posted a hairstyle everyday. She created 30 gorgeous hairstyles in 30 days! Her hairstyle challenge has been so popular that she designed tutorials for all the hairstyles in an easy reference ebook. She says that the hairstyles are easy to master and that if she can do it, we can do it too.
You can buy the ebook here - it's only $9.95 and it's totally worth it! And until Sunday, June 26th 2011, you can win it! Christina is generously giving away an ebook to one lucky winner! Simple 3 Twists Hairstyle. First, a little back story: I was on Pinterest (I know, big surprise) awhile back and Ms.
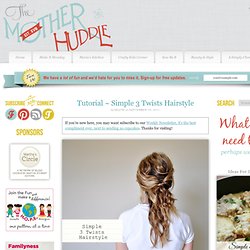
Ez from Creature Comforts pinned a fun messy hair-do, and mentioned she needed to learn how to do it. Craft, DIY, Clothes, Beauty, and Food: Shaggy Hair Bow. I have been so inspired by all the hair bows I've seen on the web lately, but I wanted to try to translate the hair bow into a do that someone around 30 or older could rock without looking like they're trying to be a teen...or Lady Gaga...or Minnie Mouse.

Not that there's anything wrong with that. Moving on! This is how I did a shaggy hair bow. First, I decided to pop a headband on in the front of my do, but you could do whatever you please. Maybe a braid or bangs? Step 1) I popped on a headband (do whatever you like here). Step 2) Behind the band a pulled up a 1 inch (2.5 cm) band of hair, hair-sprayed near the root, then back-combed. Step 3) Flip the piece you just worked on forward, grab another 1 inch band, spray it, and back-comb it. Step 4) Flip it all back in place (I realize this looks nuts). Step 5) Use a comb to gently tame the crazy. Step 6) Pull it back into a tight, low ponytail. Step 7) Separate the ponytail into three equal sections.
Step 15) Let that middle piece down now. Hair. Recently I realized that we’ve never really had a specific chat about hair serums.

There are so many different formulas from silicone-based, to alcohol free, to natural, to curl enhancing, etc… All of them promise to deliver mega shine on the driest, dullest hair. But there’s more to it than that. How To Style Maiden Braids. Last month I did a makeover story with Kelsie and had many requests for a maiden braid tutorial.
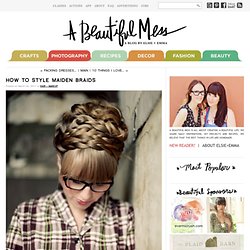
Yesterday she came in and we photographed these simple step by steps. Kelsie has extremely long and thick hair, but anyone with shoulder length or longer can do these braids (see my photo below for an example). Steps 1-2: Braid two strands on each side of a center part. Steps 3-5: Wrap braids around the crown of your head and pin in place with one pin each. Step 6: Arrange braids so that they cover the front of your head like a headband. Steps 7-8: Pull the rest of the hair into a ponytail and pin it into a cute messy bun. Step 9: Add final pins and spray.