
Installing and Building an Arduino Sketch for the $5 ESP8266 Microcontroller. Installation of the custom build of the Arduino IDE really couldn’t be simpler.
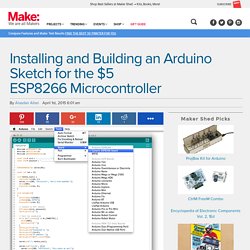
I’m on a Mac, and at that point it comes down to downloading the pre-built binary release from GitHub. The custom binary will live quite happily alongside your existing stock Arduino development environment — in fact, as well as the ESP8266 build, I think I’ve got six or seven other versions of the environment installed at the moment, with version numbers ranging from 1.0.x up to to latest 1.6.x build. Which is exactly what Sandeep Mistry has now done with the ESP8266. Installation is almost as simple as before — download it and move the esp8266com folder included in the release inside the hardware folder of your Arduino sketchbook directory. Tiny gadgets. For a while now, I’ve been playing with the super-cheap esp8266 WiFi module.

It’s been a bit of an uphill struggle, mostly because of the poor documentation (actually, that’s not fair – the documentation may well be excellent, but my understanding of Chinese isn’t) and the lack of easy programming tools. Until now, there have been essentially three ways of using the module: Serial for breakfast The initial method was to control the module via a serial link.
As supplied, it can communicate with an arduino (or anything else) using a simple serial connection, using AT-style commands which will be familiar to anyone who has worked with modems, especially GSM ones. C for elevenses Pretty soon after it became available, smarter people than me figured out that the module is powered by a general-purpose microprocessor (and a pretty powerful one at that). Of course, there’s a catch. Lua for lunch More recently, there has been nodemcu. Беспроводной датчик на базе ESP8266 с отправкой данных на удаленные сервера. На базе дешевого WI-FI модуля ESP8266 можно быстро получить беспроводной датчик температуры, влажности, давления, освещенности- достаточно обновить прошивку модуля и подключить датчики.
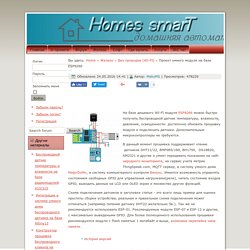
Дополнительные микроконтроллеры не требуются. ESP8266 - NURDspace. "File:" cannot be used as a page name in this wiki.
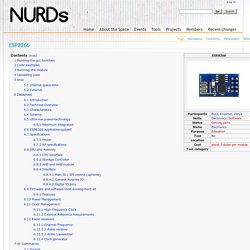
Building the gcc toolchain have a look at the github wiki Code examples. Wi07c - ElectroDragon. Specification Module power 3.3V, regular current consumption at 70ma, peak current at 240mA (300mA must be able to provided) +20Dbm power, 100M max transmitting distance on ideal circumstance.
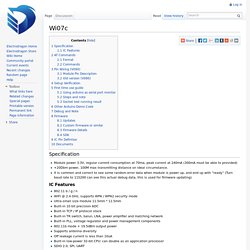
It is common and correct to see some random error data when module is power up, and end up with "ready" (Turn baud rate to 115200 can see this actual debug data, this is used for firmware updating) IC Features AT Commands Format Baud rate at 57600, 115200 (new line) use option "send new line" or 'carriage return' for each command x is the commands Commands carefully there are must be no any spaces between the " and IP address or port Pin Wiring (V090) Module Pin Description No need any pull-up Old version (V080) The old version Setup Verification First time use guide Using arduino as serial port montior Steps and note.
ESP8266 Wifi with the Arduino Micro. A few months ago a new board called the ESP8266 arrived on the scene and promised a very cheap way for serial devices (such as the Arduino) to to make HTTP requests.
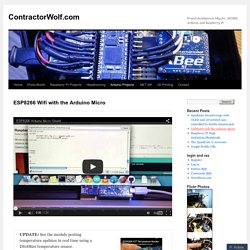
The device itself was less than $10 (I got a few on AliExpress for $5) and it meant that smart microcontrollers could be easily made into “Internet of Things” devices. The boards (from the factory) operate at 115200, and that is just too fast for SoftwareSerial, so I decided to use and Arduino Micro to play around with it. The Arduino Micro has two serial ports so that it can communicate over USB (for debugging) as well as communicate over another serial channel (Serial1). This mean that I could use the Arduino Micro as a serial pass-through device and communicate with the ESP8266 directly. The annoying part was the 8 pin setup was not very breadboard friendly, so I de-soldered the back row of pins (GND, GPIO1, GPIO2, RX) and attached external wires so that they would work easier on a breadboard.
Like this: Like Loading... Tiny gadgets. View topic - ESP8266 WiFi Module Pinouts. 5$ Arduino WiFi Module!? ESP8266 mini Tutorial/Review. ESP8266 Wifi Temperature Logger. Internet Of Things - ThingSpeak. Open source IoT toolkit. New Chip Alert: The ESP8266 WiFi Module (It’s $5) MRF24J40MA. Use Narrow Band Powerline Communication Module with Simple MAC on pcDuino. LinkSprite low-cost narrowband powerline communication module moves serial data over the power line network at a speed of 500 bps, and achieves the target of replacing serial cables by the ubiquitous power line network.
It can work on AC 220V/110V, 50Hz/60Hz, or DC line. Simple MAC powerline communication module carrier module includes not only the circuits regulate 110V/220V AC, coupling circuits, and other complex peripherals, but also can provide 5V power to the user’s device. It supports a baud rate of 600,1200,2400,4800 , 9600 or 19200bps (default baud rate). It also has a TTL level interface directly with the microcontroller’s RXD, TXD connection. Simple MAC powerline communication module provides half-duplex communication function, it can achieve local communications through 220V/110V, 50/60Hz power line .
The TXD and RXD of the module is a 5V TTL logic.