
DIY Remote WiFi Switch Using the RAK DashButton. Introduction This project aims at showing the step-by-step method to create you very own DIY remote wifi switch for your electrical appliances using the RAK DashButton board.
The purpose of creating these small wifi based switches is to allow small kids to control lights and other electrical appliances without actual having to go near the electrical outlets. Supported Devices · SpacehuhnTech/esp8266_deauther Wiki. This software is written for the ESP8266.
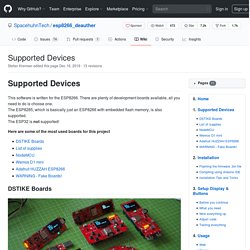
There are plenty of development boards available, all you need to do is choose one. The ESP8285, which is basically just an ESP8266 with embedded flash memory, is also supported. ESP32 Built-in OLED - Heltec WiFi Kit 32 – Robot Zero OneRobot Zero One. An introduction and set-up for the Heltec Automation WiFi Kit 32 development board with OLED display.
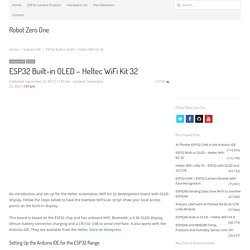
Follow the steps below to have the example WiFiScan script show your local access points on the built-in display. This board is based on the ESP32 chip and has onboard WiFi, Bluetooth, a 0.96 OLED display, lithium battery connector charging and a CP2102 USB to serial interface. It also works with the Arduino IDE. They are available from the Heltec Store on Aliexpress. Setting Up the Arduino IDE for the ESP32 Range New Easy Method. Hackster. ESP32 + HTTP server + WebSockets + Bootstrap + Husarnet + configuration and HTML files on SD.
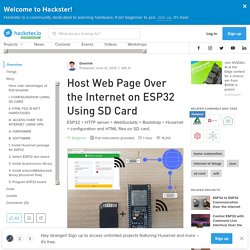
All useful technologies for creating internet controlled devices in one. This project template is a good base for creating internet-controlled devices with a web UI and easy configuration capability. Here main advantages of that template: One of the biggest problems in making connected things is the first configuration. Espressif/arduino-esp32: Arduino core for the ESP32.
ESP8266 & Temperature Sensors DS18b20 with HTTP Server. ESP8266 + ds18b20 + thingspeak+ nodemcu – Vaasa Hacklab. Update: 2016-02-06.
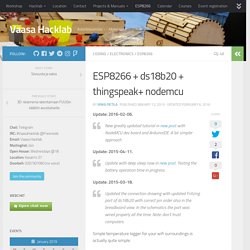
New greatly updated tutorial in new post with NodeMCU dev board and ArduinoIDE. A lot simpler approach. ESP8266WiFi library — ESP8266 Arduino Core 2.4.0 documentation. ESP8266 - jpralves.net. ESP8266E is among the most integrated Wi-Fi chips in the industry.
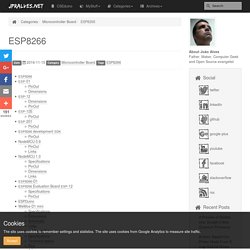
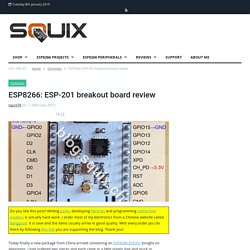
Measuring just 5mm x 5mm, ESP8266EX requires minimal external circuitry and integrates a 32-bit Tensilica MCU, standard digital peripheral interfaces, antenna switches, RF balun, power amplifier, low noise receive amplifier, filters and power management modules - all in one small package. PinOut Dimensions Originally named as ESP-12 this module has come to popularity as ESP-201 after the name clash had been discovered. In good old BASIC line adressing style the creators apparently wanted to make sure that no other name clash would occure and added a safety distance to the numbering scheme;-)It is currently my preferred module for prototyping since it is breadboard friendly and offers similar access to the chip pins as the ESP-12 does.
ESP8266 Development/Breakout board Arrived. Warning: do not connect the DHT11 temperature sensor as indicated in the eBay pictures, it is the wrong way around and will fry your board!
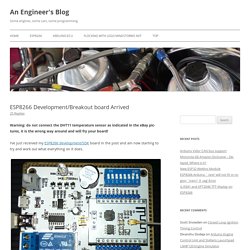
I’ve just received my ESP8266 development/SDK board in the post and am now starting to try and work out what everything on it does. With Relay, RGB LED, Serial to USB chip, DHT11 temperature and humidity sensor, buzzer, and switches I have managed to connect to the board using the on-board USB to Serial interface (CH340 chip). Plugging in to the USB mini port seems to power the board through the on-board 3.3V Voltage regulator (AMS1117 3.3) and the red LED on the ESP8266 daughter board itself powers on, along with a red LED on the main board. Plugging in to the USB micro port, however, doesn’t appear to correctly power the board.
ESP8266 - NURDspace. "File:" cannot be used as a page name in this wiki.
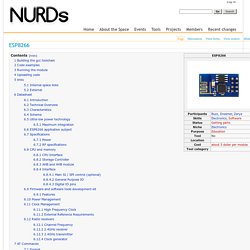
Building the gcc toolchain have a look at the github wiki Code examples Running the module The modules pins only allow 3.3v (use a multi meter to check your serial lines if you are not sure) Connect CH_PD to VCC to make it boot Uploading code The modules pins only allow 3.3v (use a multi meter to check your serial lines if you are not sure) Amazon Dash hack with Raspberry Pi and Python. Typically smart buttons cost £40, but the Amazon Dash Button costs a fiver. With a little tinkering and subversion, Amazon Dash can power anything from smart bulbs to alerts on your family’s smartphones to logging your billable hours. The Internet of Things has two flaws: the name, and the need to get your phone out of your pocket, unlock it, swipe to the appropriate app, and wait for the app to load before you can do perform a basic task, such as turning on a light.
Buttons are handy for a reason: they’re exactly where they need to be, and you can just press them. So if we’re going to have smart things, we need smart buttons. Projetsdiy/esp-01-WiFi-Scanner-ESP-01-OLED-I2C-Display: Scanner WiFi avec écran OLED I2C (SSD1306) sur un ESP-01 (ESP8266) ESP8266, NodeMCU: how to create xbm images for displaying on OLED 128×64 I2C Displays – Squix – TechBlog. Do you like this post? Writing posts, developing libraries and programming online font creators is actually hard work. I order most of my electronics from a Chinese website called Banggood. It is save and the items usually arrive in good quality.
With every order you do there by following this link you are supporting the blog. IoT with ESP8266: ESP8266 Wireless Wifi Module Develop Board 8266 SDK Development Chip. Other interesting board is this board from Electronic Gadget World, a shop on aliexpress.com.If you can not find this board you can buy other good development boards like:1.
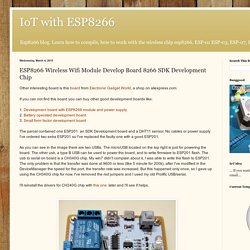
Development board with ESP8266 module and power supply.2. Battery operated development board3. Small form factor development boardThe parcel contained one ESP201 an SDK Development board and a DHT11 sensor. No cables or power supply. I've ordered two extra ESP201 so I've replaced the faulty one with a good ESP201.As you can see in the image there are two USBs. ESP8266: ESP-201 breakout board review – Squix – TechBlog. Do you like this post?
Writing posts, developing libraries and programming online font creators is actually hard work. I order most of my electronics from a Chinese website called Banggood. It is save and the items usually arrive in good quality. IBM Watson IoT Platform. Hackster. Products - BlinkStick Nano. Internet of Things Overview. Hackster. Setting Up Node Red. The hardware I used includes the Raspberry Pi B+ and Texas Instruments Sensor Tag (CC2650). I have a Wi-Pi wireless dongle and IOGEAR blue tooth dongle. I was very happy at the end of the day (okay many days) and finished the build with a nice dashboard from Freeboard.IO.
There are plenty of Tutorials on how to flash an image for the Raspberry Pi. I'm using Jessie that includes Node Red for the project. I ran into issues with version control when trying to install the Sensor Tag Node and had to remove the older version of Node Red. Sensor Tag This is a cool device and includes 10 onboard sensors. Découverte de React Native. On se demande souvent quelle solution mobile hybride choisir quand on démarre un projet et nous avons testé plusieurs frameworks pour explorer les possibilités de chacun. Nous vous présentons aujourd'hui React Native. Votre première app React Native. Cela fait déjà plus d'un an que Facebook a publié la première version de React Native. Longtemps considéré comme une expérimentation sympathique (après tout, il est né lors d'un hackathon), un cycle de release soutenu d'une version majeure toutes les 2 semaines a fait qu'aujourd'hui l'écosystème est suffisamment riche et stable pour déployer une app iOS et Android en production.
#Quels problèmes avec les solutions hybrides ? Des solutions pour développer une application mobile multiplateforme en JS existent déjà : je pense notamment à Cordova ou à son superset Ionic. Wyliodrin STUDIO by Wyliodrin. Home Assistant. 4refr0nt/lora-gw: LoRaWAN Gateway for Raspberry Pi. DeviceHive - Open Source IoT Data Platform with the wide range of integration options. Creators of Cayenne IoT Project Builder - myDevices.com. Realtime Messaging Framework. IoT Analytics - ThingSpeak Internet of Things. SUPLA. Hackster. IFTTT Smart Button. This is a v2 of my original ESP8266 IFTTT Easy Button project. Instead of modifying my original post. I will document the changes here. The big changes are that the module is not enabled until the button is pushed. This brings the battery life to whole new level. The push button "boots up" the module by sending a HIGH signal through a diode to CH_PD.
The second exciting part is that I can configure the WIFI options OTA without having to connect the button to UART. If the button cannot get a valid IP after 10 tries. After connecting to SSID "SmartButton", I can access and enter the credentials of the AP of my choice. To reset the Wifi configuration, all you need to do is hold down the button for about 5 seconds. ARM Board. Télécharger une image Windows CE dans la mini2440 - domodom. Connexion de la carte au PC de développement Le téléchargement d’une image passe par 2 câbles : un câble rs232 et un câble USB. Pourquoi 2 câbles ? La rs232 permet d’accéder au menu du bootloader, l’USB est utilisé pour échanger des fichiers avec la mini2440 (beaucoup plus rapide que la liaison série). Mini2440: Free Board Support Package released.
ARM9 mini2440 / micro2440 FriendlyARM Tutorial - ThaiEasyElec.com จำหน่ายอุปกรณ์อิเล็กทรอนิกส์ (Electronic for Embedded System) Arduino, Raspberry Pi, BeagleBone Black, FriendlyARM, Zigbee (XBee Digi), RFID, Robotic, Sensor, Oscilloscope, Power Supply, Di. Mini2440. Note that many of the pins have several functions which are selected by setting the pinmux in the SoC - I'll discuss that in greater detail in the software section. Also be aware that pins 16 and 24 are also tied to buttons on the board, and many of the pins are also routed to some of the other connectors so don't try to use them for more than one function at a time. Refer to the schematic for further details about potential conflicts. Note that many of the folks using the mini2440 have chosen to completely change their Linux installation. This means choosing a different kernel, a new root filesystem, and in some cases even replacing the Supervivi bootloader with an alternative like u-boot.
I'm not interested in making such extensive changes - the QTopia linux works fine and seems to be fairly well integrated, so I'm happy to continue using it. The most important part of setting up a development environment is to be familiar with working with the linux command line. Alselectro. Friendly ARM–mini 2440 Installing Linux Qtopia. Friendly ARM Mini 2440 is a Single-Board Computer(SBC) built on 400 MHz Samsung S3C2440 ARM9 processor & 3.5” Touch screen LCD is provided with mini 2440. S3C2440 ARM9 Board. Amazon Dash hack with Raspberry Pi and Python. Make a WiFi-Mesh Notifier (with Pictures) I think not everyone is interested in using WiFi mesh technology. ESP8266 - jpralves.net. ThingPulse/esp8266-oled-ssd1306: Driver for the SSD1306 and SH1106 based 128x64 pixel OLED display running on the Arduino/ESP8266 platform.
Mouser France. $10 DIY Wifi Smart Button / Switch. ThingPulse/esp8266-oled-ssd1306: Driver for the SSD1306 and SH1106 based 128x64 pixel OLED display running on the Arduino/ESP8266 platform. ESP8266, NodeMCU: how to create xbm images for displaying on OLED 128×64 I2C Displays – Squix – TechBlog. IoT.