
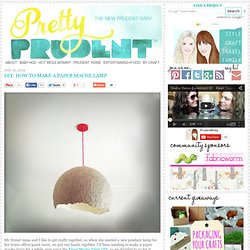
DIY: Summer Lamp Shade Bunting. DIY: How to Make A Paper Mache Lamp. My friend Anna and I like to get crafty together, so when she needed a new pendant lamp for her home office/guest room, we put our heads together.
From $3 IKEA floor mat to flippin' fabulous floor pouf. Wanna know how a couple of these striped rugs become this cushy piece of bum lovin'?

Well, sit down and relax. Let me start from the beginning. A Mini Preview from Real Living April Issue. The April issue of Real Living popped into my radar last night and of course I am in love yet once again!

Every little bit of this magazine is oozing with eye candy from real homes to cool little DIY ideas. Neon Wedding Inspiration. Something about neon just makes me SO happy — the bright colors never fail to add an extra oomph to my day.

Event planner extraordinaire Camden Chitwood of Emerson Events tempered the bright colors with neutral shades, with the help of photographer Amanda Watson on hand to to do each of the handcrafted details justice. All lovely rentals were from Paper Lion and petal tablecloth from Marianne’s Rentals, and delish cake by Madison’s on Main. View all images from this shoot in the gallery Shoot Location: Oklahoma City, OK / Concept, Event and Floral Design: Camden Chitwood of Emerson Events / Wedding Photographer: Amanda Watson / DIY Projects: Camden Chitwood of Emerson Events and Amanda Watson / China, Cake Servers, and Cake Table: Paper Lion / Tablecloth: Marianne’s Rentals / Wedding Cake: Madison’s on Main / Wedding Dress: Sarah Seven / Shoes and Clutch: Ann Taylor / Hair: Brooklyn Harsha of Van Cleef Salon / Makeup: Kati Monier of Duncan Brothers Salon / Model: Amber Dubuc.
Bottle Lamp DIY. When I saw this bottle lamp from Maison Martin Margiela, I thought: I can do this!

So I grabbed that empty bottle of wine and bought a cheap lampshade to match it. This is how it turned out: Why don't you...make pop stick tables? Words Tamara Maynesphotography Craig Wall Turn simple craft sticks into cool functional furniture with this project by Tamara Maynes.

What you need PencilRuler 16mm-thick MDF Blu-TackWooden craft sticks x 700 (packs sold in craft stores) Clear-drying wood glue Spray-on undercoat Black and white spray paint Step-by-step Using pencil and ruler, draw two octagons – one for the base (26.2cm dia.), one for the top (36cm dia.) – onto MDF. The table is built and painted in sections before being joined together. Fai da te una collana color block. Braided scarf. A little while ago my sister told me about these braided scarves and I decided I had to make one.

They were actually pretty easy to make and I think they are so cute. To make:first. Get 70 inches of jersey knit fabric. DIY Weaved Shirt. 7710_32da.jpeg (JPEG Image, 435 × 3307 pixels) D.I.Y. Stiched Chevron Necklace. Do you love the look of hand stitched accessories?

Me too! This D.I.Y. is absolutely adorable and so much fun to stitch up while watching a movie at home with hot tea and popcorn. Enjoy... Supplies Needed: white cotton fabric, an embroidery hoop, a pen, gold leather or faux leather, embroidery thread, needles, a chain, jump rings and a pair of jewelry pliers 1. Pamela Love. Créatrice de bijoux. Wednes-diy. UPDATE: This post originally ran on March 23 2011, but with summer winding down we wanted to bring it back up for some late summer inspiration!
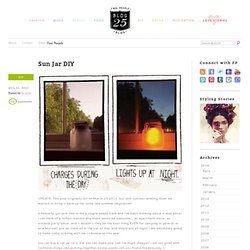
A fellow fp girl sent this to me a couple weeks back and i’ve been thinking about it ever since! I can think of a million reasons why these would be awesome… as apartment décor, as outdoor party décor, and – wouldn’t they be the best thing EVER for camping in general or at a festival? Just let them sit in the sun all day, and they’ll last all night! I am absolutely going to make some to bring with me to bonnaroo this year. Rare Fringe Sleeve Body at ASOS. Perfect Summer Bangle. Here's a fun tutorial on how to make a message bangle that's one-of-a-kind, done in the sun, waterproof and weatherproof.

Even after several trips to the beach, it won't fade or wash off! Essentially, it's the Perfect Summer Bangle. Used in this tutorial: Inkodye Red Prepare. All you'll need for this project is a raw wooden bangle (we got ours from DIYBangles.com), a black paint marker, plastic wrap, and some Inkodye! Transcribe. Perfect. Pour. Brush. Wipe. Wrap. Tape. Expose. Develop. Cut. Reveal. Wash. Enjoy. For Makers in Small Spaces: Build a Rolling Pegboard Tool Cart.
Cool Copper Projects Warm metallic hues are easy to love but often pricey. When you create the look... Easy Doily Bowl Craft a decorative bowl from a doily picked up from a flea market, antique... Google Image Result for. DIY Design Community « Keywords: DIY, Inspiration, how to, tutorial. Great for small spaces, big entryways, studios, or even guest rooms, this rolling coat rack is the perfect pop of color for any space. Also? It's totally DIYable and costs less than dinner and a movie! Heather Peterson, known around the interwebs as hrrrthrrr, created this cheerful little coat rack from common hardware store items and has a slew of great ideas for how to use it: for laundry, to plan outfits, to keep sewing projects organized, and, of course, as a coat rack. Diy projects.
Search results for mason jars. Sunday Reading: Marie Claire Idées. DIY Tuesday.