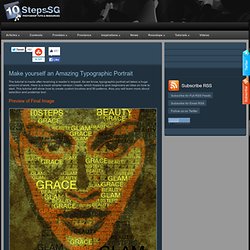

Make yourself an Amazing Typographic Portrait. The tutorial is made after receiving a reader’s request.

As we know, typographic portrait art takes a huge amount of work. Here is a much simpler version I made, which hopes to give beginners an idea on how to start. This tutorial will show how to create custom brushes and fill patterns. Also you will learn more about selection and posterize tool. Preview of Final Image Download a nice portrait image here. Using the Pen tool, crop away the black areas on both sides below the ears. Hide the Portrait layer for awhile by clicking the Eye icon on the left beside the layer. Making Complex Selections in Photoshop - DesignFestival » For Web Design Trends. Making precise selections in Photoshop is an essential skill that every designer needs.

99 Excellent Examples of Forced Perspective Photography. Forced perspective is a technique that employs optical illusion to make an object appear farther away, closer, larger or smaller than it actually is.

It is used primarily in photography, filmmaking and architecture. It manipulates human visual perception through the use of scaled objects and the correlation between them and the vantage point of the spectator or camera. There are many ways to attack photography and some are much more expensive than others. Here in this showcase, we presenting a Stunning collection of Forced Perspective Photography and Pictures taken by various artists in which all pictures are linked to the author’s pages. You may want to explore further works of the photographers we’ve featured below.
All HTC phones. 500px / Home. - StumbleUpon. Free Photoshop Tutorial - Background blur. In the sample picture, depth of focus is large, and so all the details are sharp.

We'd like to emphasize the monument in the foreground by blurring the background. On the tools palette, change to Quick Mask mode by clicking the icon marked with a red circle. Nothing visible happens, but in this mode, you can use a properly configured brush to mask out the areas you want to leave sharp. Later changes will not affect the masked areas.Change to the Brush tool (press B), select a mid-sized brush (we have used a 45-pixel one), and carefully cover the areas you want to leave unchanged. By default, covered areas display with a red veil. After the mid-sized brush, select a smaller one with a sharp edge, and cover the sensitive areas and the edges of the shape more carefully.
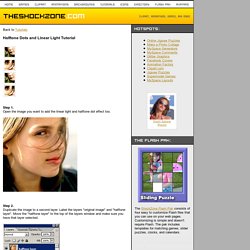
After finishing the mask, click the icon to the left of Quick Mask, or press Q to change back to Normal mode. After applying the Blur effect, press Ctrl+D to remove the selection, and finally, save the image. Halftone Dots and Linear Light Tutorial. Back to Tutorials Halftone Dots and Linear Light Tutorial Step 1.

Open the image you want to add the linear light and halftone dot effect too. Step 2. Duplicate the image to a second layer. How To Make Digital Photos Look Like Lomo Photography. A Post By: Darren Rowse The following tip on getting digital images to look like Lomo Images was submitted by DPS reader – Frank Lazaro.

You can see his photography at his Flickr page and see some of his Lomo shots here NB: most of the shots in this post can be enlarged by clicking them. update: once you’ve read this tutorial and had an experiment with the technique head to our Forum to share some of your results. From the first time I saw a photo that looked like this, I wanted to shoot one of my own. But, for the longest time I couldn’t figure it out how people took photos look like this. Then one day searching the web, I realized I needed a Lomo LC-A camera.
Low and behold I went out and bought 2 of these babies. I searched and searched and after trying several different Photoshop methods, I finally came up with my own using a mix of different techniques. Get Free Weekly Digital Camera Tips via Email. Photoshop - StumbleUpon. 30 Christmas Holiday PSD & AI Flyer Templates.
Still life: Bent objects & OWNI.eu, News, Augmented - StumbleUpon. UPDATE: The Return of Bent Objects Wires transform these objects from inanimate to hilarious works of art.

Little polish girl McDonalds as Sculpture Materials Yeah, this is where those come from. 20 Fantastic Photoshop Manipulation Tutorials -2010 - Photoshop Website - Tutorials,Brushes & more.. - StumbleUpon. Achieving a Vintage Look Through Color Tones in Photoshop CS - StumbleUpon. By Guest Contributor Anna Gay Photographers are often striving for a “vintage” look in their photos, and even though there are endless ways of achieving a vintage look, there are a couple of characteristics to keep in mind.

First of all, the color tones in a vintage photo often lean towards either a blue or a red hue, or a cross-processed look. Vintage photos also have an element of noise or grain that can be achieved through textures, and also a certain amount of vignetting around the edges of the photo. In this tutorial, we will look at adjusting color tones and adding vignettes. This photo is the result of adjusting the color curves, adding two vignettes, and a color fill, which we will walk through step-by-step. First, open your photo in Photoshop and make sure your foreground color is set to white in your side tool bar. You will see the above dialogue box.
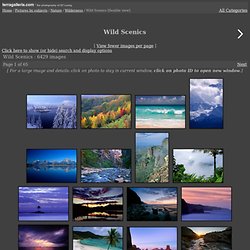
Wild Scenics Pictures - StumbleUpon. [ View fewer images per page ] Click here to show (or hide) search and display options [ For a large image and details: click on photo to stay in current window, click on photo ID to open new window.]

15 Best Photoshop Light Effect Tutorials. A Showcase of Workstations that'll Make You Jealous.