
Grace and light: Paper Punch Garland. Sewing 101. Oh… am I ever so happy to introduce Kim from Retro Mama to you.

For the next four Mondays, she’ll be teaching Craft Snob’s fresh ‘petite series’ on Sewing 101. Peek, snoop or loiter around her retro pattern shop and gobble up a few of these cuties… - Sara P.S. Here’s Part 2, Part 3, and Part 4. Hi everyone! The Sewing Machine First off, you don’t need a fancy or expensive machine to have a blast sewing and to be able to do a ton of techniques with great results.
Presser Feet Many machines come with several basic presser feet, but you may need to purchase additional feet if they aren’t already included (yours may look a little different from my photo, as presser feet do vary some by manufacturer). A. Sewing Machine Needles For the purpose of these introductory lessons, we will be using sharp/regular point needles. Thread Thread is a little bit of a tricky subject as many folks tend to be very loyal to one brand and swear that all other threads are junk.
Essential Sewing Tools. The Shirt. As with all these designs, try to start with a relatively clean, crisp bill. It will make it much easier. All folds should be sharply creased. It helps to go over the fold with a fingernail on a flat, hard surface. Start by folding the bill precisely in half lengthwise. (I prefer to fold in toward the front of the bill. Fold the bill one quarter of the way in from each side lengthwise. Turn the bill over. Turn the bill over again. Fold a little less than one third of the bill lengthwise from the opposite end as shown.
Now you will fold inward in the same direction, tucking the previous fold under the "collar" created in step 4. Gently unfold the previous two folds, keeping the creases. (This step is hard to describe, but it is actually fairly easy.) (This is a close-up of what the fold should look like when complete.) (This is what it should look like after both sides are complete.) When you re-tuck the fold you've been working on back under the collar, you're done! DIY Doily&Lamp. Diy and Crafts. How to make gift bags from newspaper.
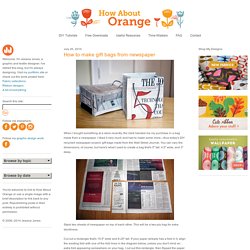
When I bought something at a store recently, the clerk handed me my purchase in a bag made from a newspaper.

I liked it very much and had to make some more—thus today's DIY recycled newspaper project: gift bags made from the Wall Street Journal. You can vary the dimensions, of course, but here's what I used to create a bag that's 5" tall, 4.5" wide, and 3" deep. Stack two sheets of newspaper on top of each other. This will be a two-ply bag for extra sturdiness. Cut out a rectangle that's 15.5" wide and 8.25" tall. Gift Box. Gift Box This box made from two bills. The bills/box can be the gift itself, but it is also just about the right size for a ring box. (Perhaps a dollar-bill ring?) Get yourself two fairly new, crisp bills. Older "soggier" bills are much harder to work with.
Lay the bill on a flat surface, face up. Fold the note top-to-bottom just to the right of the portrait, then unfold. Starting at the top left corner (as illustrated), close the top third fold to about 90 degrees. Inside this corner will be a remaining portion that you will crease along the natural 45 degree line to complete the corner. Complete the previous step for the other three corners. For each tab, pull it inside the box, folding so that the natural edge of the box is pulled slightly over inside the fold. Do this evenly for both tabs. For the two other sides, evenly fold over the edge of the bill.
You should now have an open box. I do not like the way that looks, so I close the box another way as illustrated below. Back. Page corner bookmarks. This project comes to you at the request of Twitterer @GCcapitalM.

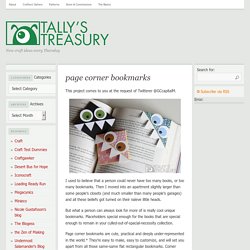
I used to believe that a person could never have too many books, or too many bookmarks. Then I moved into an apartment slightly larger than some people’s closets (and much smaller than many people’s garages) and all these beliefs got turned on their naïeve little heads. But what a person can always look for more of is really cool unique bookmarks. Placeholders special enough for the books that are special enough to remain in your culled-out-of-spacial-necessity collection. Page corner bookmarks are cute, practical and deeply under-represented in the world.* They’re easy to make, easy to customize, and will set you apart from all those same-same flat rectangular bookmarks.