
Converting a Standard Camera to a VRay Camera by VRay Guide. V-Ray ‘Decisive Moment’ CRASH. CGSociety :: Winner's Tutorial 17 August 2012, by Darko Vucenik When this competition came along, it looked like it was tailor-made for me.

I just recently started to learn V-Ray, a personal quest to give myself an opportunity to push rendering and modeling skills to a new level. Inspired by the cool contest header, featuring the famous inventor Nikola Tesla (as illustrated by Toni Bratincevic), my initial ideas explored famous, world changing inventors like Einstein, Newton and their work. However, none of the ideas featured really pinpointed a single ‘decisive moment’ so I decided to go with something different. Modeling Since this is the picture of a car crash it seemed logical to start building the car first. I used the standard 3ds Max poly modeling features. Using this method you can cut, extend and move your polys around without worrying that you will mess up the smooth curvature of the car's body.
With the car was finished, I began to block in the characters. Pharmacy direct viagra >>>> Low Prices! Best Offers! Big Discounts! THE BEST PRICE! Brief introduction Depth of field can prove to be a very effective way to add a “special” touch to an architectural rendering, or simply to focus the composition on a specific element.
Technically speaking, there are several possibilities to add dof to an image. One way to do this is to add it from the vray camera rollout (if you are using vray), but keep in mind that the rendering times can go through the roof, so unless you have a render farm you may not want to consider this option. Another way to achieve this type of effect is by adding it from the “effects” tab in 3d max. Even if this is way faster (being just a post-processing effect) I always feel the need to have more control over it regardless of the camera position or direction. Rendering a separate zdepth pass So here’s the way I do it. Showthread. V-Ray Lesson 8. Fake environment: For best environment map, best to us HDRI format.
Best to use when its just a separate object, not in the interior. Go to materials, go to open library and select from the list VrayHDRI and drag to material slot. In the browse, select the HDRi image file. By map type, select spherical environment. If you want to rotate and look around the picture, you can modify horiz. or vert. rotation. Blending material: VrayBlendMtl - mostly used in industrial design by mixing a couple of layers of material.
Vray2sidedMtl: This allows a material to pass light through itself. How to make christmas lights. There is a problem, the lights don't shine. For a final render, set a higher picture size and in the Irradiance map, modify the preset to a medium or higher and in settings increase the noise threshold. To set up an environment for a skylight: Select half a sphere that works as the sky and the forest, right click and select object properties. You can also set render presets. Hair and Fur - VRay for 3ds Max Manual. VRay Tutorial - Studio Lighting Explained (3ds Max + V-Ray) V-Ray Tutorial - Studio Lighting (3ds Max)Free 3ds Max + V-Ray Tutorials by CG Artist, Géza Kádas CGIndia Feature In this tutorial i will tell you the method of studio lighting.
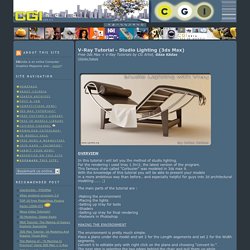
For the rendering i used Vray 1.5rc3, the latest version of the program. This famous chair called "Corbusier" was modeled in 3ds max 9. With the knowledge of this tutorial you will be able to present your models in a more ambitious way than before.. and especially helpful for guys into 3d architectural modeling...... ;) The main parts of the tutorial are : -Making the environment -Placing the lights -Setting up Vray for tests -Shaders -Setting up Vray for final rendering -Postwork in Photoshop MAKING THE ENVIRONMENT The environment is pretty much simple. We will use a Turbosmooth modofier on the plane, but to controll the way of smoothing we have to chamfer a few edges before. Now we are able to use the turbosmooth with 2 Iterations. VRayEnvironmentFog parameters. General parameters Fog color - defines the color of the fog when it is illuminate by light sources.
You can also use a texture map to drive the fog color. Fog distance - controls the fog density. Tout sur la DOF avec une Vray Physical Camera. La profondeur de champ… outil ultime du photographe c’est surement l’un des meilleurs moyens de booster vos compositions.
Je vais donc tenter de vous expliquer simplement comment utiliser la Vray Physical Camera pour reussir caler votre DOF (Depth of Field). Il est egalement possible de sortir une passe de Z-Depth pour faire ca « après » et gagner en temps de rendu. Mais franchement, ca reste mon avis, et depuis peu, rien ne vaut la DOF directememnt dans V-Ray. Avant tout, la petite definition Wikipedia : Pour un réglage et une utilisation donnés d’un appareil photographique, la profondeur de champ correspond à la zone de l’espace dans laquelle doit se trouver le sujet à photographier pour que l’on puisse en obtenir une image que l’œil (ou un autre système optique) acceptera comme nette.
L’étendue de cette zone dépend des paramètres de la prise de vue ; notamment de la distance de mise au point, de l’ouverture du diaphragme et des dimensions de la surface sensible. . . Compositing V-ray Render Layers in Photoshop. Vray et normal map - V-Ray Matériaux. Vray skin shader expérimentation avec le sss2 !! - Page : 2 - 3D - Work In Progress.