
Lesson 0. Getting Started. Adafruit Learning System. Learn.adafruit. The original Adafruit Motorshield kit is one of our most beloved kits, which is why we decided to make something even better.

We have upgraded the shield kit to make the bestest, easiest way to drive DC and Stepper motors. This shield will make quick work of your next robotics project! We kept the ability to drive up to 4 DC motors or 2 stepper motors, but added many improvements: Instead of a L293D darlington driver, we now have the TB6612 MOSFET driver: with 1.2A per channel and 3A peak current capability. It also has much lower voltage drops across the motor so you get more torque out of your batteries, and there are built-in flyback diodes as well. Instead of using a latch and the Arduino's PWM pins, we have a fully-dedicated PWM driver chip onboard. Completely stackable design: 5 address-select pins means up to 32 stackable shields: that's 64 steppers or 128 DC motors! Lots of other little improvements such as a polarity protection FET on the power pins and a big prototyping area. Proto Shield for Arduino. This is a design for an open-source prototyping shield for Arduino NG/Diecimila.
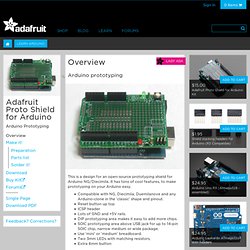
It has tons of cool features, to make prototyping on your Arduino easy. Compatible with NG, Diecimila, Duemilanove and any Arduino-clone in the 'classic' shape and pinout.Reset button up topICSP headerLots of GND and +5V rails.DIP prototyping area makes it easy to add more chips.SOIC prototyping area above USB jack for up to 14-pin SOIC chip, narrow medium or wide package.Use 'mini' or 'medium' breadboard.Two 3mm LEDs with matching resistors.Extra 6mm button Ideas for use Larger breadboard for tons of working space!
Tiny breadboard fits nicely on top. Adafruit Industries, Unique & fun DIY electronics and kits. Circuits.io. Arduino Tutorial #1 - Digital Inputs and Outputs - Button & LED. How to control a Servo. In this one, servo is programmed to be controlled by two buttons, one turns servo to the left and the other one turns it to the right.
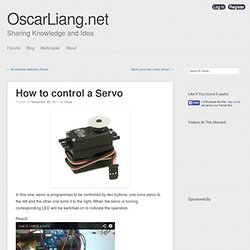
When the servo is turning, corresponding LED will be switched on to indicate the operation. Result: Because Arduino has built-in library for controlling servo, which makes servo a really easy kit to use. In this project, I will be using a servo to turn the IR sensor around constantly. This is the circuit Diagram: This is the code: #include Servo myservo; // create servo object to control a servo // a maximum of eight servo objects can be created int pos = 90; // variable to store the servo position const int maxDeg = 160;const int minDeg = 5;
Sim Vim Globe - Cockpit Simulation. How to use continuous rotation servos with Arduino – FoxyTronics Learning. Arduino Servo Tutorial 1 of 2. Driving Big Stepper Motors with Arduino. Any stepper motor is great, but the big ones are amazingly impressive.
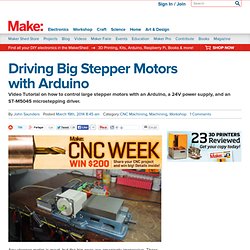
There are numerous stepper drivers dedicated for use with Arduino, but they are generally limited to Nema 17 and Nema 23. Luckily, using larger steppers (Nema 34 in this instance) with Arduino is still easy. Large steppers give you an amazing combination of precision, control and torque that can be useful for anything from home automation to DIY CNC machines. In these two videos, we walk through the setup of the motor, driver, and Arduino. Part 1: Test Code, Increase the Load In this video we test code from three different Arduino programs to drive the large NEMA 34 stepper, then increase the load on the shaft to see how the stepper handles the additional weight. Part 2: Fabricate a Steel Plate In the next video, we fabricate a test plate in the machine shop to test the motor speed and responsiveness, experimenting with what works and doesn’t.
Circuit, BOM and Code How to Wire the Circuit Bill of Materials. Arduino Shield List. Arduino Tutorials – Chapter 42 – Numeric Keypads. Learn how to use various numeric keypads with your Arduino. This is chapter forty-two of our huge Arduino tutorial series. Updated 16/12/2013 Numeric keypads can provide a simple end-user alternative for various interfaces for your projects. Or if you need a lot of buttons, they can save you a lot of time with regards to construction. We’ll run through connecting them, using the Arduino library and then finish with a useful example sketch. Getting Started Numeric keypads are available from many retailers, and no matter where you get them from, make sure you can get the data sheet, as this will make life easier when wiring them up.
Again, the data sheet is important as it will tell you which pins or connectors on the keypad are for the rows and columns, for example the black keypad shown above. This can be done using the continuity function of a multimeter (the buzzer). Furthermore some keypads will have the pins soldered to the end, some will not. Home.