
Illustrator Training Course January 2013. Learn Adobe Illustrator in 30 Days Crash Course – FREE January 02, 2014 at 17:07 Illustrator Facebook Twitter Google+ Linkedin Pinterest Reddit Last updated on 1 August 2017 This is the most popular FREE Illustrator training course created for beginners interested to learn Adobe Illustrator.

In this Illustrator training course, I will not be drilling down in detail how each feature works. This is one of the best courses for starters and beginners. Remember to subscribe to my RSS feeds for new upcoming illustrator tutorials and tips. Update August 2017 – More than 8,000 users have completed this Illustrator training course and recommended it to their friends! Illustrator Training – Week 1 Day 1: What is Illustrator Day 2: Getting Started in Illustrator Day 3: Drawing Basic Shapes Day 4: Drawing with Pencil Tool Day 5: Drawing with Pen Tool Day 6: Weekend Break Day 7: Weekend Break Thanks for supporting this Illustrator training course! Be Sociable, Share! Social Media Icons. Teach Yourself Graphic Design: A Self-Study Course Outline.
Fortunately, it isn’t required to go to design school in order to be a graphic designer.

A good foundation in graphic design history, theory, and practical application will help you hit the ground running. There are plenty of resources available in which you can learn graphic design on your own. Don’t set your expectations to high at first, as it will take enthusiastic study for years to become great. You can do it though! If you would like to learn graphic design from the ground up, through self directed study, then this article lists some great resources that will get you started with your design education. 1.
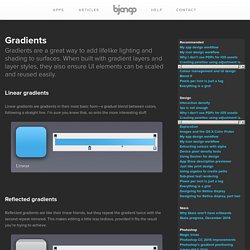
There are a few graphic design principles that effect every project you’ll create. Shape, Spacing, and Rhythm I remember first learning these basic design principles , and they seamed so foreign at first. The Principles of Design by Joshua David McClurg-Genevese What is Graphic Design? Color, Texture, and Imagery Principles of Color Design by Wucius Wong. Gradients. Linear gradients Linear gradients are gradients in their most basic form—a gradual blend between colors, following a straight line.

I’m sure you knew that, so onto the more interesting stuff. Reflected gradients Reflected gradients are like their linear friends, but they repeat the gradient twice with the second repeat mirrored. This makes editing a little less tedious, provided it fits the result you’re trying to achieve. Radial gradients Radial gradients start from the center (or any chosen point) and grow outward in a circular pattern. Angle gradients Angle gradients can be a great way to mimic environmental reflections found on highly polished metallic objects. Adobe Photoshop CS4 Basics Video Lecture Course. Learn the Basics of Photoshop: The Complete Guide.
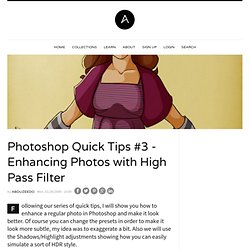
Making Complex Selections in Photoshop. Tutorials. 11 Great Photoshop Photo Effects Tutorials. Photoshop Quick Tips #3 - Enhancing Photos with High Pass Filter. Following our series of quick tips, I will show you how to enhance a regular photo in Photoshop and make it look better.

Of course you can change the presets in order to make it look more subtle, my idea was to exaggerate a bit. Also we will use the Shadows/Highlight adjustments showing how you can easily simulate a sort of HDR style. Step 1 Open a regular photo in Photoshop. I used a photo of a cat that I found on sxc.hu Step 2 Duplicate the layer and go to Filter>Other>High Pass. Step 3 Duplicate the High Pass layer. Step 4 Duplicate the original photo and change its Blend Mode to Screen.
Step 5 Group all layers and convert them to Smart Objects, Layers>Smart Objects>Convert to Smart Objects. Conclusion This is just one way to enhance your photos, you can use the Unsharp Mask filter as well. Click Here for Full Preview. Illustrator Training Course. Create A Grisly Zombie Illustration With A Pen Tablet In Illustrator. Halloween is almost here, and I’m sure some of you need to do some last minute graphics for a client project or maybe so graphics for your Halloween party.

So in this intermediate tutorial you will learn how to create a zombie illustration with a pen tablet from a photo. Have fun utilizing the Blob Brush and Eraser tool in recreating this tutorial or apply these techniques to other ghoulish illustrations! Final Image Below is the final zombie illustration we will be working towards. Tutorial Details Program : Adobe Illustrator CS4 (This tutorial use the Blob Brush, a tool specific to CS4. Step 1 First, you need to find a scary or angry portrait to trace. Step 2 Create a new document in Illustrator, go File > Place, navigate to the folder with your image, and click the Place button.
Step 3 Once placed, use the Selection tool (V) and scale the image to your desired size.