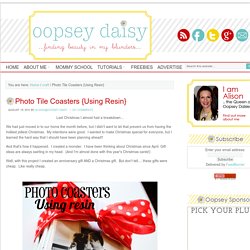

Photo Tile Coasters {Using Resin} Last Christmas I almost had a breakdown...

We had just moved in to our home the month before, but I didn't want to let that prevent us from having the holliest jolliest Christmas. My intentions were good. I wanted to make Christmas special for everyone, but I learned the hard way that I should have been planning ahead!! And that's how it happened. I created a monster.
Well, with this project I created an anniversary gift AND a Christmas gift. While I was in Utah, my sweet cousin Michelle showed me a couple of projects using resin. Here's how I made these photo coasters... I started out with a trip to Home Depot. Next, I ordered some photos. Only 13 cents a print at Costco! I used a regular old Elmer's glue stick to paste each picture onto the tiles. I won't give a full tutorial on using resin because each product is a little different. After mixing the resin with the hardener, I just poured it on! Then it took them a full 24 hours to harden up! All done! Now these are stinkin' cute!!
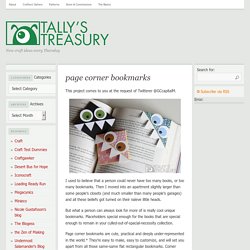
Page corner bookmarks. This project comes to you at the request of Twitterer @GCcapitalM.

I used to believe that a person could never have too many books, or too many bookmarks. Then I moved into an apartment slightly larger than some people’s closets (and much smaller than many people’s garages) and all these beliefs got turned on their naïeve little heads. But what a person can always look for more of is really cool unique bookmarks. Placeholders special enough for the books that are special enough to remain in your culled-out-of-spacial-necessity collection. Page corner bookmarks are cute, practical and deeply under-represented in the world.* They’re easy to make, easy to customize, and will set you apart from all those same-same flat rectangular bookmarks. If you like this tutorial, here are a couple others that might be up your alley.
For the monster-loving adults in the room, try some googly-eyed paper monster wine charms. What you’ll need: Putting it all together: 1) Follow steps 2 and 3 from above. Holder for Charging Cell Phone (made from lotion bottle) My husband and I both have cell phones.

And both of us have phone chargers. And that means lots of obnoxious cords. You never know when one of us may be moving phone cords around, to give our phones an extra charge while we’re chatting away……… or trying to charge our phones up before running errands or something. Needless to say, those phone cords seem to be everywhere…..and are generally in the way and hanging all over the floor. (Okay, and how about when you’re in a hotel or visiting family/friends.
I was looking around on the internet for a solution and found this. It made the perfect little holder for my cell phone while it’s being charged. Holder for Charging Cell Phone And no more phone hanging down from the outlet while in this room or that room……..the cord and phone are now up off the ground, and tucked away into the little holder, while the phone drinks up a full charge. If you look closely, you can see that the orange print is fabric. And turns out, it’s pretty useful. DIY Doily&Lamp - StumbleUpon. Glowing jar project – varázslat a lakásban (EN/HU) Stencil with freezer paper (harry potter tee)... - StumbleUpon. Yes, I am a nerd.

I came up with a brilliant idea for a Harry Potter t-shirt and I couldn't resist. "Expecto Patronum! " However, you can make whatever kind of design you want with a freezer paper stencil. It doesn't have to be Harry Potter related. (Although it would be awesome if it was.) I learned about the joys of freezer paper back in my early college days. Basically, freezer paper is backed with a plastic coating that will stick to soft surfaces when ironed, but it peels off cleanly and easily. To make a sweet t-shirt you will need: paper & pencil a t-shirt an iron a piece of cardboard or poster board fabric paint & brush Start by drawing your design on some regular old paper. My design kept getting bigger, so I taped two sheets together.
Next, place your design underneath a sheet of freezer paper and trace it neatly with a sharpie. The marker gives your lines greater width making it easier to cut them out and paint them in later. Important: Set these shapes aside.