
4 Key Lightroom Sliders That Will Supercharge Your Photos. Lightroom is kind of like a Swiss Army Knife or, better yet, a Leatherman Wave, in that it does so many things and is an invaluable program for many photographers–amateur, professional, or anywhere in between.

Regardless of whether you’re the kind of person who prefers presets, or someone who likes scooting sliders, there are four options hidden in plain sight, right on the Basic panel of the Develop module, that can dramatically enhance almost any picture. It took me a few years to learn to use these sliders properly, and even now I am still figuring out new ways to work with them, in combination with other options in the Develop module to get my pictures looking just the way I want.
But, now I am at a point where adjusting these four options is the very first thing I do on almost every single photo. They’re that useful for me, and could be for you too. The four key Lightroom sliders are: HighlightsShadowsWhitesBlacks Histogram of original unedited image. #1 – Highlights slider. How to Transform a Bad Snapshot Into 'Fine Art' with Lightroom. The 6 Most Important Things You Need to Know about Lightroom's Develop Module.
Lightroom is powerful, but it’s also complex and has a steep learning curve.

If you feel overwhelmed by all the options, there’s great value in taking a simple approach and learning to use the tools that are most useful first. Leave the more advanced features until you have more experience. With that in mind, I’ve put together this list of the six most important things you need to know about Lightroom’s Develop module. Learn these and you will be well on the way to Lightroom mastery. 1. This is the most crucial thing to set up, as everything you do to your photos in the Develop module (not to mention metadata changes like Collections, flags and keywords) is stored in the catalog.
Photography Tips, Learn Photoshop Tricks. Adobe Photoshop Layers explained. Here is a Layers crash course for you.

Layers were introduced in Photoshop 3.0. This totally revolutionized Photoshop. For the first time you could do complex compositions easily without having to be a channels guru. I remember before layers, if a client wanted to make changes to a composition, or even change a font you were in big trouble. This article will teach you what layers are and what all the part in the Layers panel do.
Photoshop Tool Basics. This is a quick summary of Photoshop’s Tools palette with a description of each tool’s functions and shortcuts.

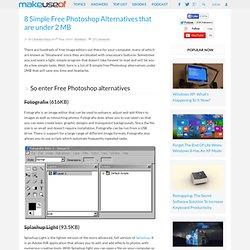
Great for those brand new to Photoshop. I decided to start at the beginning. The very beginning. Adobe Photoshop CC tutorials. 8 Simple Free Photoshop Alternatives that are under 2 MB. There are hundreds of free image editors out there for your computer, many of which are known as “bloatware” since they are bloated with unecessary features.

Sometimes you just want a light, simple program that doesn’t take forever to load and will let you do a few simple tasks. Well, here is a list of 8 simple free Photoshop alternatives under 2MB that will save you time and headache. Fotografix (616KB) Fotografix is an image editor that can be used to enhance, adjust and add filters to images as well as retouching photos. Fotografix does allow you to use layers so that you can even create basic graphic designs and transparent backgrounds. Splashup Light (93.5KB) Splashup Light is the lighter version of the more advanced, full version of Splashup. I.Mage (850KB) i.Mage is a unique small yet fast graphics editor that lets you do easy and precise pixel editing.
Paint.net (1.6MB) Learn the Basics of Photoshop in Under 25 Minutes. Adobe Photoshop CS5 Basics Guide – Interface and Tools Review. With all the advanced Photoshop tutorials we’ve been making here on groovyPost, we figured it probably made sense to take a step back and review some of the basics for those of you who might not “yet” be experts… So over the next few weeks were going to be working on a series of groovyPost’s covering all the basics for Adobe Photoshop CS5.

The goal of the series is to break things down to the most basic level so even those who have never used Photoshop before can get comfortable with this great app. To kick things off, our Photoshop expert DW96 has created a groovy Video / Screencast which walks through the high level basics of the Photoshop CS5 Interface and each of the basic tools / functions you should become familiar with on the Photoshop toolbar. The video and the write-up below will not dig very deep into any of the tools as we’ll cover each in detail in later groovyPost’s. So with that being said, let’s jump right in! Step 1 – Setup your own Workspace Ruler – Captain Obvious here! What is Adobe Photoshop Lightroom? Post-processing is an unavoidable, inseparable part of professional photography today, be it photojournalism or fashion photography.

Because of that, choosing the right software tool for post-processing your work efficiently is as important as having the right camera and lens combination for the job. It is no surprise that demand for such flexible and powerful software is met with some serious contenders. Learn the Basics of Photoshop: The Complete Guide.