
Polka Dot Cottage Category Archive for : tutorials. Everyday Cardigan KAL: finishing up!

The knitting is complete, so today we’ll wrap things up by talking about finishing: weaving in ends, sewing on buttons, blocking, etc. continue reading "Everyday Cardigan KAL: finishing up! " Everyday Cardigan KAL: the other sleeve Woo hoo! After this sleeve, the knitting is completely finished! Continue reading "Everyday Cardigan KAL: the other sleeve" Everyday Cardigan KAL: Underarm increases and more of the body Today, we’ll do one last increase row, and then embark on what may be the most boring part of the whole project. Continue reading "Everyday Cardigan KAL: Underarm increases and more of the body" Everyday Cardigan KAL: Separating sleeves and starting the body At this point you should be finished with the yoke and ready to take the sleeve stitches off of the needle.
How To Make A Ribbon Rosette Brooch! Cute Bat In Your Hair. Make Fabric Flowers. Let’s just jump right into making this flower… Start with a piece of fabric 3 inches wide by 24 inches long. Twist it really tight. Fold it in half and it will twist together on its own. Hot glue the unfolded end under to create the center of the flower. Continue wrapping around until you get to the folded end, gluing periodically. The real deal: It cost less than $0.30 to make one flower. Are you addicted to making fabric flowers yet? Go and be pretty, Free People Clothing Boutique Blog. UPDATE: This post originally ran on March 23 2011, but with summer winding down we wanted to bring it back up for some late summer inspiration!

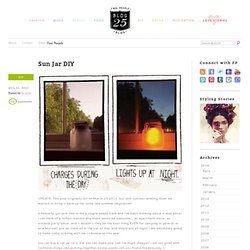
A fellow fp girl sent this to me a couple weeks back and i’ve been thinking about it ever since! I can think of a million reasons why these would be awesome… as apartment décor, as outdoor party décor, and – wouldn’t they be the best thing EVER for camping in general or at a festival? Just let them sit in the sun all day, and they’ll last all night! I am absolutely going to make some to bring with me to bonnaroo this year. you can buy a sun jar here, but you can make your own for much cheaper! What you need: a mason jar with a clear glass lid like this one from ikea, a solar garden light like the ones pictured above, which i found here, adhesive and glass frosting spray. start by spraying the inside of the jar with the frosting spray – this will help diffuse the light and give it a warm glow. don’t spray the lid though! Last image. Page corner bookmarks. This project comes to you at the request of Twitterer @GCcapitalM.

I used to believe that a person could never have too many books, or too many bookmarks. Then I moved into an apartment slightly larger than some people’s closets (and much smaller than many people’s garages) and all these beliefs got turned on their naïeve little heads. But what a person can always look for more of is really cool unique bookmarks. Placeholders special enough for the books that are special enough to remain in your culled-out-of-spacial-necessity collection. Page corner bookmarks are cute, practical and deeply under-represented in the world.* They’re easy to make, easy to customize, and will set you apart from all those same-same flat rectangular bookmarks. If you like this tutorial, here are a couple others that might be up your alley. For the monster-loving adults in the room, try some googly-eyed paper monster wine charms. T-Shirt Bracelets. SATURDAY, JUNE 4, 2011 | Comments: 45 Brightly colored t-shirts that are too small for my daughters now, have found new life as bracelets.

For this project you will need some old t-shirts and a bunch of bangle bracelets. Try using old bangles that you already own, check thrift stores or pick up some up for a few dollars at Target, Walmart – or even the sale bins at Old Navy. Cut t-shirt in 1/2" to 1" wide strips. Depending on the thickness of the bangle – a thick bracelet will need thicker strips. Loosely tie one end of the t-shirt strip to the bangle and start wrapping fabric around bracelet – the tighter the better.
Wrap fabric all the way around until you meet the first knot – untie the knot and tie both ends together to close. How to Make Clothing Buttons from Shrink Plastic… This tutorial is an old one of mine that’s too good not to share again.

Since posting the first time, I’ve had lots of questions about these buttons which will hopefully be answered in this revised post. Equipment. Cargo Scarf: Free your hands, and your mind will follow! All Featured Projects. Adventures in home-making: The world's best sewing tutorials in no particular order. Alina's Adventures sew everything A P indicates a printable tutorial or pdf pattern.

An F indicates a personal favorite.
Sewing. Dance. Future Hair Fun. Crafts. Nails.