
2,000 Suspended Dandelions by Regine Ramseier. Back in September I posted a photograph of an unknown art installation that seemed to show numerous dandelions hanging upside down in a small white room.
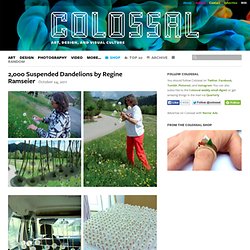
At the time I was unable to investigate any further and it seemed destined to remain a mystery. That is until shinyslingback did the requisite leg work and discovered the piece was by German artist Regine Ramseier as part of ArToll Summer Lab 2011. I didn’t stop to think of what it might take to successfully transport 2,000 un-puffed dandelion plants into a building and then suspend them one by one, but this walkthrough of the entire process is really sublime. Apparently the flowers were first treated with a gentle adhesive before being placed in a special palette Ramseier designed to fit in the back of her car.
After transport the entire palette system was moved into the room and the flowers were removed and hung one by one. Transferring an Image with Gel Medium. Journaling: Transferring Images with Con-Tact Paper. You can make journal pages much more interesting by layering multiple images and text.

There are many ways to transfer an image onto a page….so I’ll be doing several posts with different techniques. Below I’ll show you how to use clear Con-Tact paper (the stuff used for drawer liners and textbook covers). Many people use packing tape for this same technique, but I think it is too limiting because it’s size. Below are three journal pages where I used Con-Tact paper to place an image or text as a layer.
Materials needed: Clear Con-Tact paper A photocopied image (inkjet will not work) Cut out your Con-Tact paper to cover the portion of the photocopy that you want to transfer. Peel the backing off the Con-Tact paper….. ……and place on your photocopy. Use your fingernail or another object (I’m using a bone folder in the photo) to burnish the top of the Con-Tact paper to make sure it adheres well. Cut off the excess paper surround the image. The photocopied image will be left behind. Finished! How to illustrate with water colours: 7 pro tips. 01.
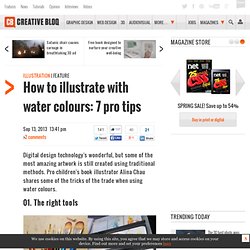
The right tools In order to achieve a desirable result with watercolour it’s important to have the right tools. While you don’t have to invest in an expensive set of supplies, you don’t want to use paint or paper that is not suitable for watercolour either. I’ve put together a list of the basic supplies you’ll need to kick-start your creative journey into watercolour painting: Brushes - my favourite are artificial sable brushes. Water bottle. 02. Regardless of whether you are painting from imagination or from live it’s always a good idea to start with sketches.
Above are some examples from my children’s book, Pickle: The Little Bird Who Doesn’t Tweet! If the lines get too messy to read, I will skip to another clean page. 03. I like to do colour studies before I work on an actual painting. These colour studies do not need to be a perfect painting. To get the classical illustration “feel” I used subtle fine lines and textures in the painting. 04.
Light pencil line.
Photography. Design. Textiles. Painting. Printing. Mixedmedia. Drawing. Sculpture.