Tin candel. Most favorited all-time - page 16. 20 Awesome Do It Yourself Projects. Thursday, June 14, 2012 4:30 am, Posted by Chris Groves | Internet 20 Awesome Do It Yourself Projects Topics: At Home Project Ideas , Creative DIY Home Projects , Do It Yourself Projects for 2012 , Fun How To Projects , What to Do with Extra Stuff Are you bored and have a bunch of extra little items hanging around here and there?
Transferring Ink to Candles. Making personalized candles is easier than you think.

Today with some help from the kids we made some candles to give to my parents on Valentine's Day. You will need some regular paper, tissue paper, tape, sharpies or markers, a candle, wax paper, and a heat gun. First, I taped a piece of tissue paper, about the size of my candle, to a piece of copy paper. Markers will bleed through the tissue paper pretty easily so you will need something to protect your table, and it was easier for the kids to draw on the tissue paper when taped to the "paper". When your little artist is done, remove the tissue paper from the copy paper. Next, you are going to take a piece of wax paper that is larger than your candle. Once you have heated the entire design gently peel back your wax paper and make sure the entire design is adhered to the candle. A very cute gift for the Grandparents. Crayon Hearts : An Eco-Friendly Gift. No need to chuck all those broken pieces of crayon that drive you nuts!

Find a jar and start saving them so that you can make some pretty awesome gifts for your kid’s friends. We made our first batch of crayon hearts for Valentine’s Day after I read about them on Whipperberry. They are super easy to make and look really cool. And best of all, it’s turning trash into treasure. What a lesson to teach your children! So start collecting your crayons in a jar (we used an old pickle jar). Use an oven safe baking mold and fill them up with the crayon pieces. Bake at 300 degree for 15 minutes (or until completely melted- mine took about 25 minutes). Let sit for a few hours until completely cool. Put Up Your Dukes: braided scarf tutorial. I have a tutorial that is forty thrillionty times easier and better than my previous (ahem, first ever...give me some grace!)
Tutorial. It is accessible to infinitely more people (you dont have to have a baby, OR a dress to start out with). And it is really simple. there are only 4 lines of stitching total. Oh, did I mention it's mega cute and chic also? DIY Turban Headband « Chic Little Poor Girl. DIY Sharpie Tie Die. Supply Captain: 550 Paracord. Magnetic Mousetrap Clips Tutorial. So I was perusing the dollar store the other day and ran across the mouse traps.

After staring at them a bit, I threw a pack into my cart and was met by my husband’s questioning stare. “Crafts”, I said. He shrugged and moved on. Yep, my husband has gotten used to my weird way of thinking. Most folks look at these little wooden traps of springing metal and think “dead mouse”. Iris Folding with Fabric. My guest bathroom has had blank walls for years.

Simply because I just haven’t come across what I really wanted in there. Then I ran across an old vintage crafting magazine that mentions the art of Iris Folding. Iris Folding involves folding strips of paper and glueing them down following a grid outline. It is called Iris folding because the final result resembles the iris of a camera. DIY Glitter Vases. Inspired by many reader requests for a DIY tutorial to recreate the glittery mason jar vases from this New Year’s Eve party, today we’re playing with glitter.
A whole lot of glitter! I whipped up two different versions of these glitter vasses, both of which are quick and easy. How to make gift bags from newspaper. When I bought something at a store recently, the clerk handed me my purchase in a bag made from a newspaper.
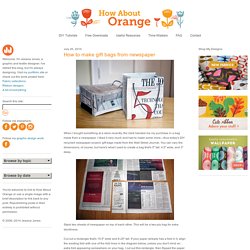
I liked it very much and had to make some more—thus today's DIY recycled newspaper project: gift bags made from the Wall Street Journal. You can vary the dimensions, of course, but here's what I used to create a bag that's 5" tall, 4.5" wide, and 3" deep. Stack two sheets of newspaper on top of each other. This will be a two-ply bag for extra sturdiness. Cut out a rectangle that's 15.5" wide and 8.25" tall. DIY Wrap Headphones. I got the idea to make these from the DIY wrap bracelets I made a little while ago.
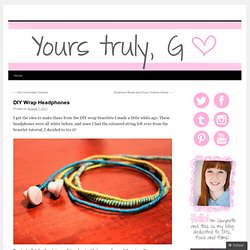
These headphones were all white before, and since I had the coloured string left over from the bracelet tutorial, I decided to try it! To start off, take the string and tie a knot with it around one of the wires. You can use one colour, or as many colours as you want. Once you have the knot set, start wrapping. Most favorited all-time. Rolled paper flowers {tutorial} Welcome to flower week – five days of simple and delightful flower projects.

I could probably do three weeks of flowers because there are so many different ways to create them, but I’ve limited it to five of my current favorites. Before we get started, let me make a few disclaimers: 1. I find inspiration for projects all over the place {online, in shops, in magazines}, then figure out how to re-create them on my own.