

3D paper diamonds. Hello there.
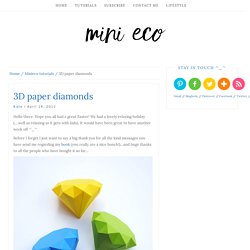
Hope you all had a great Easter! We had a lovely relaxing holiday (….well as relaxing as it gets with kids). It would have been great to have another week off ^_^ Before I forget I just want to say a big thank you for all the kind messages you have send me regarding my book (you really are a nice bunch!) …and huge thanks to all the people who have bought it so far… I’ve been meaning to get this paper diamond up for weeks now…but it’s taken ages to figure the template out (and I’ve been having breaks between each failed attempt). It’s based on simplified version of Satoshi Kamiya’s origami diamond. These paper diamonds are tricky to make (& require a fair bit of patience) so definitely adults only! 52 Weeks Project.
Most favorited last 7 days. Foef Family. Foef Family is a very unique family.
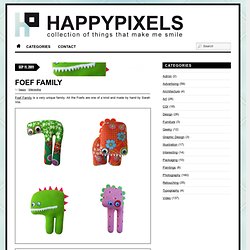
All the Foefs are one of a kind and made by hand by Sarah Vos. link Related posts: 46 Ideas For DIY Jewelry You'll Actually Want To Wear. Surprise the Ones You Love (14 pics. Dec 24/11 Surprise the Ones You Love (14 pics) Here are instructions for a very special gift for the people you love.
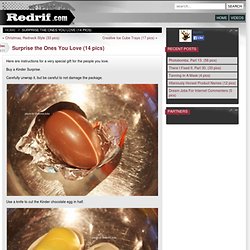
Buy a Kinder Surprise. Carefully unwrap it, but be careful to not damage the package. Use a knife to cut the Kinder chocolate egg in half. Take the toy out. Write your special message or use other surprise gift. Roll up your message. Close the container. Pour boiling hot water over a sharp kitchen knife. Use the hot knife to melt the edge of the chocolate egg’s halves. Quickly place the container inside the two halves. Quickly seal the two halves while the edges are still soft and melted.
Here comes the most difficult part. Lastly give the gift to your second half and say something like, “I bought bread and some sweets for you.” The Technique Zone: Acrylic Paint Transfer. Supplies needed: Acrylic dabbers, photocopy of an image, water spritzer bottle, paintbrush, card stock, craft sheet and heat tool (optional) Take the lid off the dabbers and brush the paint onto the card stock, ensure you get a good coverage Take your photocopied image ( remember that you will get a reverse of the image, so don't use bold words), flip it over and place it in the acrylic.

Lightly press it down making sure it's smooth and not wrinkled Leave to air dry for at least 15 minutes and then if you wish give it a blast with the heat tool Only move onto this step when you are sure your paint is completely dryTake your water filled spritzer bottle, spray the back of the paper no more than two squirts, you don't want it too wet Next start to rub the paper very gently with your finger.
Made2style.com. What I Made. I Could Do That. Watermark Tee by Sweet Verbana. Hello U-Create readers!

I am so excited to be guest posting here today. It just so happens to be my first guest post and I'm still a little shocked that it's here at Ucreate, one of my favorite blogs! A little bit about me.. TUTORIAL: Coffee Stirrer DIY Wall Art - makeanddogirl.com. Last week, I posted a preview of the simple, inexpensive wall art my mom and I created.
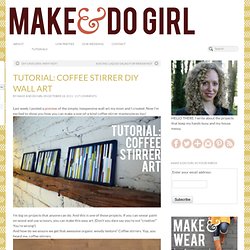
Now I’m excited to show you how you can make a one-of-a-kind coffee stirrer masterpieces too! I’m big on projects that anyone can do. And this is one of those projects. How To Make A Stylish Photo Frame For Several Photos. Here is a simple yet stylish photo frame that can accomodate quite many photos at once. The idea is very simple. Fasten twines on the empty frame and hang photos using clothes pins on them. You can use a frame you bought or a frame you made by yourself. To make it you just need to find some wood strips, sand them, paint or stain them and fasten together with the staples and nails. Yes, everything is as simple as it sounds. Instructables - Make, How To, and DIY. You knew i was going to make one. They are all over pinterest....
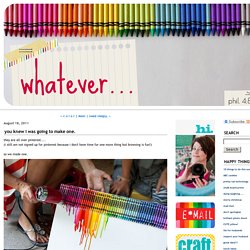
(i still am not signed up for pinterest because i don't have time for one more thing but browsing is fun!) So we made one. i took a box of 64 crayons and took out the blacks and browns.i used another small box and doubled up on the good colors i liked and hot glued them to the top of our canvas. then we turned our blow dryer to hot on high. not long after you set the hair dryer by the crayons they get shiny and then the wax starts to melt! And it dries really quickly too. seriously. what could be happier than this?? GREAT project. loved it today is the first FULL day with ALL my kids in ALL day school.yeah...i am smiling as i type that. it's good. it's quiet.
10 Jello Shots Worth the Hangover.
Green Holiday Gift Guide.