
What goes into making chocolate bowls. Leave it up to me to mess up every recipe in the world... but on the flipside, by experiencing everything that goes wrong, I end up learning the most.I had seen these bowls from Stephanie's Kitchen, and decided it was a fantastic idea for my food independent study. ingredients: chocolate, and balloons!
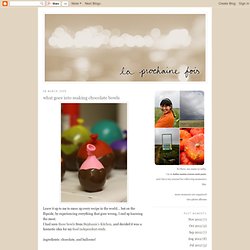
First, a giant bar of chocolate all the way from taiwan! And it's -special- grade, whatever that means. (i actually tried to pipe pretty lacy chocolate bowls first, but uh, that completely failed so i moved on. plus i don't like that pink fake chocolate.) balloons! Tip number 2, after you have melted your chocolate in a double broiler and poured it into a bowl for dipping, let it cool before you dip your balloons. because although you are really excited to dip them and set them down like this... five seconds later you shall hear a POP and you (as well as your kitchen) will be covered in chocolate because apparently latex doesn't like heat.
Hanging String Balls. Whattya need?
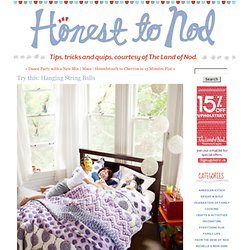
BalloonStringScissorsGlueJar How do I make glue string balls? Step 1: Hang inflated balloon from ceiling. Step 2: Put string and glue in the jar with a hole in the lid. Next, pull string from hole while wrapping around the balloon. Step 3: Wait until dry (try to contain yourself). Created by Dane Holweger. Pencils.
I have always wanted to make my own pencils, but the thought of shaping two pieces of wood to allow a piece of lead to sit perfectly inside made me think it wasn’t worth the effort.
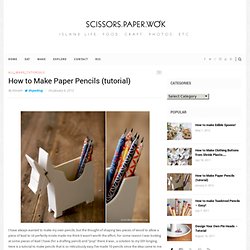
For some reason I was looking at some pieces of lead I have (for a drafting pencil) and “pop” there it was.. a solution to my DIY longing. Here is a tutorial to make pencils that is so ridiculously easy I’ve made 10 pencils since the idea came to me yesterday! Enjoy. Paper: I recommend using 6″ origami paper. The paper I used was beautiful washi origami paper made in Japan (see exact product here). Easter Eggs. Water Balloon Luminaries. A fun and easy project with a beautiful payoff.
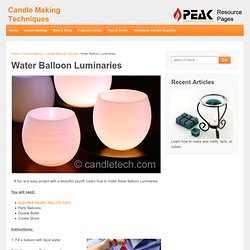
Learn how to make these Balloon Luminaries. You will need: High-Melt Paraffin Wax (IGI 1260)Party BalloonsDouble BoilerCookie Sheet. Fork Bracelet. I've always loved taking everyday items and making them into something interesting.

Ever since I was a little crafty kid I loved devouring books that taught me how to make little dolls from clothespins, beads from rolled up magazines, and little fairy ornaments from wire and fake flower petals. Summer bracelets. When M. came home from her camp with school, she showed me this yellow bracelet she made with 'scoubidoo' strings.

One of her friends taught her how to make these and of course I wanted to have a go at it too. Instead of scoubidou string I used strips of fabric for one and leather - what did you think?! - shoelaces in offsetting colors for another one. I believe both resulting bracelets look really nice. The possibilities in terms of material to braid with are endless. So, in case you 're in need of a fun summer project here's a how-to in 16 pictures with a short description below. This is what you'll need for an adult size leather bracelet. Steps: 1. This is the kind of craft you could easily do with kids - have them cut strips of fabric, no need to worry about the strips being straight and regular, and teach them how to braid. Friendship bracelets.
For several months now, we’ve been receiving emails requesting a friendship bracelet DIY.
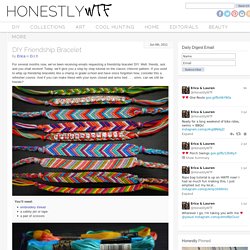
Well, friends, ask and you shall receive! Today, we’ll give you a step by step tutorial on the classic chevron pattern. If you used to whip up friendship bracelets like a champ in grade school and have since forgotten how, consider this a refresher course. And if you can make these with your eyes closed and arms tied . . . umm, can we still be friends?
You’ll need:embroidery threada safety pin or tapea pair of scissors Start by cutting several strands of embroidery thread at about 24 inches each. Newspaper Nails. A few weeks ago I shared in this post that I learned how to do this amazing thing called "newspaper nails.
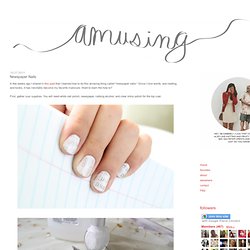
" Since I love words, and reading, and books, it has inevitably become my favorite manicure. Want to learn the how-to? First, gather your supplies. You will need white nail polish, newspaper, rubbing alcohol, and clear shiny polish for the top coat. Step one: Grab some newspaper and cut it into pieces big enough to cover your nails.
Step two: Paint your nails white. Step three: Dip a piece of newspaper into the rubbing alcohol and saturate them well. Step four: Press the bit of newspaper on your fingernail hard for about three seconds and peel it off. Step five: Top coat time! Moss Writing. How Did You Make This?