DIY string-tie envelopes. Hello!
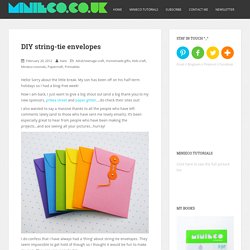
Sorry about the little break. My son has been off on his half-term holidays so I had a blog-free week! Now I am back, I just want to give a big shout out (and a big thank you) to my new sponsors, pi’ikea street and paper glitter….do check their sites out! I also wanted to say a massive thanks to all the people who have left comments lately (and to those who have sent me lovely emails). It’s been especially great to hear from people who have been making the projects…and ace seeing all your pictures…hurray! I do confess that I have always had a ‘thing’ about string-tie envelopes. These dinky little envelopes are great for all-sorts of things (storing paper ephemera, housing invitations/gift cards, storing seeds). By the way, now my kids are getting better at using scissors they have been really enjoying making their own envelopes using the template from my previous post. You will find a full tutorial and templates below!
How-to 1. 3. 5. Revolutionaries: A Project for Fall! Hello my blog friends!
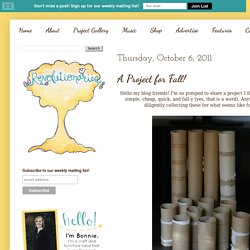
I'm so pumped to share a project I finished today! It's simple, cheap, quick, and fall-y (yes, that is a word). Anyway... I've been diligently collecting these for what seems like forever: Why? [Side note: please pin from the original source so the credit goes to the right person! But I also love projects involving trees/branches like these: Then, I saw this yesterday and even though it's not made from toilet paper rolls, I thought, hmm.... color behind the toilet paper rolls? So basically... Recyclable Crafts: Carton Wallet. This photo originally appeared in FamilyFun Magazine Total Time 1 hour Ages school-age Recycle a milk or orange juice carton into a clever carrying case for change, trading cards, and more.
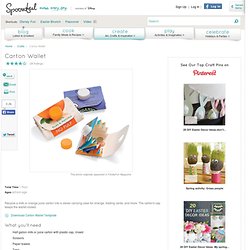
The carton's cap keeps the wallet closed. Download Carton Wallet Template What you'll need Half gallon milk or juice carton with plastic cap, rinsed Scissors Paper towels Tape Wallet Template Ballpoint pen Ruler Craft knife (optional) Butter knife How to make it Cut open the carton so it lies flat, as shown; put aside the cap for now. Comment réaliser une trousse ou un sac en magazines? Kissing Thaumatrope.
A few years ago, I thought that it would be so fun to make Joe a kissing thaumatrope for Valentine's Day.
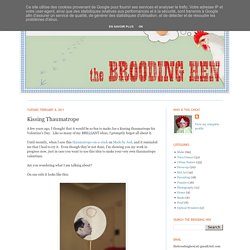
Like so many of my BRILLIANT ideas, I promptly forgot all about it. Until recently, when I saw this thaumatrope-on-a-stick on Made by Joel, and it reminded me that I had to try it. Even though they're not done, I'm showing you my work in progress now, just in case you want to use this idea to make your very own thaumatrope valentines. Are you wondering what I am talking about? On one side it looks like this: On the other side it looks like this: When you spin the stick, it looks like this: Movie magic! I'm making some for my three little Valentinos, too.
If you do make your own, please send me a picture! Materials: Paper, cardboard, double-stick tape or glue, round chopstick or kebab stick, photo prints or drawings of kissers in profile. Cette lanterne Origami est si merveilleux et facile à Craft. Fleur en papier. A pretty japanese origami ball - a kusudama it's a fun-to-make and decorative winter blossom easy to fold takes a little bit of time but it is definitely worth it you need.
Fabriquer un sac en papier. Gift bags made from newspaper is a great idea for birthday parties or weddings! We saw this on a site that was we think was in Vietnamese?? Anywho -here’s our best try at translation along with the photo tutorial. Supplies: Glue, Scissors, Paper Doiles, Newspapers, and Wire Ribbon Step 1: Cut into rectangular sheet of paper and then press twice the leading newspapers in the Middle as shown on the picture Step 2: Use glue fixed two edge paper overlap Step 3: Fold one end securely to the bottom of the bag Step 4: You fold the side edge short and long edges paste twice in photos to form bottom bag Step 5: Wait for the glue to dry Step 6: Place treats inside the bag Step 7: Fold the remaining margin 2 cm down to form the mouth of bag Step 8: fold and glue small paper doile over the top of bag Step 9: Finally, punch holes to put Ribbon through.
Voila – beautiful little gift bags! If you like this article go to the home page to see other similar posts. Toilet Paper Roll Wall Art. Well that’s a mouthful!

So the time has come, it’s Pinterest Challenge time again! Every season Sherry from YHL and Katie from Bower Power throw a little link party to get people to stop pinning things and actually start making.