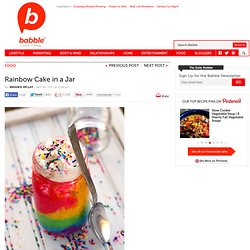

Rainbow Cake in a Jar. I’ve always had a penchant for sunshine in a jar.

Doesn’t the very phrase itself, “sunshine in a jar,” roll off your tongue and fill your mouth with magic? While I’ve never yet found myself a sunshine in a jar, I think we may have just concocted it in our kitchen tonight. In this simple recipe, a basic white cake is turned into a slew of bright colors, baked to perfection, then topped with a creamy white frosting. Cakes baked in jars can be topped with traditional metal canning lids and stored in the fridge for up to five days. They make a great treat to ship to someone, so long as you can ensure delivery to it’s final destination within 3 days.
Rainbow Cake in Jar 1 box white cake mix made according to package instructionsNeon food coloring in pink, yellow, green, turquoise, and purple3 one-pint canning jars1 can vanilla frostingRainbow sprinkles Preheat oven to 350 degrees. Scoop about 1/2 cups of cake batter into five small bowls. How to Make Marshmallow Fondant. This time I decided to make it with those mini fruit flavored marshmallows.

I had to sort them by colour first. I figured they would add a little bit of flavor to the fondant so I wouldn't have to add much flavoring oil. I use gel colours to dye my fondant but regular food colouring will work too. You won't be able to get really dark colours without making your fondant sticky, but for lighter colours you can just even it out with more icing sugar. I also had lemon oil and coconut flavoring on hand.. oh la la the value brand (which still works fine). Step One: Take a couple of handfuls of marshmallows and put them in a microwave safe bowl.
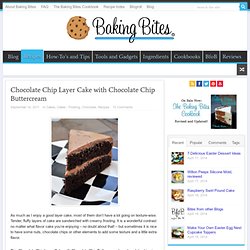
I like to make smaller batches because its easier to add the colour to the melted marshmallow than it is to work the colour into the fondant later. Step Two: Stick the marshmallows in the microwave for ten seconds at a time until the are puffed up and easily stir into a goo with a wooden spoon. Step Three: Step Four: Fondant with the icing sugar kneaded in. Chocolate Chip Layer Cake with Chocolate Chip Buttercream & Baking Bites. As much as I enjoy a good layer cake, most of them don’t have a lot going on texture-wise.

Tender, fluffy layers of cake are sandwiched with creamy frosting. It is a wonderful contrast no matter what flavor cake you’re enjoying – no doubt about that! – but sometimes it is nice to have some nuts, chocolate chips or other elements to add some texture and a little extra flavor. This Chocolate Chip Layer Cake with Chocolate Chip Buttercream has chocolate chips in the cake batter and in the buttercream frosting. Regular or miniature chocolate chips will both work well for the cake, adding bursts of chocolate throughout.
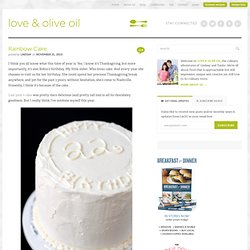
The cake is light and moist, with a very good chocolate flavor. The frosting is a simple buttercream that I enriched with a little bit of sour cream and flavored with cocoa powder and a bit of vanilla. Preheat oven to 350F. Love and Olive Oil - StumbleUpon. For Cake: 2 1/4 cups cake flour (9 ounces) 1 cup whole milk, at room temperature 6 large egg whites (3/4 cup), at room temperature 2 teaspoons almond extract 1 teaspoon vanilla extract 1 3/4 cups granulated sugar (12 1/4 ounces) 4 teaspoons baking powder 1 teaspoon table salt 12 tablespoons unsalted butter (1 1/2 sticks), softened but still cool Red, orange, yellow, green, blue, and purple gel food coloring For Frosting/Filling: 2 1/2 cups granulated sugar 10 large egg whites 2 pounds (8 sticks) unsalted butter, cut into tablespoons, softened 2 teaspoons pure vanilla extract 1 pound best-quality white chocolate, melted and cooled Preheat oven to 350 degrees.

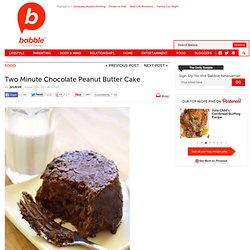
Prepare your cake pans by first liberally buttering the pans, then line the bottoms with parchment paper rounds. Butter the rounds and set aside. Pour milk, egg whites, and extracts into 2-cup glass measure, and mix with fork until blended. Divide batter evenly between six medium bowls. Let cakes rest in pans for 3 minutes. Two Minute Chocolate Peanut Butter Cake. This, friends, is where procrastination gets me.

I was staring at the computer, mired in writers’ block. I clicked on that Stumble button I installed in my toolbar but never use. Oh look! A new webpage has popped up! On it, a recipe for single-serving peanut butter cake you mix and microwave in a minute. The chocolate:peanut butter ratio wasn’t quite right, and so I made the cake chocolate with a spoonful of cocoa. Chocolate chips are a must – they turn into gooey pockets of melted chocolate in the finished product. Butter or spray a ramekin, or do it right in a mug. It took mine a minute to cook, rather than 30 seconds. Note to self: pick up some vanilla ice cream. Two Minute Chocolate Peanut Butter Cakewith thanks to Cassie of Back to Her Roots! Peanut butter AND portable?