

Woven gift-wrap // pastel edition ^_^ By Kate on August 8, 2012 I noticed that the woven gift-topper I made last year was doing the rounds again on Pinterest so I thought I would make an updated pastel version (pastels seem to be the new neon at the moment).
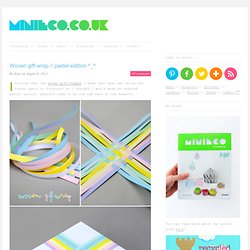
I bought some quilling strips (0.5cm) to use this time which reduces the labour by about half (I’ve also been working on some more intricate woven ‘things’ for another project…more to come soon). Anyway check out the previous post if you want full instructions. Above: Mischevious hands – the unseen backdrop in all my photo’s ^_^ While I took photos today my boys were making their own presents by wrapping boxes in newspaper.
Finally, the font used on these images is called soymilk and it’s free to download …yay! 25 Handmade Gifts Under $5. If your gift list is long and your budget is small here are some great Handmade Gifts that you can make.
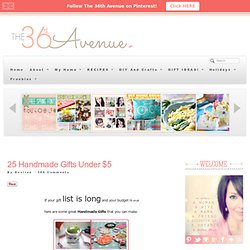
Keep in mind that handmade items are not just beautiful but special… Asymmetrical necklace} I was at a store the other day that just happened to have a huge clearance on beads.

We're talking 80% off kind of clearance. I checked with an employee to see if I was reading the sign right and then I pinched myself to make sure I wasn't dreaming. Once I confirmed that this was indeed real life I grabbed a basket and started sorting through the selection. I got some great deals and picked up an assortment of beads that I normally wouldn't have picked up at full price. Once we came home and I tucked my daughter in bed for the night I started thinking about what I could make with my new collection of pretty beads. What you'll need - nose ring plyers - wire cutter - beads/buttons - eye pins - chain - jump rings (4mm and 7mm) - lobster clasp Take a bead and slide it on to the eye pin.
Tutorials. Diy. DIY. Shrink plastic ring tutorial. Thank you to everyone who requested a shrinkydinks ring tutorial!
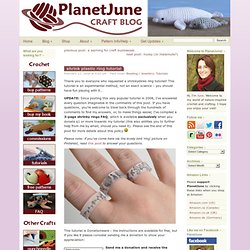
This tutorial is an experimental method, not an exact science – you should have fun playing with it… UPDATE: Since posting this very popular tutorial in 2008, I’ve answered every question imaginable in the comments of this post. If you have questions, you’re welcome to trawl back through the hundreds of comments to find my answers, or, to make things easier, I’ve compiled a 3-page shrinky rings FAQ, which is available exclusively when you donate $1 or more towards my tutorial (this also entitles you to further help from me by email, should you need it). Please see the end of this post for more details about this policy Please note: if you’ve come here via the lovely bird ‘ring’ picture on Pinterest, read this post to answer your questions. This tutorial is Donationware – the instructions are available for free, but if you like it please consider sending me a donation to show your appreciation: 1. 2. 3. 4. 5. 6.
Paper Punched Easter Eggs Tutorial by Nikki In Stitches. Some of the best projects are also the most simple, and it doesn’t get much more “back to basics” than these paper punched Easter eggs.
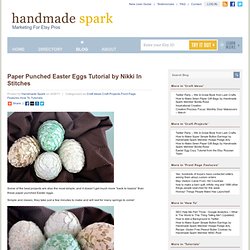
Simple and classic, they take just a few minutes to make and will last for many springs to come! Materials: 5/8″ paper punch Decorative paper Styrofoam egg Straight pins. The Shabby Creek Cottage - interior design and home remodeling on a budget. Nest of Posies. DIY: Delicious Scrub. Page 16. Lovely Spaces – Craft room (Part 2) Hello my lovely readers!
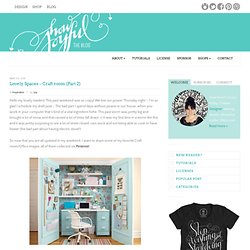
This past weekend was so crazy! We lost our power Thursday night – I’m so glad I schedule my draft post – The bad part I spend days without power in our house, when you work in your computer that’s kind of a vital ingredient hehe. This past storm was pretty big and brought a lot of snow and that caused a lot of trees fall down =[ It was my first time in a storm like this and it was pretty surprising to see a lot of street closed, cars stuck and not being able to cook or have heater (the bad part about having electric stove!) So now that you are all updated in my weekend, I want to share some of my favorite Craft room/Office images, all of them collected via Pinterest!
[source] [source] Don’t you just love the closet desk idea? [source] [source] [source] I also love the contrast and pops of color And I could not stop myself from sharing my latest obsession and next Project, an awesome Studio table =] here my inspiration. Diy craft projects. DIY Doily Lamp. Say YES! to hoboken: DIY: Tinted Mason Jars in Rainbow. I’ve been experimenting with tinting mason jars to create a look like those old vintage ones that are difficult to find anymore in second hand stores.
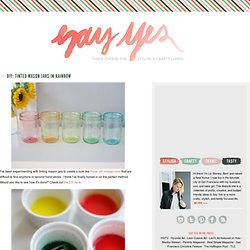
I think I’ve finally honed in on the perfect method. Would you like to see how it’s done? Check out the DIY here. Fill them with flowers, or illuminate an outdoor party filling them with battery operated tea lights or a strand of twinkle lights. 10 Craft Room Organizational Tips. Tutorials. Crafty. How About Orange. Most favorited all-time.