background preloader

Crafts

Facebook Twitter

- StumbleUpon. Hi friends! I can't tell you how excited I am to be a creative guest on Ucreate today! I've been bubbling with excitement for weeks and have been scheming over what project would be Ucreate-worthy. I hope this one fits the bill...! First of all, I'm Autie and my friend Jen and I blog over at iCandy handmade. I'm a busy mom of 2 cute little kids and during nap time and bed time, I love to work on projects! I like to make things for my kids and for my home, and share them with you on our growing blog. The project that I thought I'd share with you today started out with these.

The drawer does not open, but the cupboard door does...and it leaves about an inch of space to keep something in it...like art masterpieces of a few sheets of homework paper...hmmmm I bounced some ideas off of Jen, and this is what I came up with...I give you the Cupboard Door into Art Desk Tutorial I made one for each of my littles, and so far, they're totally diggin' it! I wanted to use the drawer as a supply holder. How to Make Cherry Blossom Lights.

How To Mix Chalkboard Paint in Any Color. We love using chalkboards as backdrops for displays and parties (like this one here!). So we were super excited to learn that you can create your own custom colors-and it's really easy! We first learned how from Martha Stewart whose tutorial you can read here. She recommends that you use latex paint, but we tried it out with acrylic paints with much success. Here's how you too can create your own chalkboard paint... Supplies: 1/2 cup acrylic paint (choose any color you like, or mix colors together to make the perfect shade!) 1. 2. Once your chalkboard has fully dried be sure to slate the surface before using it for the first time.

Have fun creating any color combination you like!! It's a good idea to use free paint chips: Check out the 31 ways paint chips are used in all kinds of projects!! Some of these you may have seen around blogland others are from Etsy. 1.PaintswatchWall2.SnowmanOrnaments3.cut leaves 4. 7. 10. 13. gift boxes 14. 16. 19. 22. 24. 26. 29. 31. Hi my sweet bloggie friends!!!

Easy and Unique DIY VasesInspiring Pretty. Everyone loves vases, but it’s difficult to find one that is unique and not the same old run of the mill vase you’ve seen 1000 times before. 
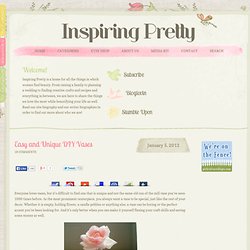
As the most prominent centerpiece, you always want a vase to be special, just like the rest of your decor. Whether it is empty, holding flower, a candle pebbles or anything else, a vase can be boring or the perfect accent you’ve been looking for. And it’s only better when you can make it yourself flexing your craft skills and saving some money as well. This lovely vase is simple and its beauty is its simplicity. All it takes is a cute vase, some sequins and some glue. How you want the sequins displayed in the vase will determine which method you use to put them in there.

If you want them on the bottom, just pour them in alone. For this cozy yet stylish vase, pick up some clear craft glue and yearn and collect a few pop bottles, beer or wine bottles. For some true vintage charm, these are the way to go. Courtesy of sjarmerende-gjenbruk.blogspot.com. DIY Planter Box Centerpiece. Hey friends! After finishing my mirrors in the dining room, my table started to look naked! So… I dressed her up today. This is a super easy project and I LOVE the results! This is the wood I used for the project… 2 – 1x6x4 whitewood boards 1- 2×4 stud Total for wood was under $10… Yippee! I also used Gorilla Wood glue to attach it all together. I cut my 2×4 the same length as my other 2 boards (4ft) I used wood glue and nails to attach the 1×6′s to the 2×4 like this… Then I cut 2 small pieces of from my stud to finish off the sides. I made some dings all around the whole box, and I also used some furniture upholstery nails around the whole thing because I like the way they look.

I decided to try a new product out to finish my box. It’s Rust-Oleum Ultimate Wood Stain. I LOVED it. The Rust-Oleum stain dries in no time. It’s also much less stinky and sticky than the others I have used. Once it dried I was all finished. I used the 12 ounce sauce bottles from their site (SAU12) What do you think??

Photo Tile Coasters {Using Resin} Last Christmas I almost had a breakdown... 
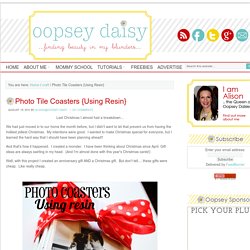
We had just moved in to our home the month before, but I didn't want to let that prevent us from having the holliest jolliest Christmas. My intentions were good. I wanted to make Christmas special for everyone, but I learned the hard way that I should have been planning ahead!! And that's how it happened. I created a monster. I have been thinking about Christmas since April. Gift ideas are always swirling in my head.

Well, with this project I created an anniversary gift AND a Christmas gift. While I was in Utah, my sweet cousin Michelle showed me a couple of projects using resin.
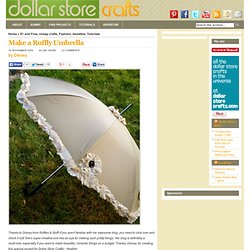
 Here's how I made these photo coasters... I started out with a trip to Home Depot. Next, I ordered some photos. Only 13 cents a print at Costco! I used a regular old Elmer's glue stick to paste each picture onto the tiles.

I won't give a full tutorial on using resin because each product is a little different. After mixing the resin with the hardener, I just poured it on! Make a Ruffly Umbrella | Dollar Store Crafts. Home » $1 and Free, cheap crafts, Fashion, Headline, Tutorials 16 November 2009 44,380 views 23 Comments by Disney Thanks to Disney from Ruffles & Stuff! If you aren't familiar with her awesome blog, you need to click over and check it out!

She's super-creative and has an eye for making such pretty things. Hello everyone! I'm so excited that Heather invited me to do a guest post here at Dollar Store Crafts! Today I'm going to share with you this super-easy umbrella refashion that I did with a dollar store shower curtain liner! Materials: boring old umbrella (on hand)Dollar Store shower curtain liner (mine had several different shades to choose from!) Cost Estimate: $1 1) First you want to measure all the way around the bottom of your umbrella, and double it for how much curtain liner you will need (plus extra for a flower, and top ruffles). 2) Then sew a straight stitch (on your machine's longest stitch length) down the middle of all the strips, and pull the bottom thread to gently gather. Fun! For the Love of: Mason Jars.

<div class="greet_block wpgb_cornered"><div class="greet_text"><div class="greet_image"><a href=" rel="nofollow"><img src=" alt="WP Greet Box icon"/></a></div>Hello there! If you are new here, you might want to <a href=" rel="nofollow"><strong>subscribe to the RSS feed</strong></a> for updates on this topic. <div style="clear:both"></div><div class="greet_block_powered_by">Powered by <a href=" title="WP Greet Box WordPress Plugin" style="text-decoration:none;">WP Greet Box</a><a href=" title="WordPress Plugin" style="text-decoration:none;">WordPress Plugin</a></div><div style="clear:both"></div></div></div> Let’s check out some of the beauties I found… mostly with the help of my BFF, Pinterest .

Herb Garden Lights. Therobotsattack | Everything arts and crafts and the fusion of the two. Anthro-Inspired Book Stack Necklace - JEWELRY AND TRINKETS. One of my favorite bloggers posted about this necklace available on Anthropologie's website a few months back. 
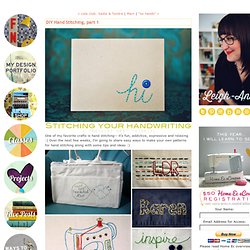
It was retailing for something like $165. I figured it would be pretty easy to diy. So I did. First, I looked around my house for leather-like items to cut up for the covers. I had a bag that my dog had chewed the straps on. I had an old placemat that I had purchased to make into a purse. I remembered an old red purse I had that would be perfect. I found an old green purse for a few dollars. I set out molding the pages out of white fimo that I had laying around.

I sandwiched them between the cut leather and mashed things around a bit. Time for round two. So I started cutting up books. Hand Stitching, part 1 - LA. One of my favorite crafts is hand stitching-- it's fun, addictive, expressive and relaxing :) Over the next few weeks, I'm going to share easy ways to make your own patterns for hand stitching along with some tips and ideas :) These are some samples of my past projects-- I like to draw patterns freehand and use my handwriting.

However, sometimes I adapt clipart type images to make a more complicated pattern, like the sewing machine or I just stitch the outline of an image I love, like the Goonies "Hey You Guys" silhouette :) I use a Back Stitch for all my hand stitching because it's very versatile and I like the look but you can use any combination of stitches for your projects... there's lots of fun ones! Today, we're going to start with handwriting & transferring your pattern :) You will Need: - Card-stock or Thick Paper (I cut a piece of 6x8" card-stock & folded it in half to create a greeting card) - Needle & Scissors - Embroidery Thread - Scrap Paper & Pen - Thumbtack or Piercing Tool.

How to transfer a photo to fabric. Did you know you can transfer photos to fabric without using iron-on sheets? I love this technique. It's simple to execute and the end results are really pretty. It's another method for hand printing! I made some fabrics the other day and used them to add pockets to one of my wool skirts. Do you want to learn to transfer photos to fabric? I thought so... Supplies Needed: Fabric (I used white quilting cotton), Gel Medium (I used this kind from Liquidex), Paint Brush and the image you want to transfer. How to transfer a photo to fabric: 1. Note: Don't be alarmed if your transfer isn't completely perfect. Well there you go! Simple Ideas That Are Borderline Crafty (35 Pics) Click Here For More Amazing Ideas. {Valentines day} pixel-y popup card.

I‘ve been scratching my head trying to come up with a card for my hubby {AKA the non-romantic type}. I finally decided to make this pixely popup heart card! They are really minimal (which I love) and take about 20 minutes to make (that includes the card, insert and envelope). You can even make some pixely confetti to put inside the card (if you are a big kid like me!). Full instructions and printable templates below! (BTW I remember seeing something similar in a popup book years ago. How to 1. (If you have a cutting machine then see note at end of post!) Cut along the black lines and score the grey lines. 3. 5. 7. Edited to add: The lovely Kayla from saynotsweetanne has send me a .dfx file of the card which you can use if you have a cutting machine.

25 Handmade Gifts Under $5. If your gift list is long and your budget is small here are some great Handmade Gifts that you can make. Keep in mind that handmade items are not just beautiful but special… I love to give them and I love to receive them. In my opinion they are the best! Jersey Knit Bracelet Lovely! This would make a perfect gift for any of your girlfriends. You can choose the colors and recycle t-shirts that you have around the house. Cheap and cute! Tutorial Paper Clip Earrings Tutorial This is a brilliant idea… and the possibilities are endless.

Love it! Printed Candles Who doesn’t love a candle? Think about how many different stamps you could use to customize this project. tutorial Hot Chocolate Art! What a great gift for neighbors and teachers… I am personally a hot chocolate lover so this would make a great gift for me tutorial Tile Coaster You can buy these plain tiles at Home Depot for under a dollar. I’ve seen them with family pictures also… Way cute! Tutorial Bow Belt I was amazed how easy this tutorial was. So Pretty! The 30 Minute $6 Dress Tutorial | papernstitch - StumbleUpon. Guest post by Rachael at Talk 2 the Trees. The perfect dress is hard to come by. I like my dresses to be cheap, and long enough. (I’m not a fan of super short dresses!)

Cheap and long dresses don’t seem to go hand in hand.. so, if you want something done right, you have to do it yourself! Here’s Your Supplies List: 1. Here’s How you Make it: 1. 2. 3. 4. 5. 6. 7. 8. 9. 10. 11. 12. Here’s the tutorial in pictures… Believe it or not, this dress only took about 30 minutes to make. About the author. Stuff to Make in my Old Age - StumbleUpon. Guest blogger - Sasha from The Guilded Bee: Perfect Summer Bangle - StumbleUpon.

Make an Edible Candy Bowl | Dollar Store Mom - Frugal Fun - Crafts for Kids - StumbleUpon. On the Cheap: Scrapbook Paper iPhone Covers. Crafty. » How to Make a Fabric Bow | Tutorial » Whipperberry. Photo 1- Merry Crafts-mas! DIY The Best Holiday Decor With 4 Chic (Easy!) Ideas. DiY crafts, free sewing patterns & sewing tutorials – WhatTheCraft.com. Top 100 Tutorials of 2010. How to make gift bags from newspaper.

Flowers DIY