Kara
i'm upside down
Easy Pumpkin Cheesecake Muffins. Straight From The Curls: Paper Inspired. I'm always in awe of creative thinkers and innovators.
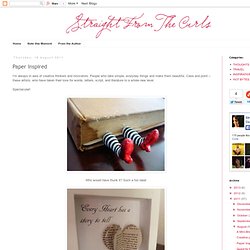
People who take simple, everyday things and make them beautiful. Case and point -- these artists, who have taken their love for words, letters, script, and literature to a whole new level. Spectacular! Who would have thunk it? Such a fun idea! So true. Brilliant idea. I wouldn't even open this gift if it came my way. Love! Xo SimiImages courtesy of Pinterest.com. Suzys Artsy Craftsy Sitcom: Feature Friday- Faux Metal Wall Art.
Looking for the Faux Metal Wall Art?

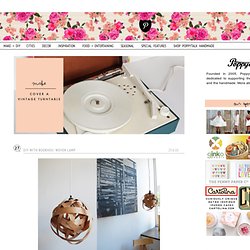
Since this project was originally published on The Sitcom in December 2010, it has been my most popular project by far. Who knew that a bunch of toilet paper tubes and an idea would become so big? Honeycomb storage shelves. These honeycomb shelves came our way at a perfect time — not only do they satisfy my need for cheerful spring colors, but they also provide a great storage solution to alleviate spring-cleaning woes.

Sarah and Josh, the creative husband-and-wife photographers behind Arrow & Apple, whipped up these pretty hexagonal shelves for free using salvaged cabinet doors and brackets. They really lucked out on the color palette of the old cabinets, and I love the mix of painted and unpainted pieces. Luckily, recreating this look is easier than you think. DIY With Bookhou: Woven Lamp. D.I.Y. by Arounna Khounnoraj of Bookhou what you need: -strips of wood veneer (you can also get 3/4 in. veneer at the hardware store that is for ironing on the edge of shelves - you can also use strips of paper) -white glue -large clips (or clothes pins) - I started with four and found I needed more as I went along -scissors -HEMMA ikea light -pen -small piece of cardstock safety alert * use a low watt bulb and ensure material chosen is not touching or close to the bulb. step 1-2 take the strip of wood veneer and make a circle shape to the desired size you want your lamp to be. place a small amount of glue to the attachment and hold with clip. step 3 proceed the same way as in step one - creating an overlap on the other strip of veneer. glue the attachment and secure with clip step 4-5 take smaller strips and weave through the lamp continuing in a circular manner. secure any overlaps with glue and clip - also allow the glue to dry - it will make it easier to work with the shape.
--Arounna. Zipper Bracelet. DIY Chan Luu-Style Wrap Bracelet. Like this: Like Loading...
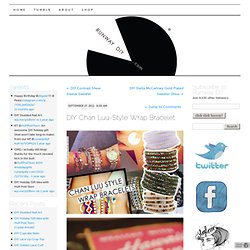
Filed under Accessories, Bracelets, Jewelry Tagged as Accessories, bracelets, Chan Luu, DIY, DIY Jewelry, do it yourself, Fashion, Fashion DIY, jewelry, Runway, Runway DIY, Wrap Bracelets. Wall-E Art. Zipper Bracelet. A Tutorial: Fabulous Ric Rac Flowers & Matilda Jane Clothing Rocks - StumbleUpon. Let me start out with a warning or sorry of some sort.

The warning is because I have never done a Tutorial before, so I hope this is helpful and easy to follow. The sorry is for how horrible my nails look. The Hipster Home & Blog Archive & How to Make a Tiny Terrarium in a Light Bulb - StumbleUpon. Ahoy there Hipster Homers!

I’m Julie and I’m the very first guest blogger on this fine site. Today’s project involves breaking stuff, plants, found objects, and miniatures. My DIY Wedding& My husband (and business partner) Danny and I are both very artistic and crafty people by nature.

So naturally, a lot of elements at our own wedding were handmade. Here is a peek at some of what we did in the hopes it will inspire you to infuse a little bit of the do-it-yourself spirit into your wedding day. How to make a snow globe. My first gallery exhibit!! (incredible amount of pictures) - MORE ART, LESS CRAFT. Awhile back, I posted two watercolor paintings I did, "Titania and Oberon.
" Mature Valentines day treasure hunt. {I'm the Prize!} - OCCASIONS AND HOLIDAYS. Stained Glass, Fused Glass, Blown Glass: Projects, Patterns & More - Craftster. EnJOY it.: tutorials. Family photo on banner was taken by Tara Whitney.

Unless otherwise stated, all words and photos on this blog are my own. If you use a photo, please link back to this site to provide credit. Under no circumstances, should the text of this blog be copied and re-posted elsewhere unless you have permission from me to do so. Please note, hurtful or offensive anonymous comments will be blocked. This is a for profit blog. Thank you so much for reading. How To Make a Secret Hollow Book: The first step into making the hollow book is to select a book.
Make sure this is a book your own, and not one belonging to the library, or your family. I suggest rummaging through books at yard/garage sales. Make sure it is a hardback; otherwise you will cut all the way through the other side when you are cutting out the insides.You'll also need: Elmer's white gluea container to hold glue solution (I've chosen a film canister)X-acto knife, and/or box cutter. Both if you have thembrush to apply glue solutionpencil/penruler, or other rigid straight edgeSelect a page that you want to be the first one cut out, and save that page to be cut out at the end. Mix a solution of white glue and water. Holding the remaining pages together, brush the edges with the glue solution - enough to soak in pretty well, but not too drippy. Allow this to dry, but use a spacer so the first couple pages, and the front cover don't get stuck.
Misc. My videos. Beauty. Music. School resources. Humor. Art. Help.