
16 Good Ideas. Creative Uses for Dryer Sheets. Uses for Aluminum Foil - Aluminum Foil Recycled. How To... Embed This Infographic <a href= "><img src=" title="10 How Tos" alt="How To Infographic" border="0" class="nopin" /></a><br />Source: <a href=' title='Interesting Facts'><a href=' title='Interesting Facts'>Today I Found Out</a></a> 1) How to drastically increase the life of your shaving razor Before or after you shave (I prefer before so that the blades are dry), place your jeans on a hard flat surface; then run the razor up the pant legs about 10-15 times quickly; then repeat running it down the pant legs 10-15 times quickly.

No need to press that hard, but a little pressure is necessary. necessary. In both instances, you want to point the top of the razor in the direction you are rubbing the shaver on the pants. The threads on the jeans then will very effectively both fix any tiny bends in the blades that inevitably happen and will also sharpen the blades on your shaver cartidge. 2) How to make your teeth whiter Baking soda makes a good teeth whitener. 3) How to Test a Car Alternator 1. IKEA Hack. Home Improvement Ideas, Photos and Answers.
Materials. Great Ideas. DIY Month: Home Decor Ideas from Our Favorite Bloggers. A different way to build a house: Adding secret passages and hidden rooms. Page 2. DIY Braided Bead Bracelet. It’s been awhile since our last bracelet DIY.

I don’t know about you, but our wrists have been begging for another colorful addition for months now. So after playing with some materials that were already on hand, we’ve created a tutorial for a braided bead bracelet, which is a not so distant cousin of the hex nut and wrap bracelet. Because honestly, you can never have too many . . . You’ll need: Cut the waxed linen cord into a 26″ and 19″ piece. Tie a knot about half an inch down from the loops. Start braiding the strands. Push the bead against the base of the braid, and cross the left strand over the middle. Keep a finger at the base of the braid, holding the beads in their place and keeping the braid tight. Finish the bracelet with another inch of braided cord, measuring it against the wrist. Thread on a two hole button – two strands through one hole and one strand through another. Trim the end. Your bracelet is finished! (all images by HonestlyWTF) Your source of daily updated funny pictures and gifs.
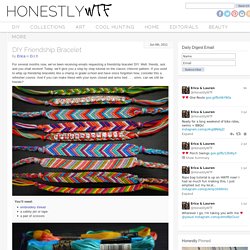
DIY Friendship Bracelet. For several months now, we’ve been receiving emails requesting a friendship bracelet DIY.

Well, friends, ask and you shall receive! Today, we’ll give you a step by step tutorial on the classic chevron pattern. If you used to whip up friendship bracelets like a champ in grade school and have since forgotten how, consider this a refresher course. And if you can make these with your eyes closed and arms tied . . . umm, can we still be friends? You’ll need:embroidery threada safety pin or tapea pair of scissors Start by cutting several strands of embroidery thread at about 24 inches each. Start on the left side with the outermost color (shown here in red) and make a forward knot by creating a 4-shape over the 2nd color, loop it under and back through the opening.
Pull up and to the right to tighten. Now pick up the outermost color on the right side (show here in red) and make a backward knot, creating a reverse 4-shape over the 2nd color, loop it under and back through the opening. Most Popular DIY Projects of 2011. 2011 proved to be a great year for all things DIY, from repurposed and updated technology to computer building to cool things you can make for your own enjoyment.

Here's a look at our most popular do-it-yourself projects and posts this year. P Top 10 Ways to Turn Your Retired Gadgetry into the Technology of the FutureP With the rapid progression of technology each year, it's easy to accumulate a pile of obsolete gadgets that you just can't bear to get rid of. So don't! Top 10 Space-Saving Household ProjectsP Whether you live in a tiny apartment or just have too much stuff, there's likely a lot of space you aren't using, like your walls, your ceilings, or the nooks and crannies in your furniture. How to Build a Hackintosh Mini for a Less Expensive, Faster MacP We've shown you how to build a Hackintosh with enough power to rival a Mac Pro, but for those of you who want a still powerful Mac on a budget you can build a Hack Mini. Turn Photo Negatives Into Artsy, Personalized LampsP.
One Pearl Button: Jewelry.