
Motel loc: Bentley, MI 48613. Reserve - Motels in Pinconning, Motel in Pinconning Trail Inn Motel, Best Inns in Pinconning, Pinconning MI 48650. Rooms & Rates for Days Inn Grayling. Super 8 Grayling - About. Western Trails Motel - About. Fay's Motel - Our Rooms. Pendants and Stuff for Gamers by BestGamersShop. Flip-Flop Refashion: Part 3 (Ruffled T-Strap) Are you tired of flip flips yet?
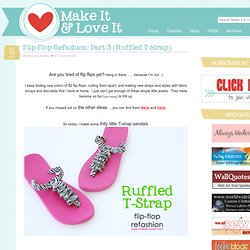
Hang in there…….because I’m not. :) I keep finding new colors of $2 flip-flops, cutting them apart, and making new straps and styles with fabric scraps and doo-dads that I have at home. I just can’t get enough of these simple little jewels. They have become so fun (and cheap) to frill up. If you missed out on the other ideas…..you can find them here and here. So today, I made some frilly little T-strap sandals. They would look great in any color. And they just happened to fit perfectly on my little 15 year old niece. (Such a perk to have family nearby. The breathable cotton makes these super comfy and light for the warmer weather. Great with jeans. Thanks for letting me use your feet Camille. Ready to make your own? Before you begin, check out the post here, to see how to take apart an old pair of flip flops. DIY TUTORIAL and a giveaway! Happy Monday everyone!
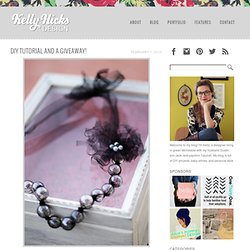
Today I am going to show you how to make this necklace and introduce my first giveaway! Below are the steps to make this tulle necklace. And to win this necklace, just leave me a comment below! A winner will be announced on Friday. Finger Knitting How-to. You know how I just wrote about how I like getting a handmade gift more than just about anything.
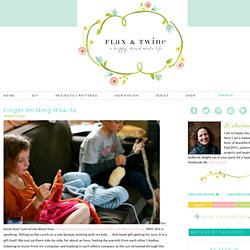
Well, this is anything. Sitting on the couch on a lazy Sunday, knitting with my kids . . . that beats gift-getting for sure. Day 7: A Crystal Ruffle - a diy ribbon necklace. This necklace came about because I didn't like how the plastic crystal beads were looking as I attached them to this ribbon.
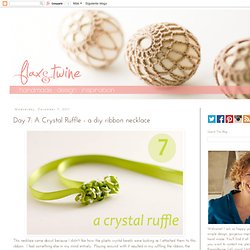
I had something else in my mind entirely. Playing around with it resulted in my ruffling the ribbon, the same way you would fabric, pulling the basting thread and voila! I made this as a necklace but I think it would make a cool bracelet or headband as well. Since the ribbon ends are just loose, you can do just that and play with it. Fun! I originally made the necklace in yellow, but liked the green after I took photos for the tutorial. I created all this jewelry in a mad frenzy over the course of three evenings. For all the other jewelry tutorials from this month, check out 24 Days of Glam page here.
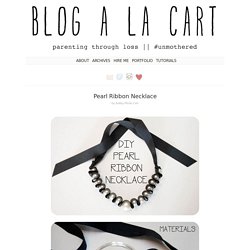
Tutorial: Magic Paint Board. Pearl Ribbon Necklace. Photos: Courtesy of Ashley Weeks Cart.
Project 6: Canvas Art « A Smith of All Trades. You don’t have to know how to sew to work with fabrics.
I’m OK at sewing, but my machine is missing the pedal… Oops. E dell'ovetto che si fa? Baby Name Embroidery. I was inspired to do this straight from this picture from Pinterest.
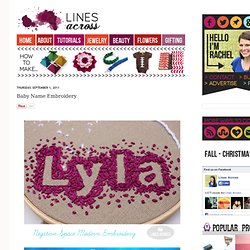
Confession: I do not own (or have any clue how to use) a sewing machine. I have never really embroidered before. Lately I keep coming across amazing and very modern embroidery ideas that I love. I love this project because it is great for a beginner and because it is such a fun and current twist on traditional embroidery. What I used: A 6 inch embroidery hoop (which was surprisingly only $1) Embroidery thread and needle Embroidery Fabric.
Fork Bows - How To Tie A Bow Using A Fork. Yesterday I posted about how to use a fork to make pom-poms to decorate your knitting and craft projects.

The next instalment in my cutlery embellishment series brings you Fork Bows. Using a simple four-pronged dining fork you can tie easy miniature bows which look perfect every time. 1. Gather a fork and a length of ribbon about 6″/15cm long and hold around the left side of the fork. 2. 3. take the other end of the ribbon and pass it between the centre two tines of the fork over the top of the bow. 4. How to Make a Chandelier (Part 2 (With Friends)) I'm not going to lie to you, this chandelier is both time + labor intensive.
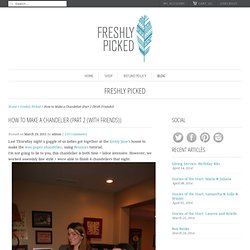
However, we worked assembly line style + were able to finish 4 chandeliers that night. 1. Tear off your wax paper into long pieces. We used 2 - 2.5 foot pieces. DIY: Banana Republic Braided Neck Tee Shirt. Bird and Text Collage Wall Art. There are currently no images from other crafters. close Terms & Conditions You must enter into this Agreement if you want to submit digital images or other content to Prime Publishing through Sharing Customer Images (the "Service"). As used in this Agreement, "we" or "Prime Publishing" means Prime Publishing, LLC. and "you" means the individual or entity submitting materials to Prime Publishing. Any individual or entity that wants to use the Service must accept the terms of this Agreement without change. DIY Ideas & Tutorials.
Fun and Crafty Uses for Newspaper. This to That (Glue Advice) - StumbleUpon. Hi friends! I can't tell you how excited I am to be a creative guest on Ucreate today! I've been bubbling with excitement for weeks and have been scheming over what project would be Ucreate-worthy. I hope this one fits the bill...! DIY pixel heart necklace. Need a last-minute DIY Valentine's Day gift?
Show how much you care by using 50 cents' worth of paper and glue to make a pendant. I was inspired by all the pixel stuff at Pinterest lately. (Part of the 80s revival, perhaps?) And I was really impressed by a paper necklace Patricia Zapata was sporting at the Alt Design Summit recently. To make the pendant, cut 12 hearts from cardstock. Glue the hearts into a stack, applying glue sparingly. As the glue dries, the pendant will harden nicely. Glass Etching. Have you ever done any glass etching? Well, neither had I before today. But wow. Such an easy, yet sweet little touch that you can add to any glass. Check out my new and improved etched Trifle Bowl. The perfect bowl for desserts of all kinds…..and even a great place for fresh fruit on the counter. Craft DIY Projects, Patterns, How-tos, Fashion, Recipes @ Craftzine.com - Felting, Sewing, Knitting, Crocheting, Home & More.
Stenciled Pillows {tutorial} - New Martha Stewart Decorative Paint Line!! <div class="greet_block wpgb_cornered wpgb_shadowed"><div class="greet_text"><div class="greet_image"><img class="enable-pib-img-under" src=" alt="WP Greet Box icon" data-recalc-dims="1"/></div>Thanks for coming by!
Judah Method - Bleaching Experemnet on the Behance Network. How to Make Cherry Blossom Lights. Turn Photo Negatives Into Artsy, Personalized Lamps. Print Hula Hoop Rug Page. Toilet Paper Art « This Handmade Circus. This is absolutely the most popular piece of artwork in our home, so I decided that this would be the perfect tutorial to start with! This is made from all recycled paper towel and toilet paper rolls, but everyone thinks it is made of iron. It is super light weight and you can change it to look anyway you would like and costs less than 1$! I found a picture of this on pinterest and LOVED it! There was no tutorial that I could find, so I figured I would just figure it out and it turned out to be super simple and really fun.
The hardest part was the looooooong wait that it took to gather and hoard and “steal” enough toilet paper/paper towel rolls. First gather as many paper towel/toilet paper rolls that you need (mine took a LOT) and then begin cutting them into 1 inch strips. Then form your center flower with as many petals as you would like with the tips touching and pushing them as close together as you can. Once you’re done, head outside with your spray paint color of choice. Map love.
I love maps...and look at all the amazing things made with them... Most gawked all-time. The Burlap Bag - High Quality Handmade Goods Shop - Austin Texas. December 20, 2011 by Lauren (Check out our new ONLINE SHOP for The Burlap Bag!!) We have two cats. DIY Platform Bed. Custom Bean Bag : DIY. 25 Handmade Gifts Under $5. If your gift list is long and your budget is small here are some great Handmade Gifts that you can make. Keep in mind that handmade items are not just beautiful but special… Lollies - a little ART CANT HURT - StumbleUpon.
A perfect rainy day thing to do! Holder for Charging Cell Phone (made from lotion bottle) My husband and I both have cell phones. THC Molecule Necklace Marijuana Weed chemical by Exaltation. Harm_crystal. Legalize It marijuana Metal Stamp Bracelet by darkerblue. Welcome to Thirty-One Gifts. Free People Clothing Boutique Blog - StumbleUpon. UPDATE: This post originally ran on March 23 2011, but with summer winding down we wanted to bring it back up for some late summer inspiration!