
A simple object classifier with Bag-of-Words using OpenCV 2.3 [w/ code] Just wanted to share of some code I've been writing.
![A simple object classifier with Bag-of-Words using OpenCV 2.3 [w/ code]](http://cdn.pearltrees.com/s/pic/th/simple-object-classifier-29947974)
So I wanted to create a food classifier, for a cool project down in the Media Lab called FoodCam. It's basically a camera that people put free food under, and they can send an email alert to the entire building to come eat (by pushing a huge button marked "Dinner Bell"). Really a cool thing. OK let's get down to business. I followed a very simple technique described in this paper. Edit (6/5/2014): Another great read for selecting the best color-space and invariant features is this paper by van de Sande et al. The method is simple: - Extract features of choice from training set that contains all classes. - Create a vocabulary of features by clustering the features (kNN, etc). Turns out, those crafty guys in WillowGarage have done pretty much all the heavy lifting, so it's up for us to pick the fruit of their hard work.
Starting with the first step: Simple! Boom. Coding Robin. Open this page, allow it to access your webcam and see your face getting recognized by your browser using JavaScript and OpenCV, an "open source computer vision library".

That's pretty cool! But recognizing faces in images is not something terribly new and exciting. Wouldn't it be great if we could tell OpenCV to recognize something of our choice, something that is not a face? Let's say... a banana? That is totally possible! Here's the good news: we can generate our own cascade classifier for Haar features. But now for the best of news: keep on reading! The following instructions are heavily based on Naotoshi Seo's immensely helpful notes on OpenCV haartraining and make use of his scripts and resources he released under the MIT licencse. Let's get started The first thing you need to do is clone the repository on GitHub I made for this post. Git clone You'll also need OpenCV on your system. If you're on OS X and use homebrew it's as easy as this: Samples How many images do we need?
Find . Download - Adaptive Vision. This page uses cookies.

For details and possible settings refer to our Privacy Policy. Continuing to use this page means accepting the processing of cookie files. POL ENG GER 中文 Download If you want to try Adaptive Vision Studio or use it for non-commercial applications, please download the Lite edition: Adaptive Vision Studio 4.3 Lite (32 bit) Adaptive Vision Studio 4.3 Lite (64 bit) If you want to buy commercial licenses for Adaptive Vision Studio Professional, please contact our distributors.
For more information about available editions please refer to the Editions section. Contact us If you have any questions or comments about our products, please use the form below to contact us: Message Adaptive Vision Future Processing Sp. z o. o.Bojkowska Str. 37A, 44-100 Gliwice, POLAND Phone: +48 32 461 2330, +48 607 788 281Fax: +48 32 376 23 18 Sales & Partnershipinfo@adaptive-vision.com.
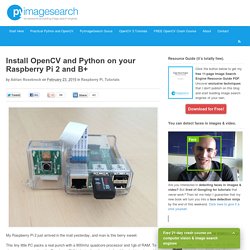
Done! Install OpenCV and Python on your Raspberry Pi 2 and B+ My Raspberry Pi 2 just arrived in the mail yesterday, and man is this berry sweet.

This tiny little PC packs a real punch with a 900mhz quadcore processor and 1gb of RAM. To give some perspective, the Raspberry Pi 2 is faster than the majority of the desktops in my high school computer lab. Anyway, since the announcement of the Raspberry Pi 2 I’ve been getting a lot of requests to provide detailed installation instructions for OpenCV and Python. So if you’re looking to get OpenCV and Python up-and-running on your Raspberry Pi, look no further!
In the rest of this blog post I provide detailed installation instructions for both the Raspberry Pi 2 and the Raspberry Pi B+. I’ve also provided install timings for each step. Finally, it’s worth mentioning that we’ll be utilizing the Raspberry Pi inside the PyImageSearch Gurus computer vision course. Here’s a quick example of detecting motion and tracking myself as I walk around my apartment on the phone: