
DIY Body Sugaring Recipes For Removing Hair. Centuries ago in ancient Egypt, Cleopatra and her handmaidens discovered a secret beauty treatment that magically and painlessly got rid of unwanted hair…and this recipe was lost for years until recently discovered.
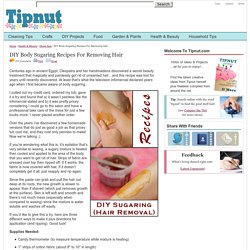
At least that’s what the television infomercial declared years ago when I first became aware of body sugaring. I pulled out my credit card, ordered my tub, gave it a try and found that a) it wasn’t painless like the infomercial stated and b) it was pretty pricey considering I could go to the salon and have a professional take care of the mess for just a few bucks more. I never placed another order. Summer Hair Braid Trends. Braids, pleats, or plaits—whatever you call them, we're absolutely loving all things twisted in hair this season.

Beautylish brings you the three hottest braid trends this season and three easy braid DIY tutorials to replicate the look yourself. Who needs a headband when you can make one from your hair! We're loving this European, Heidi-inspired front braid that you can style into an updo or wear with your hair down. Hair Romance. Hair Romance is a wonderful blog dedicated to all things hair related, where Christina, a super lovely australian blogger, offers a lot of valuable hair advice.
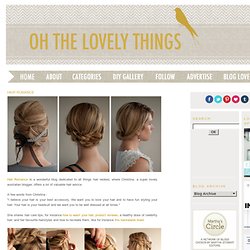
A few words from Christina : "I believe your hair is your best accessory. We want you to love your hair and to have fun styling your hair. Your hair is your headsuit and we want you to be well dressed at all times. " During the month of May 2011, she posted a hairstyle everyday. She created 30 gorgeous hairstyles in 30 days! Her hairstyle challenge has been so popular that she designed tutorials for all the hairstyles in an easy reference ebook.
She says that the hairstyles are easy to master and that if she can do it, we can do it too. You can buy the ebook here - it's only $9.95 and it's totally worth it! Pretty Side French Braid low Updo Hair Tutorial. Three twisted buns. I'm excited to share another hair tutorial!

You know those days when you want your hair to look pretty but you only have a minute? Well, my friend Caroline swears by this gorgeous set of three twisted buns ("like cinnamon rolls! " she says). So she came over to explain exactly how to do them, and the wonderful Jamie Beck took a few photographs. And guess what? Here are Caroline's steps, if you'd like to try them out... 1. 2. 3. How to style long hair short. Sometimes you want to have a short hair day, but without the commitment of actually getting your hair cut!

Here's a fun and cute way to style your long locks into a short bob do. Enjoy! 1. Divide your hair into two sections, from one ear to another. 2. Pin up the top section, just to keep it out of the way. 3. 6 secrets I learned at makeup artist school - StumbleUpon. Total-beauty TODAY Style TODAY Jan. 12, 2012 at 9:50 AM ET Totalbeauty.com / By Sharon Yi, TotalBeauty.com You could say that I have a love/hate relationship with makeup.
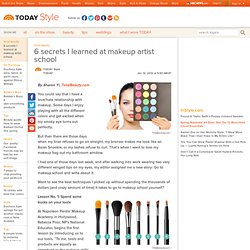
But then there are those days when my liner refuses to go on straight, my bronzer makes me look like an Asian Snookie, or my lashes refuse to curl. I had one of those days last week, and after walking into work wearing two very different winged tips on my eyes, my editor assigned me a new story: Go to makeup school and write about it. Want to see the best techniques I picked up without spending the thousands of dollars (and crazy amount of time) it takes to go to makeup school yourself? Lesson No. 1: Spend some bucks on your tools.
Nails. 520 214 516 278 567 107 831 1006 920 762 1273 472 570 715 1160 567 828 778 293 261 459 700 688 181 901 1206 1010 844 1145 641 824 308 174 53 300 63 830 4063 168 292 677 358 638 173 361 203 528 191 112 904 144 335 477 746 148 419 280 585.
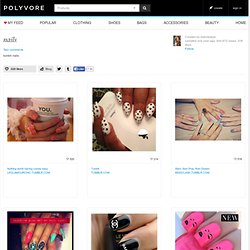
25 Totally Pretty 10-Minute Hairstyles. By Jaime Morrison Curtis | If there is anything that gets abandoned in the morning it would have be my hair, and more often than not a hat or ponytail has become the solution to this problem.
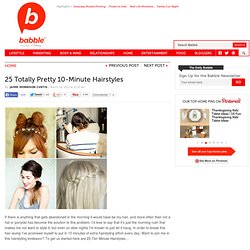
I’d love to say that it’s just the morning rush that makes me not want to style it, but even on date nights I’m known to just let it hang. In order to break this hair slump I’ve promised myself to put in 10 minutes of extra hairstyling effort every day. Twisted pony. » Dear Emmie. TBDthepieceypony.jpg (512×1569) Simple 3 Twists Hairstyle. First, a little back story: I was on Pinterest (I know, big surprise) awhile back and Ms.
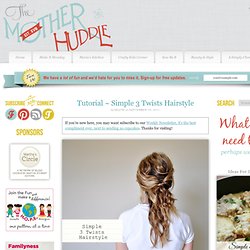
1 Minute To Soft Hands – Olive Oil Sugar Scrub. Happy Friday friends!
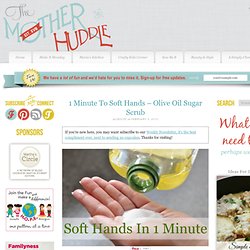
I am so excited to introduce our new segment Beauty & Style. We had such an overwhelming response from our 3 Twists Hair Style post, we decided beauty and style is something all of us want to see more of. GUEST POST. Photos by: Kathleen Bly post designed by kristin ess Mad love for our first guest post winner, Taylor Nick!!! I am fully obsessed with this bohemian-inspired-braided-goodness! Even though Taylor had some SERIOUS competition, there’s no doubt that this little lady took the cake in our hair tutorial contest. She created a beautiful, textured, easy hairstyle that will work with almost any hair type. Congratulations Taylor, and thanks to ALL of you who entered this post contest. THE LONG + THE SHORT OF IT. BACK TO BASICS. Hope everyone had a great Halloween! We’re looking at all of the photos you posted on twitter and we are SO impressed!
Today’s video was created for those of you who haven’t mastered the good ol’ french braid yet. NAILED IT! Photos + post design by Kristin Ess While you’re all probably busy decking the halls right now, perhaps you’ll be able to take a break to get fancy, festive + fun with this manicure tutorial from Lady Conrad! She wanted to string some lights across her nails and so she did… Literally! Here’s how she created these lil’ cuties: TOOLS: base & top coat, green polish & red polish (you can use any colors you want), white or off-white polish, cuticle nippers or small scissors, black cotton string, a small brush or pointed q-tip. On clean nails, do a solid coat (or two thin coats) of white or off white polish.After the white polish dries, do one clear coat. Tags: bright, brite, christmas, DIY, do it yourself, holiday, how to, kristin ess, lauren conrad, light, lighting, lights, lite, mani, manicure, nail art, nails, string, the beauty department, thebeautydepartment.com, tutorial, xmas Related posts:
SHORT STUFF. Photos and post design: Kristin Ess This updo/chignon was kind of a random discovery for short hair. My gorgeous client Katie, who has a long bob, was sitting in my chair and this happened so we thought we’d snap some photos and share since we get a lot of requests for short hair styles! TOOLS: bobby pins, accessory, hairspray. Tutorials.
We get a lot of emails asking how to use brushes correctly so I hope this helps you out a little! A brow brush is designed to be stiff and angled for a reason. And we use the slanted edge to shade and the tip of the edge to outline. Put those components together and a brow brush is quite frankly a thing of perfection! Here’s how to use it properly: READ MORE… Last week we explored four different ways to wear Spring’s biggest Cobalt blue trend. This method has been around for centuries!
Hair Raising. Hair. Snake Braid Tutorial. Lovely Locks. Hairstyles I Love. YOU ASKED FOR IT… - StumbleUpon. Photos + post by Kristin Ess So many emails have come in asking how I did the braid on Lauren’s hair for her last Chelsea Lately appearance. I recently recreated that braid and took a couple photos so you could see it up close.