

Windowsill Sprouting my way through the Winter. My orchids are dark speckled and bruised from the cold.
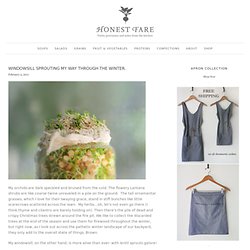
The flowery Lantana shrubs are like coarse twine unraveled in a pile on the ground. The tall ornamental grasses, which I love for their swaying grace, stand in stiff bunches like little scarecrows scattered across the lawn. My herbs…oh, let’s not even go there (I think thyme and cilantro are barely holding on). Then there’s the pile of dead and crispy Christmas trees strewn around the fire pit.
We like to collect the discarded trees at the end of the season and use them for firewood throughout the winter, but right now, as I look out across the pathetic winter landscape of our backyard, they only add to the overall state of things. My windowsill, on the other hand, is more alive than ever- with lentil sprouts galore! Tricking yourself into thinking its springtime is one way of looking at it, but sprouting lentils is also a great way to add a super fresh, nutrient packed component to a meal or salad.
I Could Do That. Matte Printing Instructions. Stencil with freezer paper (harry potter tee) Yes, I am a nerd.

I came up with a brilliant idea for a Harry Potter t-shirt and I couldn't resist. "Expecto Patronum! " However, you can make whatever kind of design you want with a freezer paper stencil. It doesn't have to be Harry Potter related. (Although it would be awesome if it was.) DIY Doily Lamp. You knew i was going to make one. They are all over pinterest....
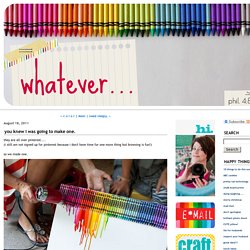
(i still am not signed up for pinterest because i don't have time for one more thing but browsing is fun!) So we made one. i took a box of 64 crayons and took out the blacks and browns.i used another small box and doubled up on the good colors i liked and hot glued them to the top of our canvas. then we turned our blow dryer to hot on high. not long after you set the hair dryer by the crayons they get shiny and then the wax starts to melt!
And it dries really quickly too. seriously. what could be happier than this?? How to transfer a photo to fabric. Did you know you can transfer photos to fabric without using iron-on sheets?

I love this technique. It's simple to execute and the end results are really pretty. It's another method for hand printing! I made some fabrics the other day and used them to add pockets to one of my wool skirts. Do you want to learn to transfer photos to fabric? Make Your Own Canvas Portrait! Glowing jar project – varázslat a lakásban (EN/HU) Paper Source Stationery Stores. 10 Affordable DIY Modern Wall Art Projects! Bare walls are the pits.
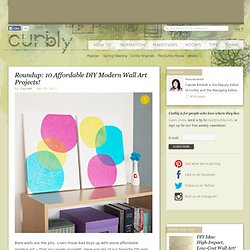
Liven those bad boys up with some affordable modern art -- that you made yourself! Here are ten of our favorite DIY wall art projects to make this week. 1. Bubbles of magnificent splendor! This project is high-impact and low, low cost. 2. 3. 8485681.JPEG (JPEG Image, 400x10200 pixels) - Scaled (6%) TetraBox Light by Ed Chew. Liquid to Light Designer Ed Chew takes a green step in the right direction with the TetraBox lamp, a light object made from discarded drink packets that would have otherwise ended up in landfills already packed to the brim.

The design is achieved by unfolding the packets and refolding them into hexagonal and pentagonal sections that are then pieced together to form a geodesic sphere or any other desired shape. Here, the Epcot-like ball makes an attractive overhead light and casts an impressive web of shadows and shapes on the surrounding space. Gifts to Make for Your Man. 52 Weeks Project. How to Build a Bicycle. Cool miniature stove. Top Bloggers Favorite DIY Projects.
Hanging String Balls. Whattya need?
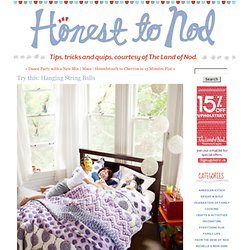
BalloonStringScissorsGlueJar How do I make glue string balls? Step 1: Hang inflated balloon from ceiling. Step 2: Put string and glue in the jar with a hole in the lid. Next, pull string from hole while wrapping around the balloon. Step 3: Wait until dry (try to contain yourself). Created by Dane Holweger. Paint chip calendar. A few weeks ago, I saw this paint chip calendar on my friend David’s blog Cheltenham Road and knew I had to make one!
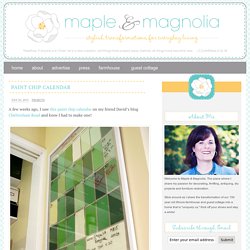
It combines two things that I love…stylishness and organization. And the fact that it utilizes paint chips? Even better. I mostly followed David’s tutorial with just a few modifications. That’s the beauty of this project…it’s totally customizable. Since I planned for this calendar to hang in my office, I chose paint chips that would coordinate with the room and with the pin board that hangs on the adjacent wall. Here’s my version. materials needed: poster frame, fabric, hot glue gun, 35 paint chips, paper trimmer, corner rounder, fabric glue, foam brush 1) Purchase a poster frame (mine came from Target…$9.99). 2) Remove the edges from the frame. 3) Cover the cardboard insert with fabric using hot glue to secure it on the back, pulling tightly to keep the fabric smooth.