

Do-it-yourself jewelry storage « Monaluna. Okay, yes, I’m on a storage kick these days.
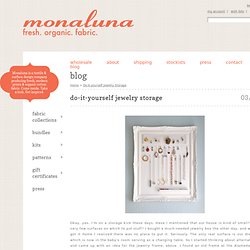
Have I mentioned that our house is kind of small? With very few surfaces on which to put stuff? I bought a much-needed jewelry box the other day, and when I got it home I realized there was no place to put it. Seriously. The only real surface is our dresser, which is now in the baby’s room serving as a changing table. Maze for Kids. DIY String Art Tutorial. DIY Roman Shades « It always feels great when you have your mind set on how you want something to look and then it all comes together.

This is exactly what has happened with my entry way/porch area. I knew I wanted to put stripes on the wall but it was a matter of finally getting around to it. Once that was done and the porch was all cleared out I knew I had to make it something that was worth having. That’s when I ordered my desk and watched the space slowly turn into what I had envisioned. I had my cream and tan stripes, I had my white lacquered desk, now it was time for some color. Waverly Chippendale Fretw Quartz Premier Prints Gotcha White/Candy Pink Waverly Cross Section Raspberry I knew I wanted a geometric pattern so that almost immediately eliminated the second fabric (Waverly Chippendale) and I wasn’t too sure about that first print because of the whole papaya part.
Fabric, Measuring Tape, Scissors, Fabric Glue, Mini Blinds. 1. 2. Should look like this when it’s all done. 3. 8485681.JPEG (JPEG Image, 400 × 10200 pixels) It's doable... Crafts, food and life - Blog - It's doable...the flower wall art. What started it all...
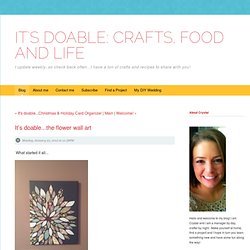
This was inspired by another Pinterest viewer, of which I've tried desperately to track down, I'm in the works though! -- The search comes to an end!! Thank you, CANDICE for such a beautiful and fun craft!! I have loved seeing all of the flowers that others have come up with :) This is quite an easy project and it cost me a total of $13! -1 12x16 inch canvas $5.99 (with 40% off coupon, originally $9.99) -1 Artist's Loft 4 oz acrylic grey paint $3.99 (I used the excess on this project) -5 pieces of scrap book paper $3 total.
How to Make a Wire from a Plastic Bottle (with pictures) Kindle Cover Tutorial. We are baking, sewing & crafting up a storm, preparing handmade gifts for this holiday season.

I am sharing 30 wonderful sewn gifts from 30 amazing bloggers! How to sew a zippered pouch. I hope you are enjoying all of these wonderful sewn gift tutorials.
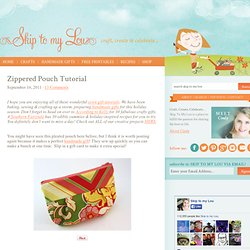
We have been baking, sewing & crafting up a storm, preparing handmade gifts for this holiday season. Don’t forget to head on over to According to Kelly for 30 fabulous crafty gifts. A Southern Fairytale has 30 edible yummies & holiday-inspired recipes for you to try. You definitely don’t want to miss a day! Check out ALL of our creative projects HERE. You might have seen this pleated pouch here before, but I think it is worth posting again because it makes a perfect handmade gift! Download pattern pieces and print with no scaling selected on your printer. Pleated Pouch Pattern Download Mark fabric from pattern where it should be pleated.
Place outer top piece face down on pleated piece, line up edges and stitch across 1/4 inch from the edge. Origami box in Crafts for home stationery and paper for birthdays, anniversaries or dinners. Fabulous origami box which we can make it in a moment, and it's great to keep the gifts we want to give as a present or just to store our little treasures.
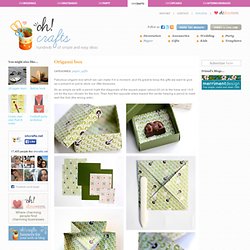
It's as simple as with a pencil mark the diagonals of the square paper (about 20 cm to the base and 14,5 cm for the top) chosen for the box. Then fold the opposite sides toward the center helping a pencil to mark well the fold (the wrong side). To make the base, fold the opposite sides parallel to the midpoint and toward the inside and should measure about 3,5 cm. Folding and unfolding and repeat for the other two sides. For the lid, fold the opposite sides (should measure 1,4 cm each), folding and unfolding and repeating the process with the other side. If we pay attention, a little wrinkle has been created in the folds of the corners of the base and lid. Finally, displays the opposite sides of both the base and lid and return to fold inward.
Glowing jar project – varázslat a lakásban (EN/HU) Realistic Duct Tape Rose. Kindle case mosaic. Fabric Origami Workshop. How to Make a Kusudama Flower. Edit Article Edited by Mimi, Krystle, Knowledge Junkie, Eric and 43 others A pretty kusudama flower can be made by folding five or six square pieces of paper.

If you make twelve flowers, they can be assembled into a beautiful kusudama ball. Even if you use colorful sticky notes, the result is very impressive and can be used for decorative purposes or even worn as a temporary brooch. Ad Steps a Kusudama Flower Step 1.360p.mp4 00:00 00:04 00:04 spaceplay / pauseescstopffullscreenshift + ←→slower / faster (latest Chrome and Safari)←→seek . seek to previous 12…6 seek to 10%, 20%, …60% 1Fold a square piece of paper in half diagonally. 17Wait for the glue to dry completely before removing the paperclips.
Tips. Secret Belgian Binding Instructions - StumbleUpon. The Secret Belgian Binding These instructions show you how to bind a book with an interesting pattern of weaving which laces the front and back covers to the spine.
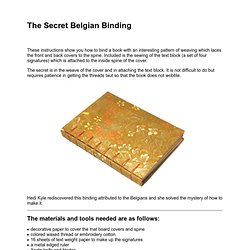
Included is the sewing of the text block (a set of four signatures) which is attached to the inside spine of the cover. The secret is in the weave of the cover and in attaching the text block.