background preloader

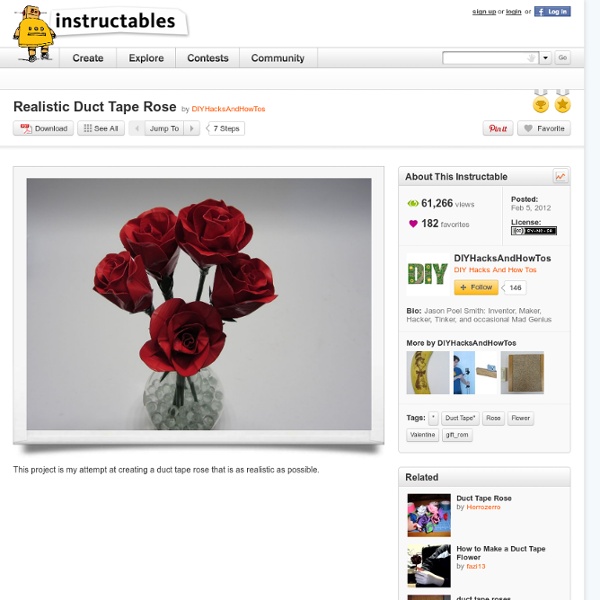
Realistic Duct Tape Rose

Realistic Duct Tape Rose

DIY Crepe Paper Flowers I recently spotted a sensational bouquet of paper flowers inside my favorite (and the ultimate) boutique for creative inspiration, Castles In The Air. A combination of Mexican paper flowers and those ever so popular tissue paper pom poms, these vibrant and cheerful flowers make perfect ornaments for any celebration. Plus, they’re incredibly easy to make! You’ll need:6 – 7 pieces of 180 gram florist crepe paper cut into 20″ x 30″ sheets (it’s important to use heavyweight crepe paper for it’s stretchiness and strength)6 – 7 small binder clips or large paper clips16 gauge floral wire (last seen here)heavy duty scissors First, lay out the sheets of crepe paper and fold each one into an accordion. Keep each bundle bound together by a small binder clip or large paper clip. Working with the outer color first, gradually trim down the length of each sheet in 1-2 inch increments. With scissors, trim the ends into rounded and pointy shapes. Cut along the folds of each bundle . . .

How to Make a Kusudama Flower Edit Article Edited by Mimi, Krystle, Knowledge Junkie, Eric and 43 others A pretty kusudama flower can be made by folding five or six square pieces of paper. If you make twelve flowers, they can be assembled into a beautiful kusudama ball. Even if you use colorful sticky notes, the result is very impressive and can be used for decorative purposes or even worn as a temporary brooch. Ad Steps a Kusudama Flower Step 1.360p.mp4 00:00 00:04 00:04 spaceplay / pauseescstopffullscreenshift + ←→slower / faster (latest Chrome and Safari)←→seek . seek to previous 12…6 seek to 10%, 20%, …60% 1Fold a square piece of paper in half diagonally. Tips Warnings Things You'll Need

Laurel Roth 7 Stunning DIY Paper Flower Tutorials! » Curbly | DIY Design Community « Keywords: Roundup, curbly-original, paper flowers, DIY Curbly-Original If you spend much time in the online DIY/craft sphere (guilty as charged!), chances are you've noticed a whole lot of paper flower love lately. And I'm not talking about those paper flowers you made as a kid that were all scraggly and sad, these are seriously stunning creations that people are posting. Lucky for you, we've rounded up seven of the prettiest and best paper flower tutorials all in one spot -- ENJOY! 1. 2. 3. 4. 5. 6. 7. And, for those who want to skip a few steps, the people at The Crimson Poppy sell pre-cut DIY paper flower kits! Tagged : Roundup, Curbly-Original, paper flowers, Craft, paper craft, flowers, tutorials, How-To, trends, decor, centerpiece, crepe paper flowers, DIY

Secret Belgian Binding Instructions - StumbleUpon The Secret Belgian Binding These instructions show you how to bind a book with an interesting pattern of weaving which laces the front and back covers to the spine. Included is the sewing of the text block (a set of four signatures) which is attached to the inside spine of the cover. The secret is in the weave of the cover and in attaching the text block. Hedi Kyle rediscovered this binding attributed to the Belgians and she solved the mystery of how to make it. The materials and tools needed are as follows: decorative paper to cover the mat board covers and spine colored waxed thread or embroidery cotton 16 sheets of text weight paper to make up the signatures a metal edged ruler Xacto knife and blades scissors pencil bone folder carpet thread sewing needles white glue brush for gluing masking tape 2 clothes clips an awl Secret Belgian Binding Instructions Cut two covers out of mat board 4x5-3/4", and one piece 5/8x5-3/4", for the spine. Questions or comments?

CayceZavaglia giant paper flowers from ruche You may remember the wedding of our lovely D*S contributor Brittany Watson Jepsen. Her huge paper blooms made such a splash that she started selling them in her shop, and just recently Brittany wrote a great article for Brooklyn Bride about the paper flower trend. I’m thrilled that this is a growing phenomenon; I adore anything made in exaggerated scale, so I feel that the more giant flowers and plants there are in the world, the better. This particular giant-flower DIY project comes from the creative team at Ruche. They decided to make these giant fantasy flowers for their spring lookbook, which is aptly titled “Enchantment.” Read below for the story of how this project came to be, and find the full tutorial after the jump. Our creative team brainstormed ways to turn our spring lookbook, Enchantment, into a daydream. Read the full how-to after the jump! Materials Instructions Making the stem: 1. 2. 3. 4. 5. 6. Making the leaves: 1. 2. 3. 4. 5. Making the flowers: 1. 2. 3. 4. 5. 6. 7.

Origami box in Crafts for home stationery and paper for birthdays, anniversaries or dinners Fabulous origami box which we can make it in a moment, and it's great to keep the gifts we want to give as a present or just to store our little treasures. It's as simple as with a pencil mark the diagonals of the square paper (about 20 cm to the base and 14,5 cm for the top) chosen for the box. Then fold the opposite sides toward the center helping a pencil to mark well the fold (the wrong side). To make the base, fold the opposite sides parallel to the midpoint and toward the inside and should measure about 3,5 cm. For the lid, fold the opposite sides (should measure 1,4 cm each), folding and unfolding and repeating the process with the other side. If we pay attention, a little wrinkle has been created in the folds of the corners of the base and lid. Finally, displays the opposite sides of both the base and lid and return to fold inward. To clarify any doubts, here's a great video overview:

Giant Paper Rose Flower If you loved the beautiful DIY wedding this morning and Nata’s gorgeous paper flower bouquets, you are in luck as Nata is sharing how she crafted them with us! She was inspired by a template created by Morgan Levine on Martha Stewart (as was I in the flowers I created for this styled shoot). I just love that this basic idea has inspired different brides to create their own version of giant paper flowers – you might remember these equally awesome giant paper flowers from this wedding I shared last year. :) Thanks so much Nata for sharing how you created your giant pink paper rose + special thanks to Studio Castillero for the photos of the DIY + her wedding! Materials (to make one giant rose) Step 1: Cut the petals Cut 5-6 teardrop petals and 15-6 heart-shaped petals from the petal colored crepe paper. IMPORTANT: Crepe paper is directional so it matters which way you’re cutting the paper. Repeat until all of your petals are cut Step 2: Cut the leaves + calyx Step 3: Make the rose stem

How to sew a zippered pouch I hope you are enjoying all of these wonderful sewn gift tutorials. We have been baking, sewing & crafting up a storm, preparing handmade gifts for this holiday season. Don’t forget to head on over to According to Kelly for 30 fabulous crafty gifts. A Southern Fairytale has 30 edible yummies & holiday-inspired recipes for you to try. You might have seen this pleated pouch here before, but I think it is worth posting again because it makes a perfect handmade gift! Download pattern pieces and print with no scaling selected on your printer. Pleated Pouch Pattern Download Mark fabric from pattern where it should be pleated. Place outer top piece face down on pleated piece, line up edges and stitch across 1/4 inch from the edge. Make a zipper sandwich. With a zipper foot sew across the top between the edge of your zipper sandwich and the zipper teeth (closer to the zipper feet). Bring lining and outer fabric to the same side. Make another zipper sandwich on the other side of the zipper.

carnation flower cookies… Let’s Smell the Flowers, shall we? As I’ve mentioned before, I have little luck with growing things. Cut flowers I can manage, as their fate has been determined before I put them in my vases. And I almost always have cut flowers in vases, it’s one of my indulgences. So I was thrilled to be a part of the Let’s Smell the Flowers collection of cookie flowers created by cookie genius Haniela . I chose carnations. So I chose to glorify the carnation. To make these I used the same method I used to make these gerbera daisies . It took a good bit of fiddling to come up with the signature ruffle look of a carnation, and my end result is still a bit too rose-like, perhaps. how to make carnation cookie pops you will need:* cookie dough royal icing fondant 1 1/2-inch cookie cutter lollipop sticks food coloring wax paper rolling pin pinking shears light corn syrup small paintbrush decorating bag coupler size “4″ decorating tip rubber band *For fondant, use store-bought or make your own . step one: make your fondant carnations. 1.

Kindle Cover Tutorial We are baking, sewing & crafting up a storm, preparing handmade gifts for this holiday season. I am sharing 30 wonderful sewn gifts from 30 amazing bloggers! Head on over to According to Kelly for 30 fabulous crafty gifts. A Southern Fairytale is spotlighting 30 edible yummies & holiday-inspired recipes.You definitely don’t want to miss a day! Check out ALL of our creative projects HERE. Hello friends! I am so blessed to be married to an amazing man, mom to two beautiful little girls and part time nurse at a remarkable hospital. I am so excited to be a part of this Holiday Bake, Craft and Sew Along and to be bringing you a full tutorial on how to make your own Kindle Cover. Materials: *Fabric (preferably two different patterns that go together) *Matting (like the kind used in quilting) *Elastic *Iron on velcro *Fabric button *Basic sewing supplies *Sewing machine Getting Started My cover is made for the Amazon Kindle with dimensions as follows: Length x Width x Height 7.5 in x 4.8 in x 0.335 in

~Lily of the Valley Cookies~ Did you know Lily of the Valley is considered to be a flower of fairies? Apparently they use tiny bell shaped flowers as cups to drink from. Who knew right? Lily of the Valley is a flower of May, weddings, symbol of purity, modesty and happiness and I adore it for its tiny clustered flowers. I decided to take a more modern approach for this cookie design, using a simple round cookie cutter. Lily of the Valley Cookies Bake the Cookies, Collection of RecipesMake Royal Icing, color icing : 3 shades of green, leaf green, mint and darker leaf green, and whiteOutline cookie with leaf green, flood the cookie with leaf green. 10 Second Flood Icing TutorialImmediately after you flood the cookie, follow with wet on wet technique using flood consistency mint and dark green, pipe lines onto the cookies(see the image above)Let the cookie dry completelyRandomly pipe bell shapes onto the cookie, preferably in the direction of piped lines, making one or 2 bells out of line a bit. 1.

Related: