

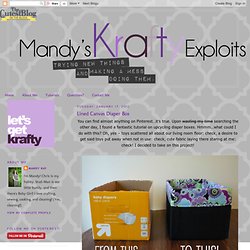
Lined Canvas Diaper Box. You can find almost anything on Pinterest…it’s true.
Nest of Posies. Nest of Posies: raise our kids where the good Lord's blessed ~ point our rocking chairs towards the west... There’s a few requirements when it comes to porches, in my book.
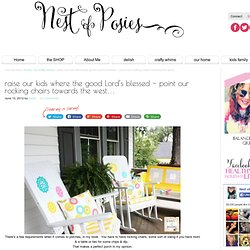
You have to have rocking chairs, some sort of swing if you have room & a table or two for some chips & dip. That makes a perfect porch in my opinion. We live in a small older home. Nothing fancy. But it’s loaded with character. We’ve been slowly but surely working on some things around the house, and one of the main things this past week was getting these rocking chairs back up to being sassy once again. Because they sure were ugly.We purchased these rocking chairs, 6 years ago.
I took this above pic with my Instagram app, but just to show it took all day to remove the stain & then prep them for primer. After 4 cans of primer, and 6 cans of spray paint, my chairs were looking rather sassy! I went back & forth in my head whether I wanted to stencil the top part with paint. Nest of Posies: Dipped Votives - Dollar Store Craft Idea. This weekend I kicked it in high gear & finally started doing some major & minor projects outside.
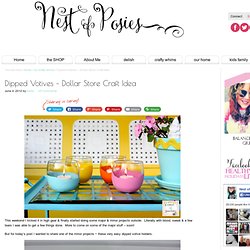
Literally with blood, sweat & a few tears I was able to get a few things done. More to come on some of the major stuff – soon! But for today’s post I wanted to share one of the minor projects ~ these very easy dipped votive holders. There’s really no reason for instructions. Because the pictures can tell the story. But just to break it down… Paper Lanterns. Cupcake Flower Lights. May 24 By Steph Hung May flowers have arrived!
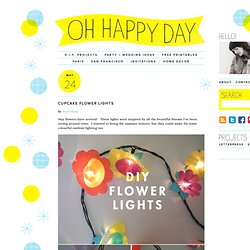
These lights were inspired by all the beautiful blooms I’ve been seeing around town. I wanted to bring the summer indoors, but they could make for some colourful outdoor lighting too: Making these floral garlands couldn’t be faster – all you need are cupcake papers and string lights, and you’re on your way to some simple summer lighting.
Materials you will need: cupcake papers (large and small), string lights, scissors, and an exacto knife. Step 1: To make leaves – fold a small cupcake paper in half 2 times, and with the folded point at the bottom cut a leaf shape. Step 2: To make an 8-petal flower – fold a small cupcake paper in half 3 times, and with the folded point at the bottom cut around the top. Step 3: To make a 16-petal flower – fold a large cupcake paper in half 4 times, and with the folded point at the bottom cut around the top. Step 4: Cut a small X in the center of each paper. Www.allinbox.com/technique/lampe_A_LED/Comment_creer_votre_propre_lampe_LED.pdf. 30 Tage 30 Dinge. When ever your bored by the naked light switches on the wall you can pimp them with Elaines idea.
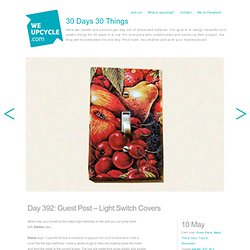
Elaine says: “I use the lid from a cookie tin or popcorn tin, cut it out and form it into a cover the the light switches. I have a series of jigs to help me properly place the holes and form the metal to the correct shape. The jigs are made from scrap plastic and scraps of wood. Wind-up paper butterflies are my fave (guest post from amelia)
I had a baby so I’ve invited some fave guests to take over for me while I spend time with the little guy.
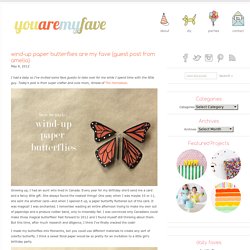
Today’s post is from super crafter and cute mom, Amelia of The Homebook. Growing up, I had an aunt who lived in Canada. Every year for my birthday she’d send me a card and a fancy little gift. She always found the neatest things! One year, when I was maybe 10 or 11, she sent me another card—and when I opened it up, a paper butterfly fluttered out of the card. I made my butterflies into Monarchs, but you could use different materials to create any sort of colorful butterfly. Materials: You’ll need heavy cardstock, 24 gauge wire, silicone rubber bands (I found mine in the hair aisle at Walgreens) needle-nose pliers, scissors, tape, a paintbrush, a black marker, and a white ink pen. Step 1: Measure and cut your wire. Step 2: Find the center of the longer wire. Bird Mobile — Spool Sewing. I had been toying with the idea of a mobile project and our adorable bird pattern seemed the perfect fit.

Fabric Pendant. Long-time friend of CRAFT, Ellen Baker of The Long Thread, has a new fabric collection for Moda Fabrics called Quilt Blocks.
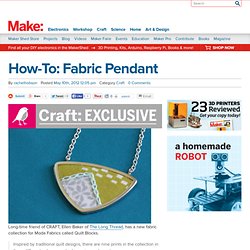
Inspired by traditional quilt designs, there are nine prints in the collection in three different colorways: shade, marine and spectrum. The prints are delightful, charming and bold, and perfect for summer sewing projects. Today, she’s sharing a simple project for making a cute fabric pendant. Fabric Pendant. Make a Ping Pong Ball Pendant Lamp. DIY Lace Jars. Last weekend I prettied up some old glass jars with a little lace. This DIY is super quick and easy and you probably already have all of the things required!
The finished jars look really lovely holding a bunch of flowers fresh out of the garden… And they make cute candle holders too! To make the lace wrapped jar, I simply cut a length of lace as long as the circumference of the jar. I then used Mod Podge and a paint brush to glue the lace to the bottom of the jar. To make the lace polka dot jar, I used the lid of an old juice bottle and a pencil to trace circles on the lace. What do you think? If this project takes your fancy, you might also like some of the other cute, crafty ways to recycle jars here. I hope you are all having a happy, sunshiney, magical week. True Blue Me & You: I'll Try Not to Waste Our Time.
True Blue Me & You: I'll Try Not to Waste Our Time.